If you're starting out with knitting, try crocheting! This is a comprehensive guide that covers all the necessary knowledge and steps for beginners.
This one-page guide will help you "start crocheting right away," covering everything from how to choose tools and materials to basic knitting techniques, completing your project, and adding the finishing touches.
Five steps you can learn from this article
- Choosing the best tools and yarn for crochet beginners
- Knitting instruction video that clearly shows the movements of your hands
- Basic knowledge of knitting symbols and how to read knitting patterns
- Let's try knitting some recommended items
- Q&A for when you're in trouble
We have condensed the entire process onto one page, so that beginners to crocheting can feel at ease knowing just this much.
We also offer a "Beginner's Crochet Course" where you can learn by watching videos.
If you want to learn knitting on your own from the comfort of your own home, use this guide as your textbook and let's enjoy knitting together!
This article is a must-have.
Please bookmark this so you can refer back to it whenever you like and read it at your leisure.
If you are unsure about how to create your work, please click on the link to go to each item.
Index
Choosing the perfect tools and yarn for crochet beginners
The tools specific to crocheting that you should have ready are a crochet hook and a darning needle.
All you need is some everyday stationery, such as scissors and a tape measure, to start knitting.
crochet hook
Conclusions Ahead: Recommended Crochet Hooks
- Orthodox metal ones are recommended
- You can choose your crochet hook with or without a grip, depending on your preference.
- It is important to be able to tell which is the "front" when holding the needle.
- The important thing is whether the grip is in a position that is easy to hold.
- If you are choosing your first crochet hook, we recommend a size 7 crochet hook for medium weight.
The only tool that is unique to crocheting and is absolutely essential is the crochet hook.
Choosing the right crochet hook is very important.
It might have been more enjoyable if you had used tools that were easy to use, but it would be a shame if you ended up thinking, "Crocheting is hard..." because the tools were difficult to use!
Here we will also tell you some tips on how to choose an easy-to-use crochet hook.
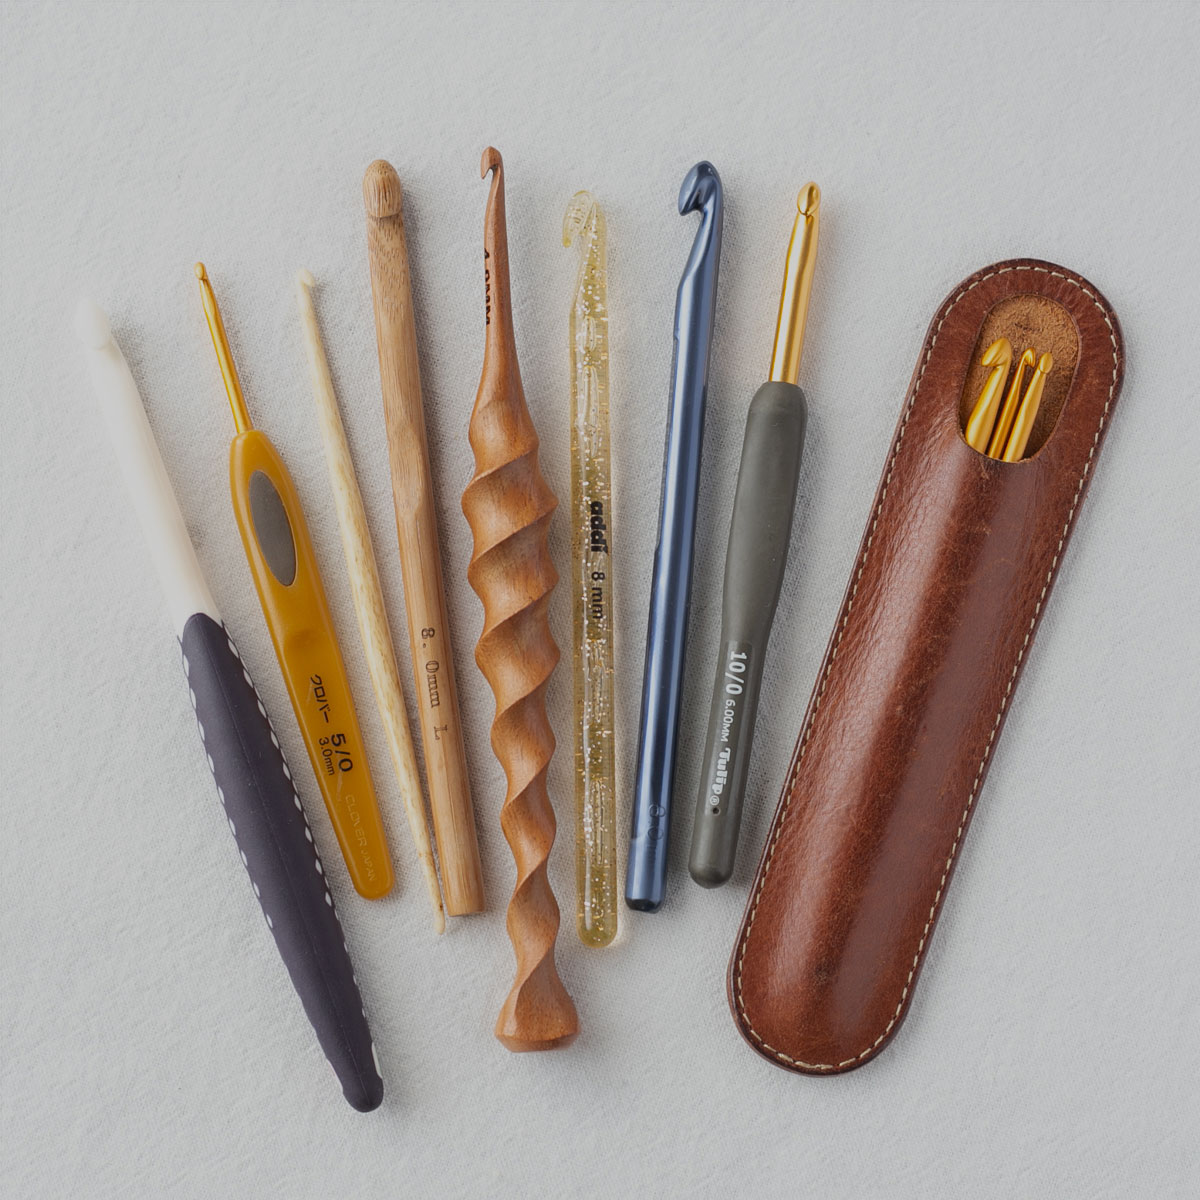
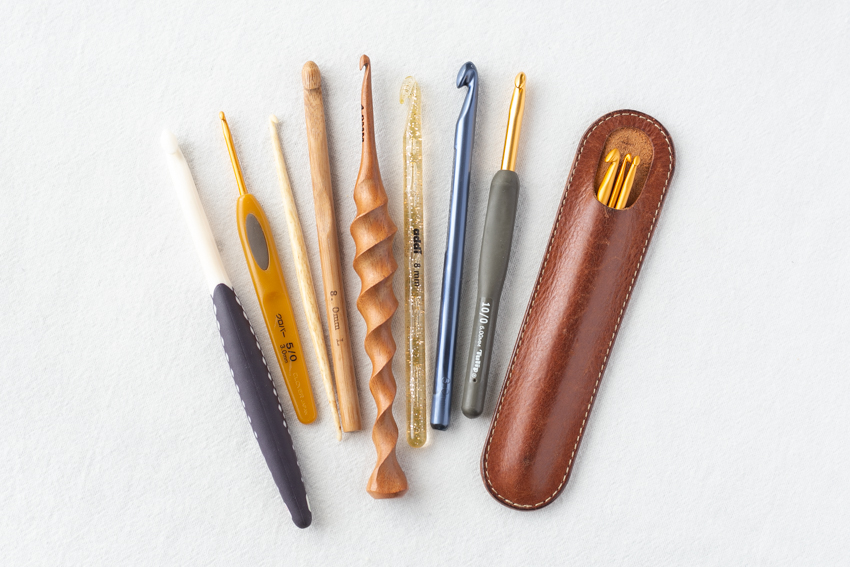
Types of Crochet Hooks
Crochet hooks come in metal, bamboo, plastic, and more.
Metal crochet hooks are recommended as they are readily available.
Metal crochet hooks come in two types: those that are made entirely of metal and those with a grip made of a different material.
Additionally, there are single-sided crochet hooks, which have a hook on only one side of the needle, and double-sided crochet hooks, which have hooks on both ends.


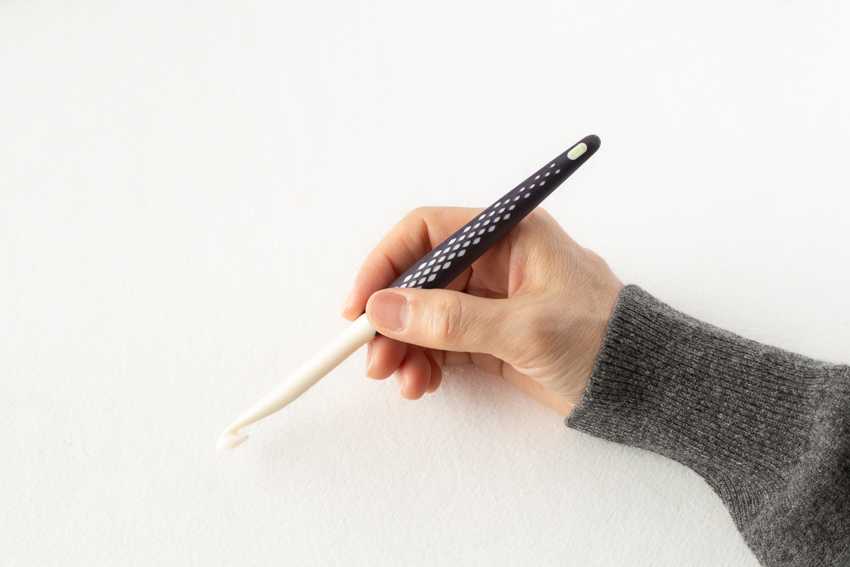
A crochet hook without a grip has a flat part a little away from the hook, which you hold with your thumb.
Crochet hooks with grips allow you to place your thumb on the grip.

I use a metal double-ended crochet hook with no grip.
Crochet hooks with grips are also very popular and many people use them.
Up until now, I have picked up various types of crochet hooks from Japan and overseas, following my interests.
The ease of use of different crochet hooks varied, so I would like to dig a little deeper.
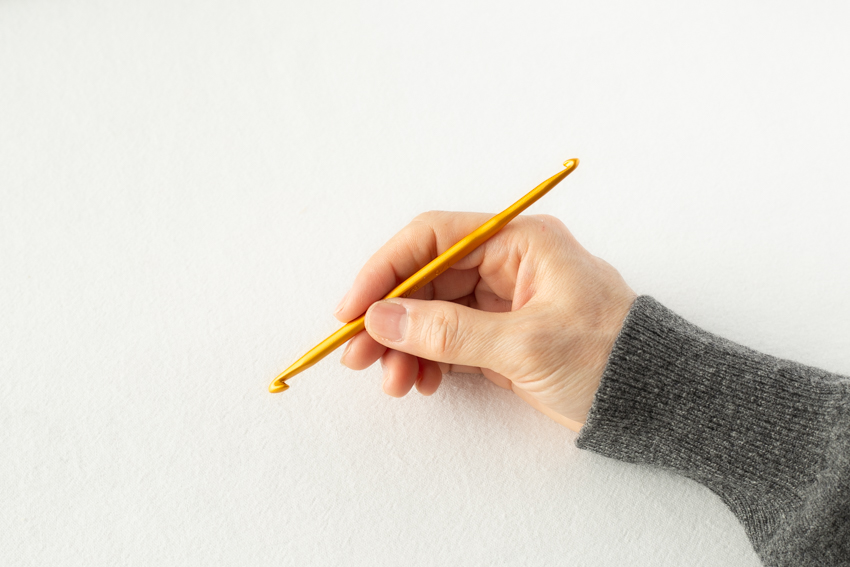
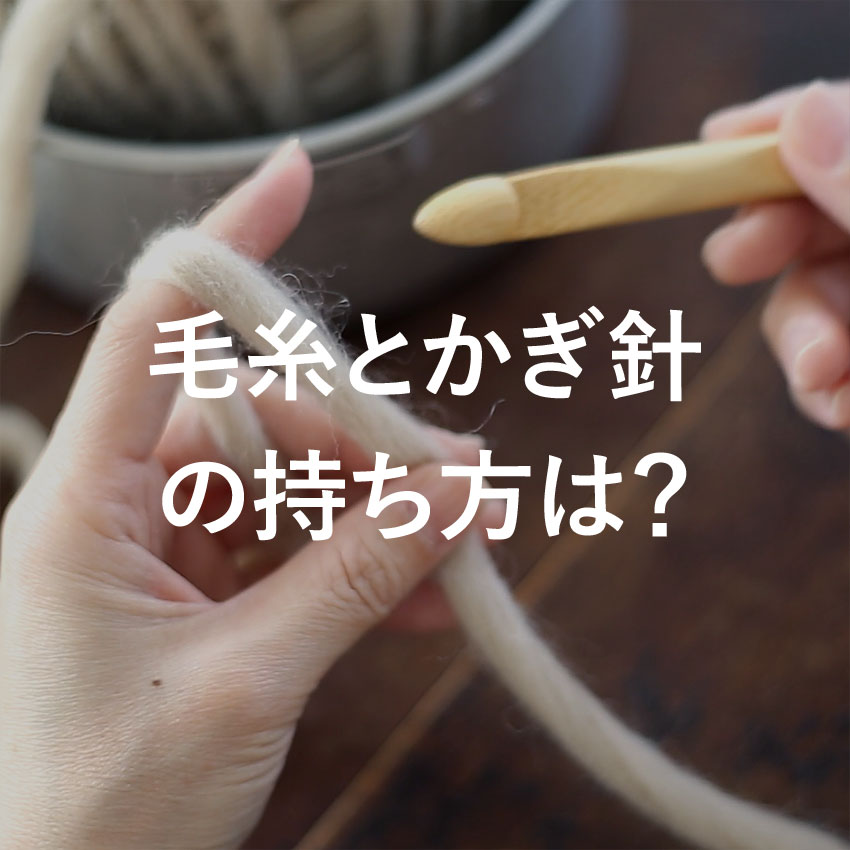
Here, I will assume that you are using the "pen grip" which is the mainstream grip in Japan (which is what I also use).
First, let me talk about what I think is important about the shape of the crochet hook.
- You can tell which side is the "front" when you hold the needle.
- Grip in a comfortable position
Most crochet hooks have a specific position to hold, but there are also types that can be held anywhere around the hook.
Such crochet hooks are smooth and cylindrical, with no tangible indentations or grooves, so even when you hold them you cannot tell which is the front of the hook.
As you knit, the hook may turn and point in an unexpected direction.
For this reason, it is easier to use a crochet hook that allows you to see which side is the front when you hold it.
Next, check whether the grip is in a position that makes it easy to hold.
There doesn't seem to be much difference when it comes to Japanese crochet hooks, but some crochet hooks from overseas have grips that are quite far from the tip of the needle.
I have small hands, so it's difficult for me to apply force if the grip is too far from the tip of the needle, so it suits me better to have it closer to the tip.
Hold the crochet hook like you would a pencil, and if it feels comfortable, that's fine.
Crochet hook size
Once you have decided which crochet hook to use, the next thing to choose is the size.
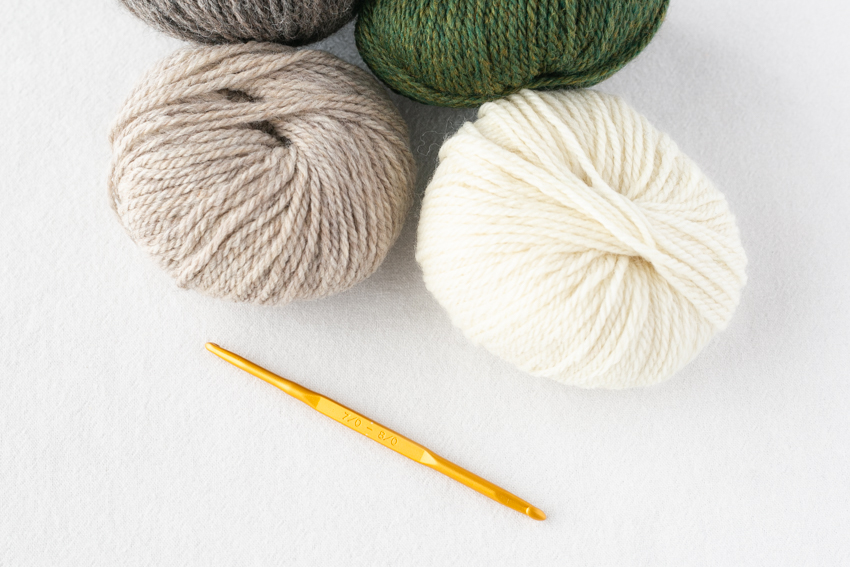
Crochet hook sizes are usually chosen according to the thickness of the yarn you are using.
Beginners find it easier to knit with slightly thicker yarn (see below), so if you are thinking of using medium or extra thick yarn, we recommend a size 7 or 8 crochet hook.
If you had to choose one, I would recommend a size 7 crochet hook for medium weight yarn.
Medium weight yarn is very popular and comes in many varieties, so size 7 crochet hooks are a size that will continue to be used frequently.
A side note
My favorite crochet hooks are Clover's double crochet hooks.
Perhaps it's because they fit my hands perfectly, but I have never had any complaints about them, and I've never come across a crochet hook that is easier to use.
I have sizes 3/0 and 5/0, 4/0 and 6/0, and 7/0 and 8/0, and I knit most of my projects with these three.


The minimalist look of just metal is also appealing.
Furthermore, the compact design of the double-ended crochet hook makes it very convenient.
On the other hand, there are many cute crochet hooks with grips that have a strong presence and are pleasing to the eye.
The grip is especially useful when knitting with stiffer yarn as it helps prevent hand fatigue.
There are many lovely sets of gripped crochet hooks available, so if you want to get them all at once, we recommend buying a set.
The included case is also attractive as it means you won't have to worry about storage.
Find the crochet hooks that suit your tastes and make your knitting fun!


Sewing needle
Conclusion ahead of time: Recommended sewing needles
- If you are looking for a set, we recommend one that includes needles for thick and thin threads.
- First, prepare a straight needle.
Unlike crochet hooks, darning needles are tools that don't require much care.
To start with, prepare a slightly larger size sewing needle that can handle medium to extra thick thread.
They are often sold in sets of two or three, so it is recommended to purchase a set that includes both needles for thick and thin threads.
They are sold under names such as "yarn darning needles."
They come in both metal and plastic versions, and the plastic versions tend to be larger in size, while the metal ones seem to be sold in sets with a balanced mix of large and small needles.


Also, some sewing needles have curved tips.
This seems to be useful for yarn embroidery or when using long-pile threads such as fancy yarns, but first I think it would be best to have a straight darning needle.
If you start using thin threads more often, it will be easier to work with a darning needle for thin threads.
Also, a darning needle for thin threads is useful as you can use the excess thread ends to sew on buttons or brooch pins.
Scissors, tape measure, marker, etc.
Predicting conclusions: a complementary tool
- Use your own scissors
- Beginners rarely need a tape measure.
- Stitch markers are useful
As long as you don't need to worry about portability, any scissors you have on hand will do!
If you want to bring it on an airplane, you can use a thread cutter, nail clippers, or dental floss cutters instead.


Tape measures and rulers are tools you'll want to have on hand when knitting large pieces such as clothing that require measuring gauges, or when knitting pieces that require precise measurements.
It may not be used much in smaller projects that are easy for beginners to knit.
And there is a small knitting tool called a "stitch marker."
It's handy to have, but not absolutely necessary.
Stitch markers come in several shapes, including round rings and ones that can be attached and removed like safety pins.
It is made of plastic and comes in a variety of vibrant colors.
Stitch markers that are solid, complete loops are designed for knitting needles and cannot be used for crocheting (be careful!).
The following markers can be used for crocheting:


How to use stitch markers
- Use it according to the knitting instructions of the project, such as "Put a marker here as a guide."
・Use it independently to avoid burying stitches that may be lost
・Use as a counting marker when there are many stitches
etc.
Stitch markers are useful, but their role is simply to mark the spot.
Simply cutting the yarn into short pieces and leaving them as markers can serve the same purpose (my mother, who has been knitting for a long time, has always used this method).
I don't use it that much, but I have more than enough lol.
I hope that even beginners will be aware that such a tool exists.

[I've written more about this in this article]

yarn
Conclusions Ahead: Recommended Yarns
- Yarn of "medium" to "extra thick" thickness
- brightly colored yarn
- Straight yarn with no nap
- Yarn made of materials that are less likely to break, such as wool or cotton
The type of yarn you use will directly affect how easy it is to knit, so choosing the yarn is an important step.
Here we will tell you the key points of yarn that are easy to knit with even for beginners.
First, the thickness of the yarn.
I recommend using a slightly thicker yarn.
The thickness of the yarn is as follows, from thin to thick:
"Ultra-fine" → "Fine" → "Comparative" → "Medium-fine" → "Medium-thick" → "Standard" → "Extra-thick" → "Ultra-thick"
and are classified as follows.
Among these, "medium thickness" and "extra thick" are thicknesses that are easy for beginners to knit.
In particular, "medium-weight" yarn is recommended as there are many types and it is easy to obtain.
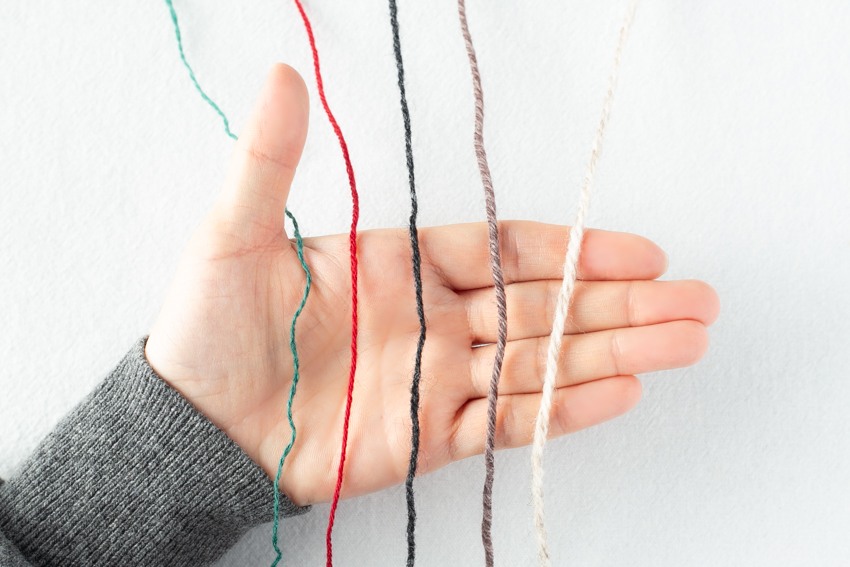
Secondly, the colour of the yarn.
For beginners, it helps to have easy-to-see stitches, so try knitting with light-colored yarn.
Light-colored yarn is also less stressful when it comes to counting stitches.
If you want to choose a darker color, it's best to stick to navy, brown, or charcoal gray and avoid black.
If you absolutely have to go for black, try it in a bright place during daylight hours.
The third is the shape of the yarn.
The most common type of yarn you'll find in craft stores is straight, unbrushed yarn, which is the one we recommend.
In the image below, the yarn is like the two on the right.
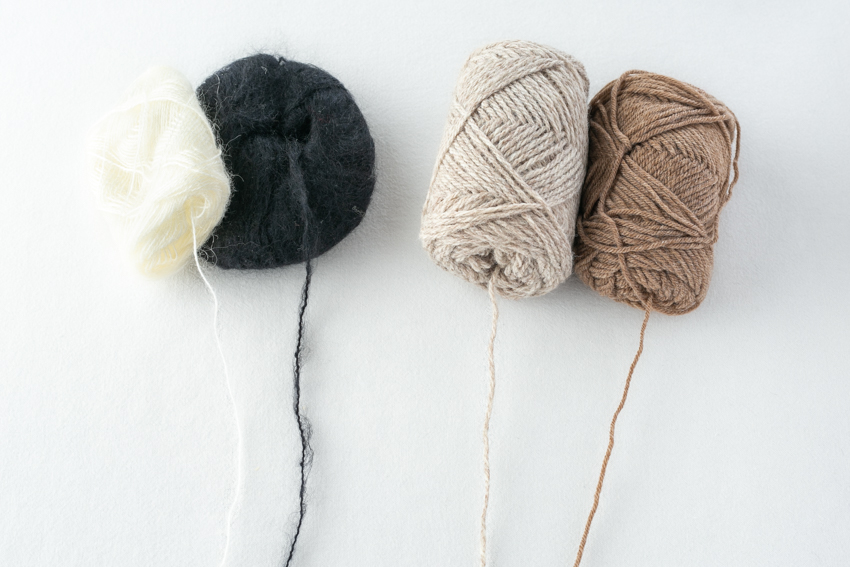
In contrast, brushed yarn is fluffy, fuzzy yarn like mohair (the two on the left in the image).
It's very cute, but the fluffiness gets tangled and it's difficult to untangle.
I think it's best to start this once you've gotten a little more used to knitting.
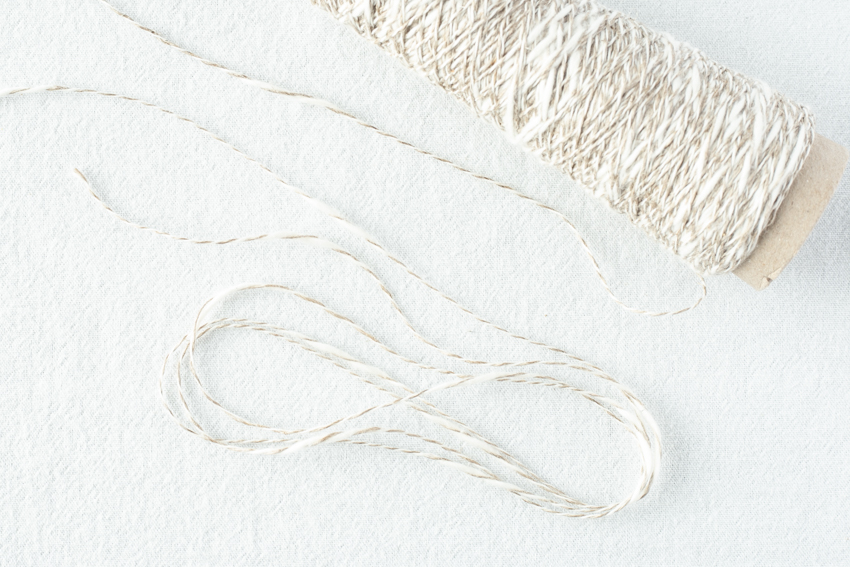
Also, yarn that is not straight yarn is yarn such as "slub yarn" in which the thread thickens and thins along the way.
It can be hard to tell if your stitches are uneven or if the yarn is changing, so it's easier to work with straight yarn that is uniform in thickness at first.
The fourth is the material.
You don't need to be too picky about the material, but we recommend using thread that is less likely to split.
Linen fibers are hard and difficult to twist, so some threads are prone to splitting.
Wool is less likely to untwist, and cotton is often tightly twisted, so the yarn is less likely to split and is easier to knit with.
When I was a beginner, I often knitted miscellaneous items, so I often used cotton yarn.
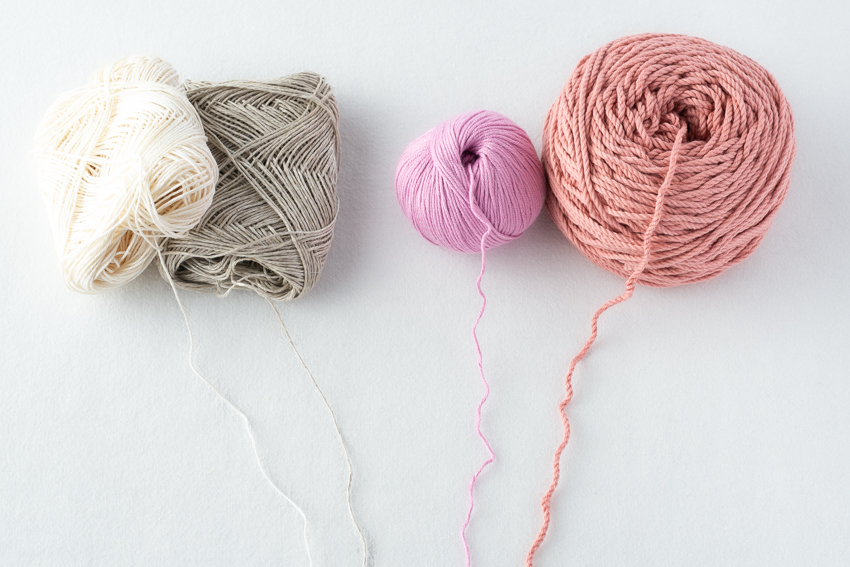
In the photo above, the two on the left are loosely twisted, while the two on the right are tightly twisted.
Each has its own merits, but for beginners, the thread on the right is recommended.
Tightly twisted yarn has a plump, three-dimensional appearance, while loosely twisted yarn has a straight, flat appearance.
Using these points to consider when choosing yarn, try to find a yarn that will be easy to knit with at first!
[I've written more about this in this article]

Knitting instruction video that clearly shows the movements of your hands
Now that you're ready to crochet, let's take a look at how your hands actually move!
Here we will explain the basics of crocheting.
The stitches that almost always appear in crochet are the chain stitch, slip stitch, knit stitch, double crochet, and double crochet.
We will explain six items, including these five knitting methods and how to handle the yarn.
Before that, please read this article:
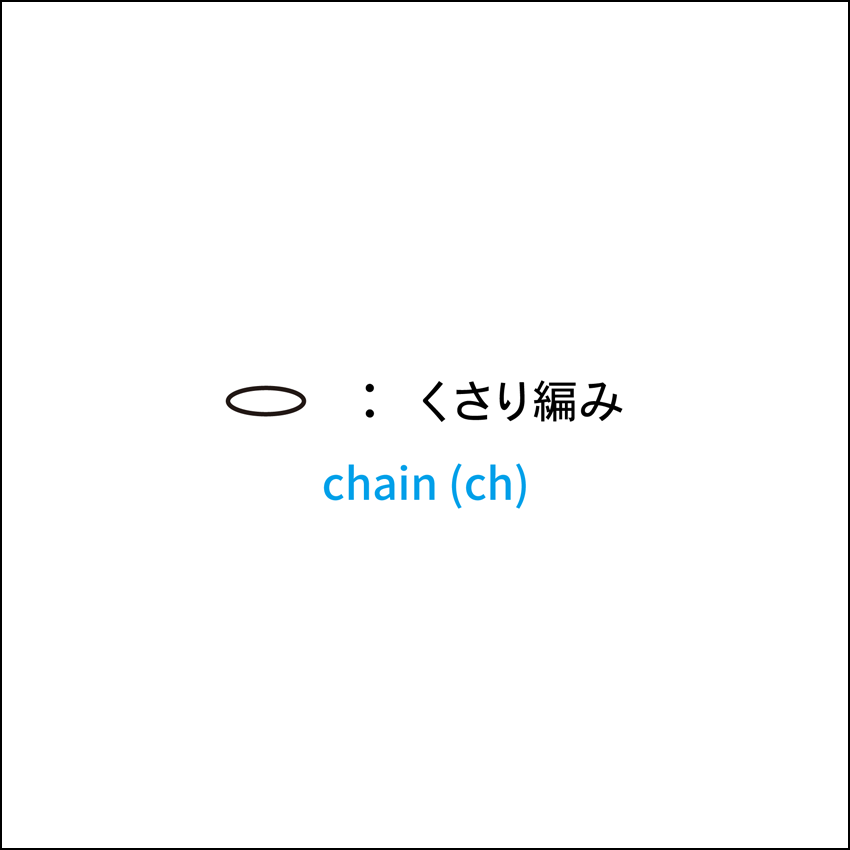
Chain
Chain stitch is also used to cast on at the beginning of knitting.
This is an essential technique for creating crocheted pieces.
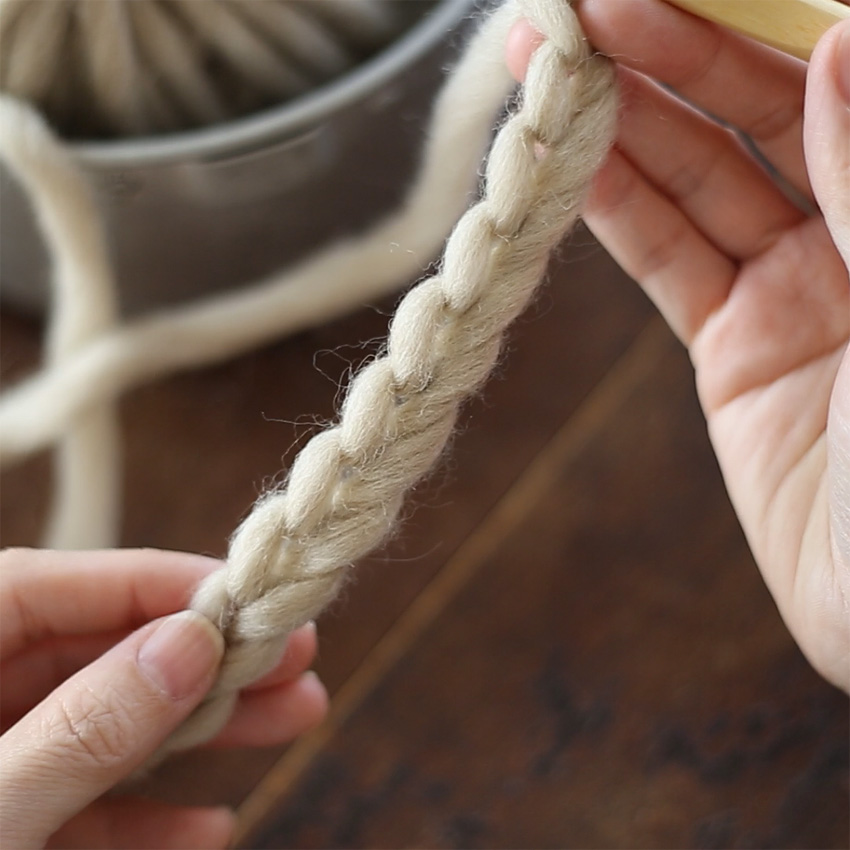
Chain stitches are also great for practicing crocheting.
To practice the basic position of holding yarn and a crochet hook, try knitting a long chain.
"Chain knitting" explanation with photos
![くさり編み[1] 針に糸をかけます。](https://ronique.jp/wp-content/uploads/2021/03/basic_method_ch01.jpg)
![くさり編み[2] ループから引き出します。](https://ronique.jp/wp-content/uploads/2021/03/basic_method_ch02.jpg)
![くさり編み[3] また、針に糸をかけます。](https://ronique.jp/wp-content/uploads/2021/03/basic_method_ch03.jpg)
![くさり編み[4] ループから引き出します。](https://ronique.jp/wp-content/uploads/2021/03/basic_method_ch04.jpg)
![くさり編み[5] もう一度、針に糸をかけます。](https://ronique.jp/wp-content/uploads/2021/03/basic_method_ch05.jpg)
![くさり編み[6] ループから引き出します。](https://ronique.jp/wp-content/uploads/2021/03/basic_method_ch06.jpg)
[I've written more about this in this article]
Slip Stitch
The slip stitch is also an essential crochet technique.
The slip stitch you're likely to encounter most often as a beginner is when you slip the stitch at the end of a row to connect that row to a loop.
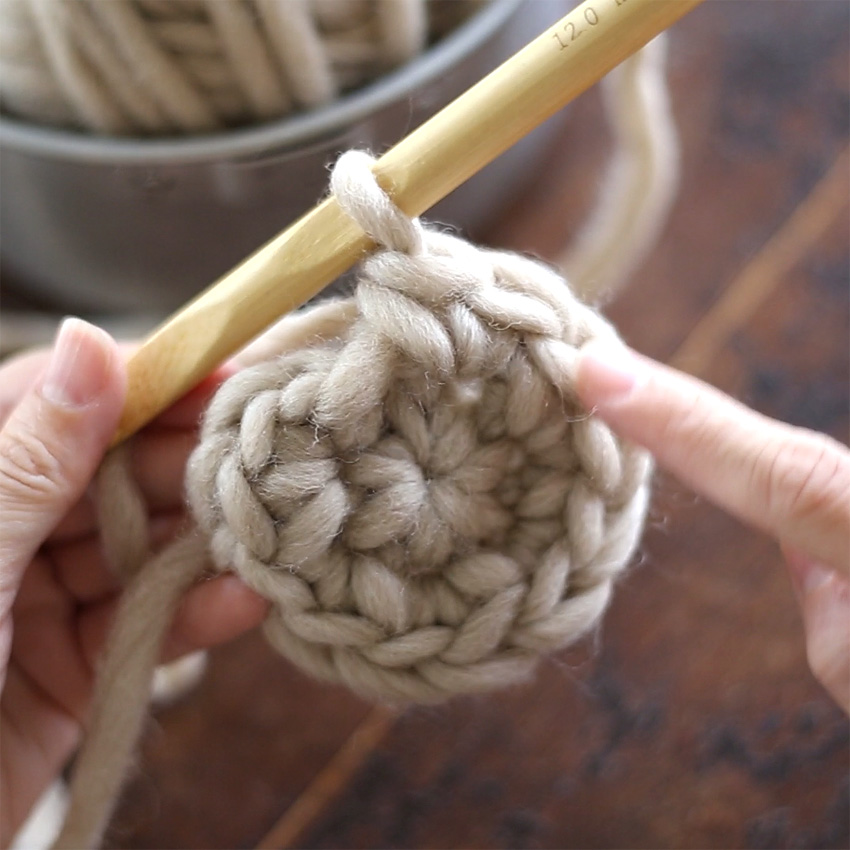
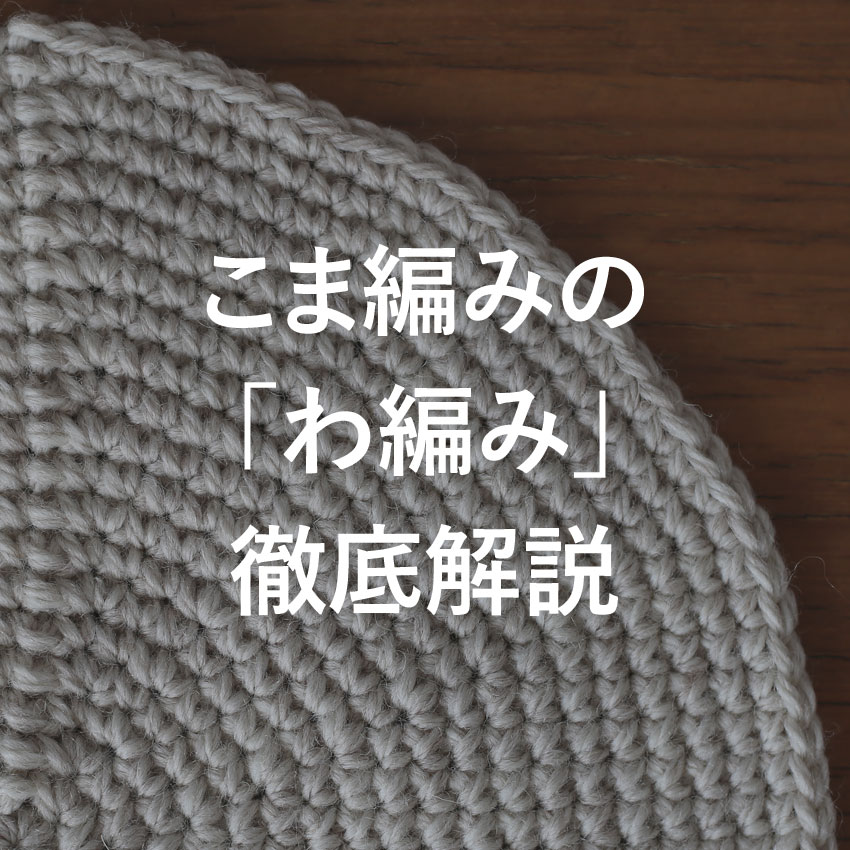
This is used when making circular knitting, which is used in making amigurumi and bag items.
"Pulled knitting" explanation with photos
This photo-illustrated explanation will show you how to knit a slip stitch, which is a stitch that is knitted into a knitted fabric.
![引き抜き編み[1] 前段の目に針を入れます。](https://ronique.jp/wp-content/uploads/2021/03/basic_method_02_01.jpg)
![引き抜き編み[2] 針に糸をかけて引き出します。](https://ronique.jp/wp-content/uploads/2021/03/basic_method_02_02.jpg)
![引き抜き編み[3] 針のループにもくぐらせます。](https://ronique.jp/wp-content/uploads/2021/03/basic_method_02_03.jpg)
![引き抜き編み[4] 引き抜き編みが1目編めました。](https://ronique.jp/wp-content/uploads/2021/03/basic_method_02_04.jpg)
![引き抜き編み[5] となりの目に針を入れます。](https://ronique.jp/wp-content/uploads/2021/03/basic_method_02_05.jpg)
![引き抜き編み[6] 針に糸をかけて引き出します。](https://ronique.jp/wp-content/uploads/2021/03/basic_method_02_06.jpg)
![引き抜き編み[7] 針にかかっているループにもくぐらせます。](https://ronique.jp/wp-content/uploads/2021/03/basic_method_02_07.jpg)
![引き抜き編み[8] 2目編めました。同じ要領で繰り返します。](https://ronique.jp/wp-content/uploads/2021/03/basic_method_02_08.jpg)
[I've written more about this in this article]
There are five other video tutorials on the related articles page, so please take a look.
Single Crochet
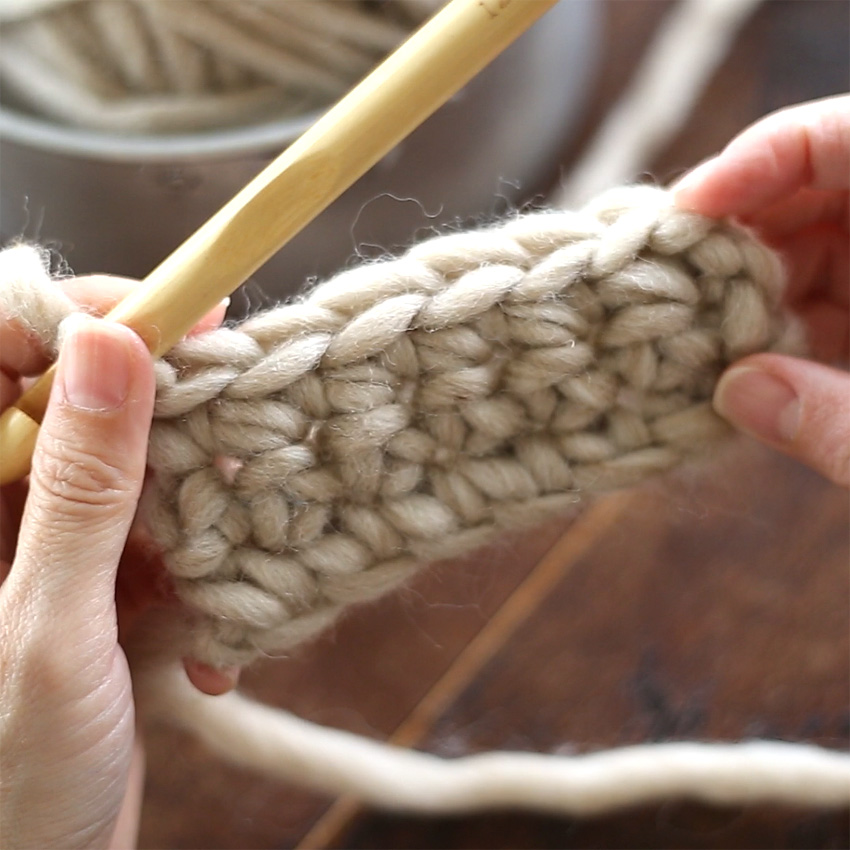
"Koma knitting" is one of the most common crochet knitting techniques.
Crochet is known for its firm, thick, and stretch-resistant knitting, which is typified by the knitting pattern.
The most orthodox way to make amigurumi and bags is with the knitting technique.
It would take a long time to explain knitting knitting, so for a detailed explanation please refer to the related article. Here, we will focus on how to knit knitting knitting knitting.
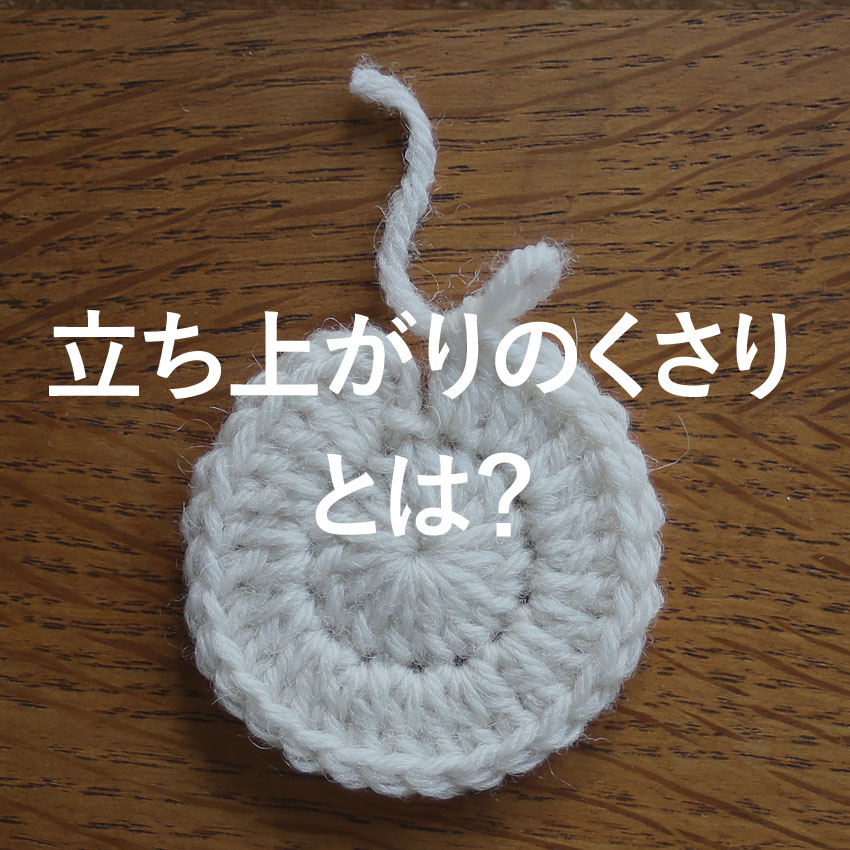
At the beginning of a knitting row, knit one chain stitch to start before knitting the first knit stitch.
reference:What is a "starting chain" in crochet?
"Koma Knitting" explanation with photos
We will explain with photos how to knit the ``knot stitch'', which is knitted at the beginning of a row using loop stitch.
![こま編み[1] 立ち上がりのくさり1目を編みます。](https://ronique.jp/wp-content/uploads/2021/03/basic_method_03_01.jpg)
![こま編み[2] くさりの根本(矢印の位置)に針を入れます。](https://ronique.jp/wp-content/uploads/2021/03/basic_method_03_02.jpg)
![こま編み[3] 針を入れるのはここです。](https://ronique.jp/wp-content/uploads/2021/03/basic_method_03_03.jpg)
![こま編み[4] 針を入れたら、糸をかけて引き出します。](https://ronique.jp/wp-content/uploads/2021/03/basic_method_03_04.jpg)
![こま編み[5] 引き出したところです。](https://ronique.jp/wp-content/uploads/2021/03/basic_method_03_05.jpg)
![こま編み[6] 糸をかけ、2つのループをくぐらせます。](https://ronique.jp/wp-content/uploads/2021/03/basic_method_03_06.jpg)
![こま編み[7] こま編みが1目編めました。](https://ronique.jp/wp-content/uploads/2021/03/basic_method_03_07.jpg)
![こま編み[8] 次の目は、となりに針を入れて[4]~[7]を繰り返します。](https://ronique.jp/wp-content/uploads/2021/03/basic_method_03_08.jpg)
[I've written more about this in this article]
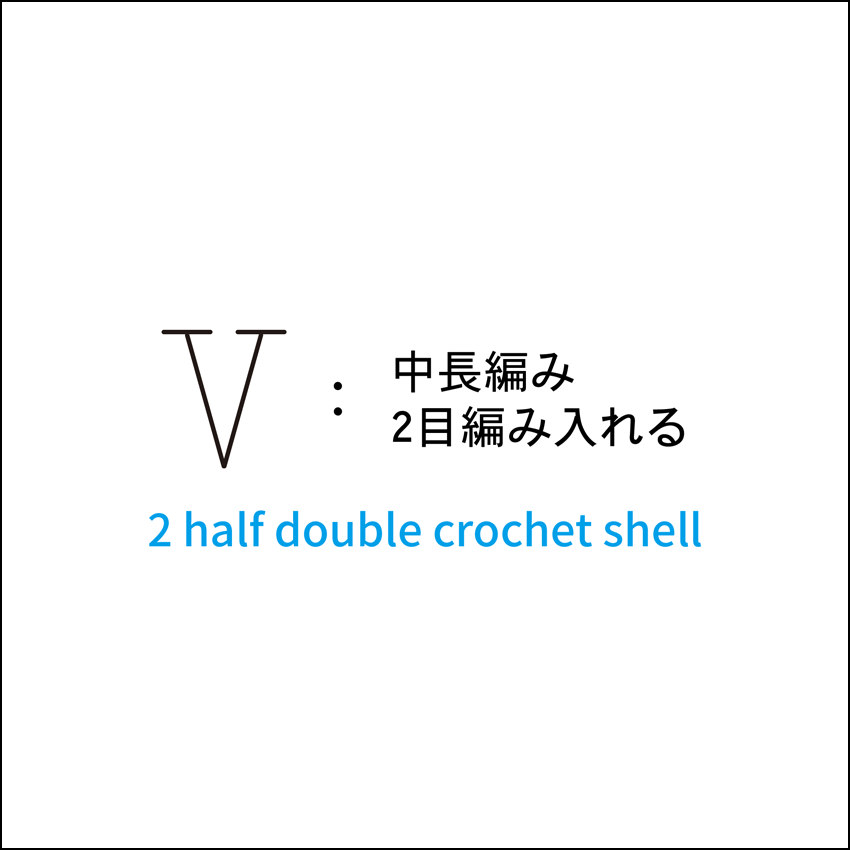
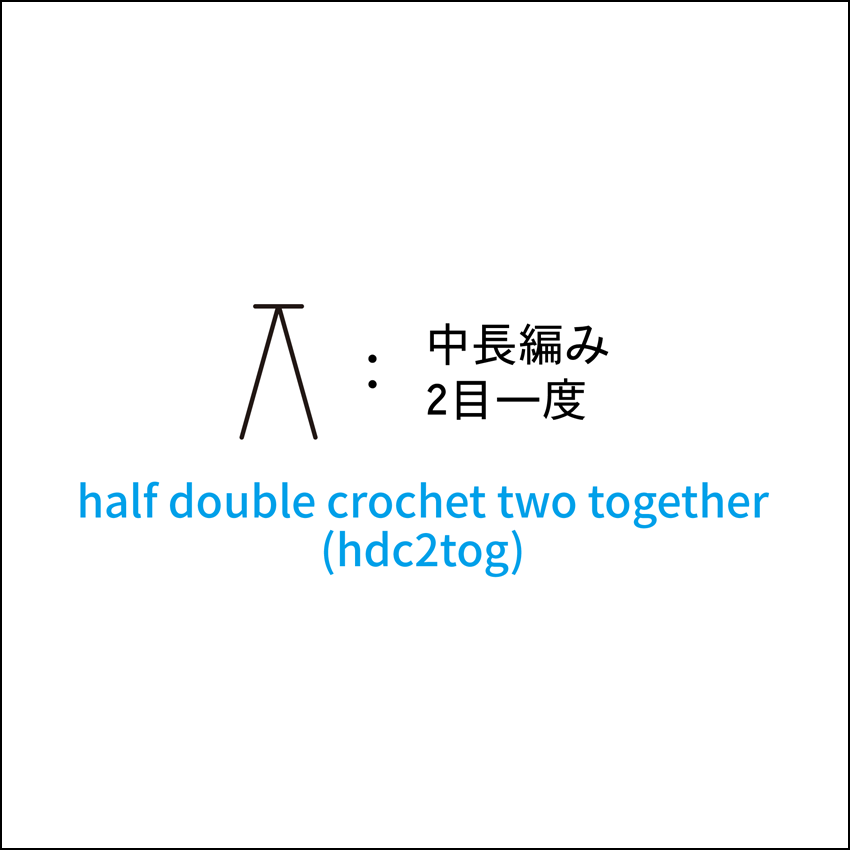
Medium long knit
The "medium length stitch" is also one of the most common crochet techniques.
It is characterized by a fluffy, thick knit fabric.
Compared to the knit stitch and the double stitch, which we will explain next, the double stitch appears less frequently, but it is sometimes used in patterned knitting, so remembering it will broaden the range of projects you can knit.
The double crochet stitch will be two quarter stitches high.
At the beginning of the "double crochet" row, crochet two chain stitches to start the work.
"Medium length knitting" explanation with photos
![中長編み[1] 針に糸をかけます。](https://ronique.jp/wp-content/uploads/2021/03/basic_method_15_01.jpg)
![中長編み[2] 前段の目に針を入れます。](https://ronique.jp/wp-content/uploads/2021/03/basic_method_15_02.jpg)
![中長編み[3] また糸をかけて引き出します。](https://ronique.jp/wp-content/uploads/2021/03/basic_method_15_03.jpg)
![中長編み[4] 糸を引き出しました。](https://ronique.jp/wp-content/uploads/2021/03/basic_method_15_04.jpg)
![中長編み[5] もう一度かけて、針にかかっている3つのループを一気にくぐらせます。](https://ronique.jp/wp-content/uploads/2021/03/basic_method_15_05.jpg)
![中長編み[6] 中長編みが編めました。](https://ronique.jp/wp-content/uploads/2021/03/basic_method_15_07.jpg)
![中長編み[7] 5目編むとこのようになります。一番右にある立ち上がりのくさりも中長編み1目と数えます。](https://ronique.jp/wp-content/uploads/2021/03/basic_method_15_08.jpg)
[I've written more about this in this article]
Double Crochet
The double stitch is also one of the most common crochet techniques.
Compared to knitting knitting and double crochet, double crochet is characterized by the fact that it produces a slightly thinner knitted fabric.
For this reason, double stitching is often used for items that need to be light, such as shawls and clothing.
And then there's the double stitch, which is often the basis for patterned knitting.
This knitting method creates a variety of different textures and expands the fun of crocheting.
The double crochet stitch will be three quarter stitches high.
At the beginning of each double crochet row, crochet three chain stitches to start the work.
"Long Crochet" explanation with photos
We will explain with photos how to knit the double crochet at the beginning of a row using loop stitches.
![長編み[1] 長編みの編みはじめは、立ち上がりのくさり3目を編みます。](https://ronique.jp/wp-content/uploads/2021/04/basic_method_21_01.jpg)
![長編み[2] 針に糸をかけ、](https://ronique.jp/wp-content/uploads/2021/04/basic_method_21_02.jpg)
![長編み[3] 前段の目に針を入れます。](https://ronique.jp/wp-content/uploads/2021/04/basic_method_21_03.jpg)
![長編み[4] 糸をかけて引き出します。](https://ronique.jp/wp-content/uploads/2021/04/basic_method_21_04.jpg)
![長編み[5] 糸を引き出しました。](https://ronique.jp/wp-content/uploads/2021/04/basic_method_21_05.jpg)
![長編み[6] 糸をかけ、針先に近い2つのループ(青で示したところ)をくぐらせます。](https://ronique.jp/wp-content/uploads/2021/04/basic_method_21_06.jpg)
![長編み[7] 2つのループをくぐらせて、糸を引き出しました。](https://ronique.jp/wp-content/uploads/2021/04/basic_method_21_07.jpg)
![長編み[8] 針に糸をかけ、全てのループをくぐらせます。](https://ronique.jp/wp-content/uploads/2021/04/basic_method_21_08.jpg)
![長編み[9] 長編みが編めました。](https://ronique.jp/wp-content/uploads/2021/04/basic_method_21_09.jpg)
![長編み[10] 3目編むとこのようになります。](https://ronique.jp/wp-content/uploads/2021/04/basic_method_21_10.jpg)
[I've written more about this in this article]
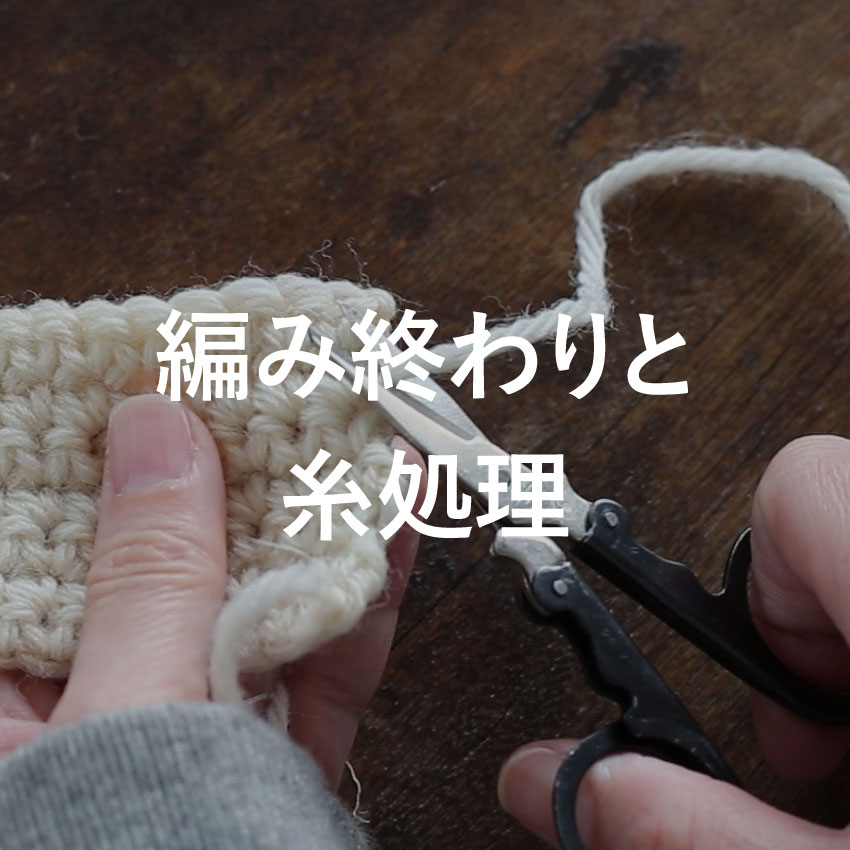
Yarn processing
Once you have finished knitting your piece, cut the yarn leaving a small end, and finish the yarn by passing the end through the knitted fabric.
Here we will explain everything from finishing knitting to how to process the yarn.
Finish knitting: Tighten by passing through the loop
This is the most conventional method of finishing, as it securely holds the end of the knitting in place.
![[1] 最後の目を編み終えたら、針に糸をかけて、ループに糸をくぐらせます。](https://ronique.jp/wp-content/uploads/2021/03/fasten_off02.jpg)
![[2] 15cmくらい糸端を残して糸を切ります。](https://ronique.jp/wp-content/uploads/2021/03/fasten_off04.jpg)
![[3] ループの中を糸端がくぐりぬけるように、そのまま糸を引き抜きます。](https://ronique.jp/wp-content/uploads/2021/03/fasten_off05.jpg)
![[4] 糸の根元を引き締めます。](https://ronique.jp/wp-content/uploads/2021/03/fasten_off07.jpg)
Finishing the yarn end: Pass it through the knitted fabric
Once you have finished the end of the knitting, you will then need to finish the ends of the yarn.
To avoid any residue from the yarn treatment affecting your finished piece, please treat the yarn in as inconspicuous an area as possible on the back of the knitted fabric.
![[1] 糸の根本付近から、2~3cm編み地の中にとじ針をくぐらせます。](https://ronique.jp/wp-content/uploads/2021/03/fasten_off09.jpg)
![[2] 針を引き抜くと、このように毛糸が編み地の中をくぐります。](https://ronique.jp/wp-content/uploads/2021/03/fasten_off10.jpg)
![[3] 糸が出ているところからUターンするように、近くの編み地にまた2~3cm針をくぐらせます。](https://ronique.jp/wp-content/uploads/2021/03/fasten_off11.jpg)
![[4] 糸が矢印のように編み地の中をくぐります。](https://ronique.jp/wp-content/uploads/2021/03/fasten_off12.jpg)
![[5] 根元で糸を切り、糸処理が完了です。](https://ronique.jp/wp-content/uploads/2021/03/fasten_off13.jpg)
[I've written more about this in this article]
How to use a steam iron after completing the work:What if it bends back or twists?Please see "

Basic knowledge of knitting symbols and how to read knitting patterns
Predicting the conclusion: Characteristics of knitting patterns
- The overall picture is easy to understand at a glance
- The arrangement of the knitting symbols resembles the shape of the knitted fabric.
- The symbol represents the knitted fabric as seen from the front.
- It is easy to see the repeating knitting parts.
- The number of steps is written in numbers
In Japan, it is common to express knitting methods using diagrams called "knitting patterns" that use "knitting pattern symbols."
Knitting patterns are easy to learn intuitively even for beginners, and once you know how to read them, you can pretty much understand how to knit without any verbal explanation.
Knitting patterns also have the following features:
- The overall picture is easy to understand at a glance
If you assume that knitting patterns are difficult, you may not notice this, but knitting patterns have the great advantage of being easy to understand at a glance.
However, it's hard to get a sense of it without something to compare it to.
Unlike in Japan, English patterns that describe knitting methods in words are the norm overseas.
When it comes to English patterns, you won't understand the full knitting instructions until you've finished reading the entire text.
In contrast, a knitting pattern allows you to understand the overall knitting method just by looking at it.
This is one of the great things about knitting patterns and their great appeal.
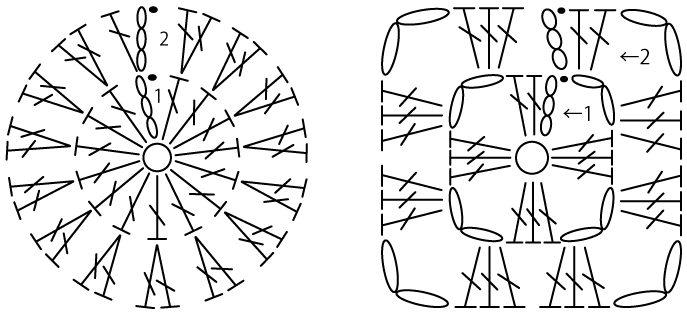
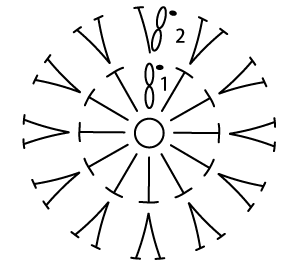
- The arrangement of the knitting symbols resembles the shape of the knitted fabric.
Many knitting patterns are drawn to represent the shape of the knitted fabric.
For example, for a circular motif, the knitting symbols are arranged in a circle, and for a square motif, they are arranged in a square.
- The symbol represents the knitted fabric as seen from the front.
Crocheted fabric has a "front" and a "back", and the appearance of the fabric is often different.
Japanese knitting patterns show the pattern as it appears when the knitted fabric is viewed from the front.
This may not make much sense to you, but keep it in the back of your mind.
- It is easy to see the repeating knitting parts.
When knitting a piece, if there are sections where you repeat the same knitting pattern, it will help you keep a good pace and make it easier to knit.
For this reason, knitting techniques such as "knit from here to here x number of times" often appear.
In such cases, a knitting pattern makes it easier to understand because you can visually see the repeated knitting areas.

- The number of steps is written in numbers
Most knitting patterns have small numbers written in them that represent the number of rows.
By looking at the numbers, you can check how many rows you have knitted.
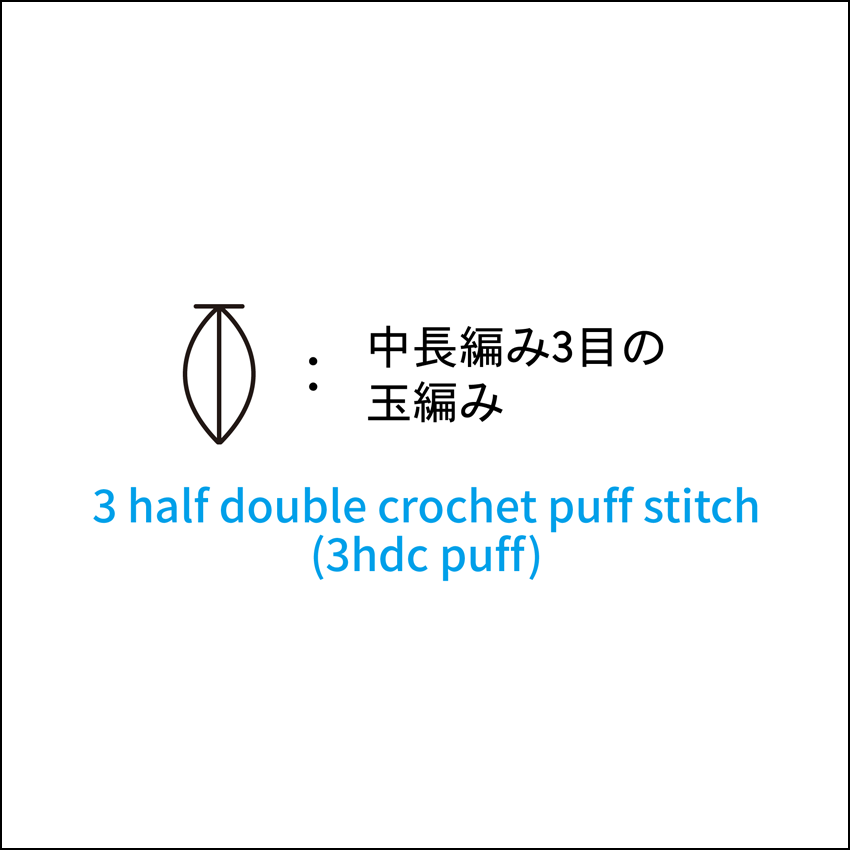
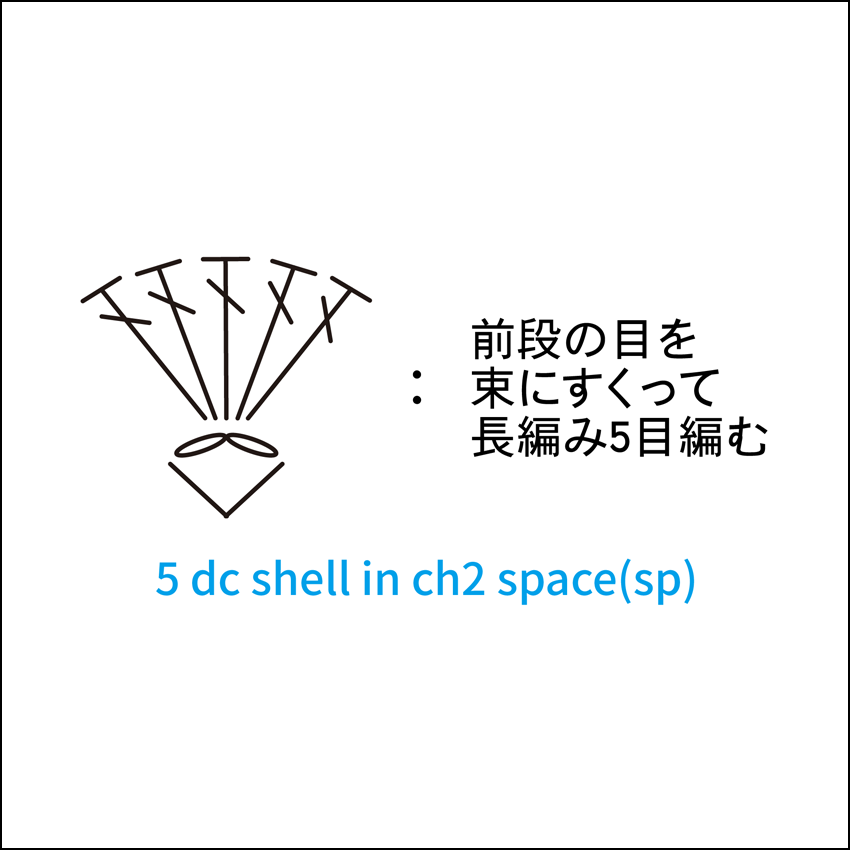
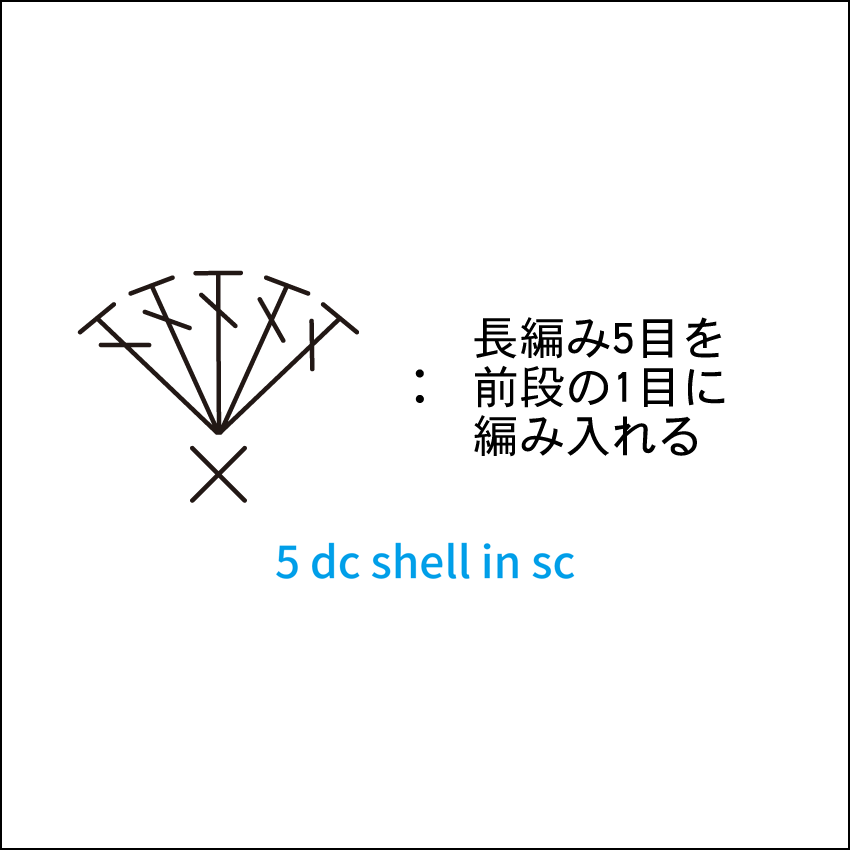
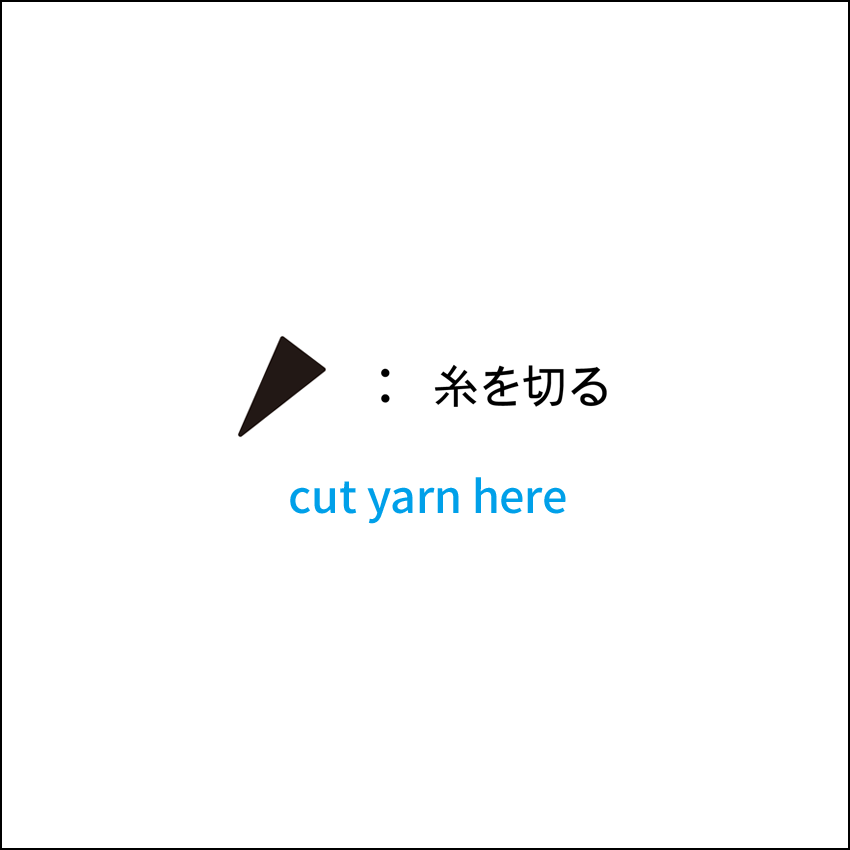
Knitting chart symbol list
We have compiled a list of "knitting symbols" that are commonly used in knitting patterns.
Actual knitting patterns may use symbols that are not listed here, but in the case of special symbols, additional explanations are usually provided.
*The link in the list leads to a video explaining how to knit.


Crochet patterns for basic stitches
Here we will explain how to read knitting patterns for the five basic crochet stitches (chain stitch, slip stitch, knit stitch, double crochet, and double crochet).
In addition to the knitting symbols, each item also includes a small practice knitting pattern that is easy to understand even for beginners.
There is also a knitting video available, so you can actually practice knitting.
In addition, we will also introduce "works with free knitting patterns" that can be made using each knitting method. Please read on and check how the symbols are used in actual works.
How to read a knitting pattern - Chain knitting -
Chain stitches are represented by the following knitting symbols:
For example, a chain of 10 knitting symbols represents 10 chain stitches.
The same meaning applies when intermediate knitting symbols are abbreviated as "~" and written in supplementary text as "10 chain stitches."

[Free knitting patterns using chain stitches]
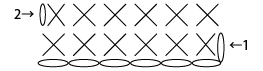
How to read a knitting pattern - slip stitch -
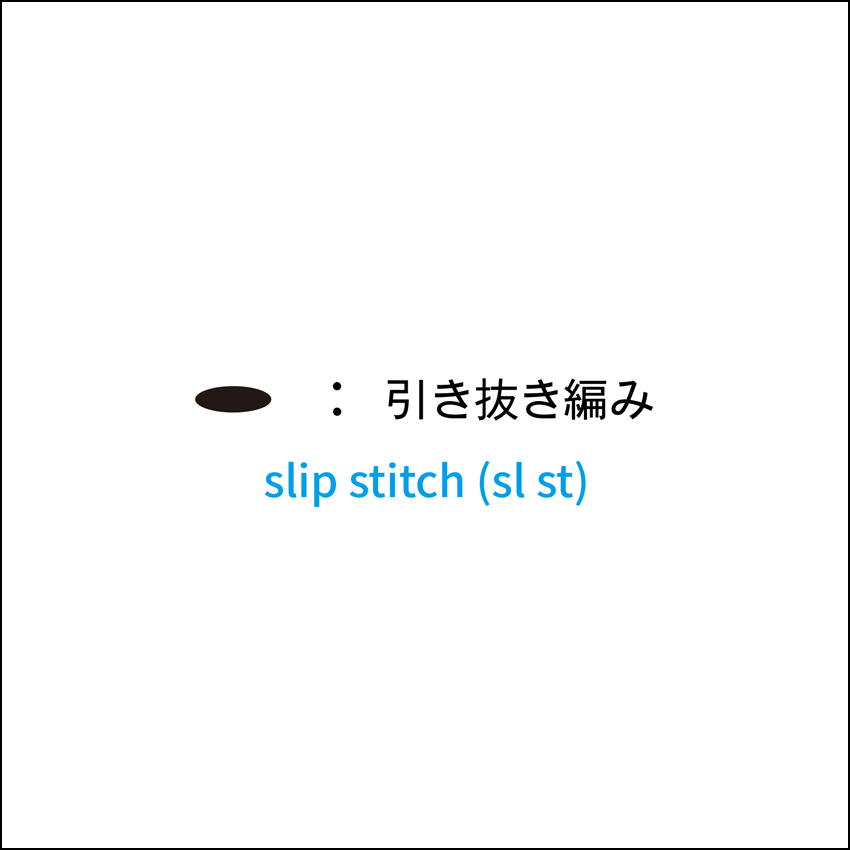
The slip stitch is represented by the following knitting symbol:
For example, if you knit 10 chain stitches and then slip stitch to make a loop, the knitting pattern would look like the one below.

[Free knitting patterns using slip stitches]
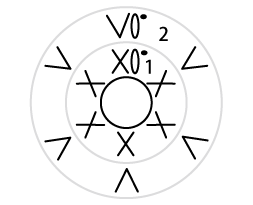
How to read knitting patterns - Knit stitch -
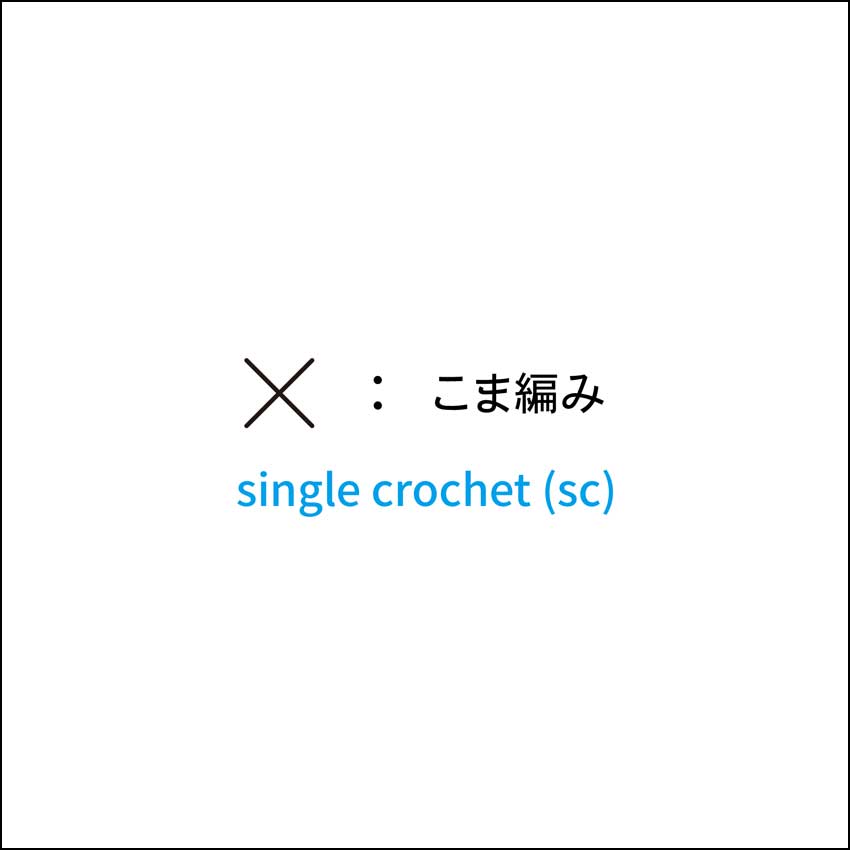
"Knit stitch" is represented by the following knitting symbol:
The first knitting pattern is an example of a knitting pattern for round knitting in the knit stitch.
The second is an example of a knitting pattern for circular knitting using the "knit stitch" technique.
[Free knitting patterns using round knitting]
[Free knitting patterns using round knitting]
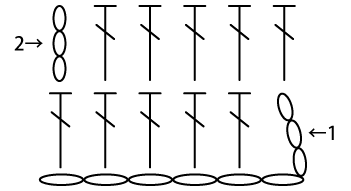
How to read the knitting pattern - Double stitch -
The "double crochet" is represented by the following knitting symbol:
The first knitting pattern is an example of a knitting pattern for a double stitch.
The second is an example of a knitting pattern for a "double crochet" round.

[Free knitting patterns using medium-length stitches]
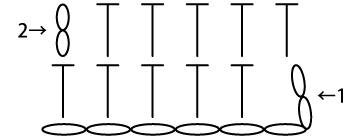
How to read a knitting pattern - Double crochet -
The double crochet is represented by the following knitting symbol:
The first knitting pattern is an example of a double stitch round knitting pattern.
The second is an example of a knitting pattern for a double crochet in the round.

[Free knitting patterns using double crochet (round crochet)]
[Free knitting patterns using double crochet (circular crochet)]
Let's try knitting some recommended projects for beginners
Are you starting to get a better idea of what crocheting is?
The "Beginner's Crochet Course" available for free on our website includes video explanations of how to crochet, with hands moving slowly so that beginners can easily understand.
We also provide detailed explanations about the work, including how to read the knitting patterns, so please make use of it.
The "Start with classic accessories" course consists of 7 sessions.
You can try out a wide range of creations, from coasters to market bags.
Take a look now!
![定番小物からはじめる かぎ針編み初心者コース[第1回]](https://ronique.jp/wp-content/uploads/2021/03/beginner_course01-2.jpg)
![定番小物からはじめる かぎ針編み初心者コース[第2回]](https://ronique.jp/wp-content/uploads/2021/06/beginner_course02.jpg)
![定番小物からはじめる かぎ針編み初心者コース[第4回]](https://ronique.jp/wp-content/uploads/2021/10/beginner_course04.jpg)
![定番小物からはじめる かぎ針編み初心者コース[第6回]](https://ronique.jp/wp-content/uploads/2022/02/bigginer_title0602.jpg)
Q&A for when you're in trouble
Q. I'm a complete beginner at crocheting and I don't have anyone to ask. Is it okay to learn on my own?
A. Yes, that's fine. I also started by learning on my own.
Recently, there are many supplementary tools such as videos available, and more and more people are learning at their own pace. This article covers all the points I wish I had known when I was a beginner.
First of all, don't be afraid of failure and try taking the first step with chain knitting.
Q. Are crochet tools from a 100 yen store sufficient?
A. If you are just trying it out for the first time, a 100 yen shop item is fine. However, if you are serious about getting started, we recommend a branded product.
One way to start is to buy everything you need at a 100 yen store and try it out to see if it suits you.
If you think, "I want to continue!" or if you start knitting for long periods of time, try using crochet hooks from a specialized manufacturer. You can knit smoothly, your hands won't get tired easily,The good thing about it is that it really feels like it's been well thought out.There is.
Q. As I knit, the beginning of the stitches becomes odd or the number of stitches becomes inconsistent.
A. Don't worry, this is a path that all crochet beginners must take!
In particular, with knitting stitches, it is easy to make mistakes in counting the stitches and where to knit them.
This articleRelated articles on knitting] is explained in detail, so please refer to it if you are unsure.
Even if you are used to crocheting, your stitch count may be off. If you get into the habit of counting each row, you will gradually develop the ability to judge the stitches.
When you feel tired, it is recommended that you stop and refresh yourself rather than pushing yourself too hard.
Q. I'm left-handed. Can I use this beginner's guide?
A. The basic mechanism is the same, but the hand movements and the orientation of the knitting pattern are "flipped left to right."
It is most efficient to learn the theoretical overview from this guide and then supplement the actual movements with "left-handed videos" on YouTube or elsewhere.
There is only one video explanation for left-handed people on this site (Crochet Techniques: Mastering the Foundation Single Crochet (FSC) (Left-Handed Version)) so please make use of it if you have the opportunity in the future.
Paid patterns that are easy for beginners to knit
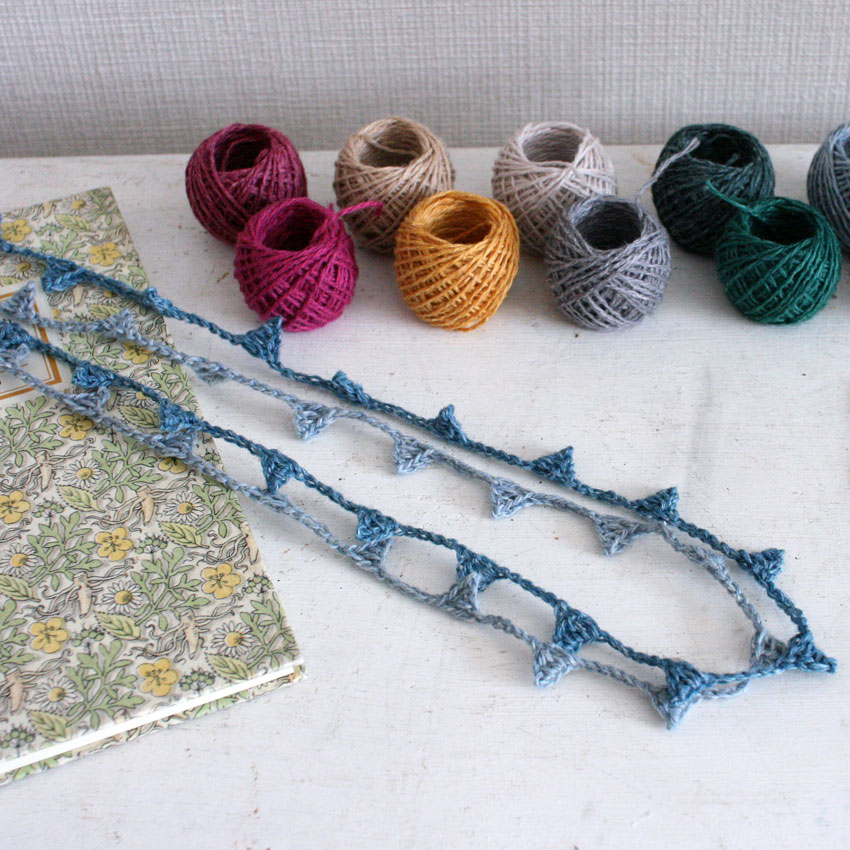
You can knit this! "Crochet Necklace" Knitting Pattern
This necklace is made by repeat knitting, so once you get the hang of it, you can knit it without looking at the pattern.
You can also knit it using leftover yarn, so it's great for practicing crocheting!
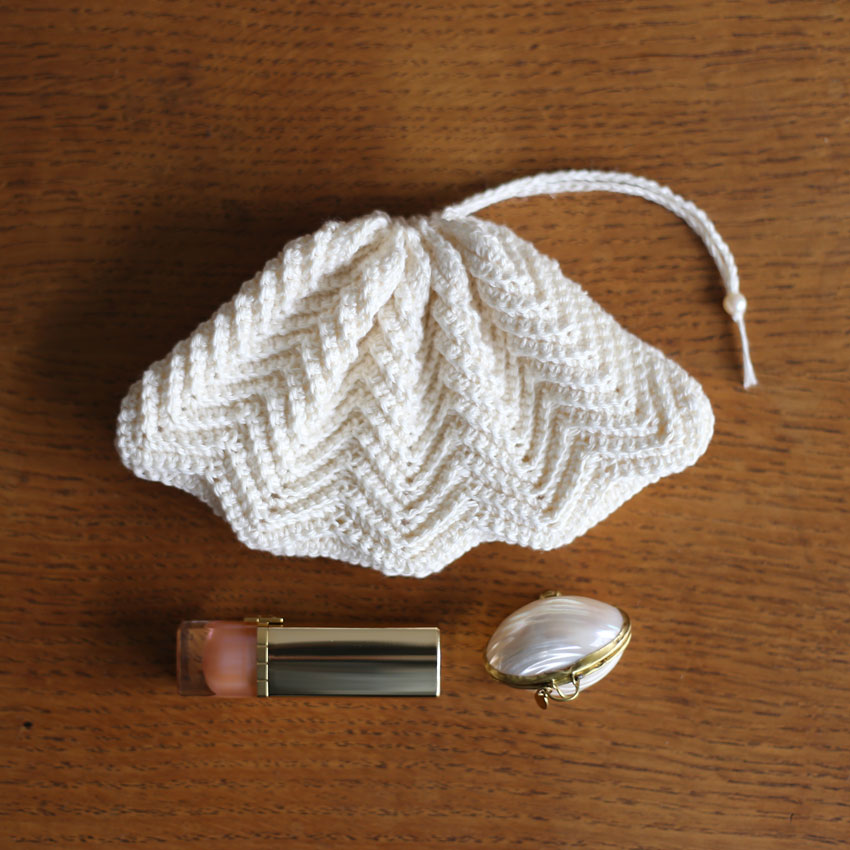
Crochet "Seashell Pouch" Pattern
Ronique Store's most popular pattern.
This is a piece that has been knitted by many people, including self-proclaimed beginners.
The knitting method is simple.
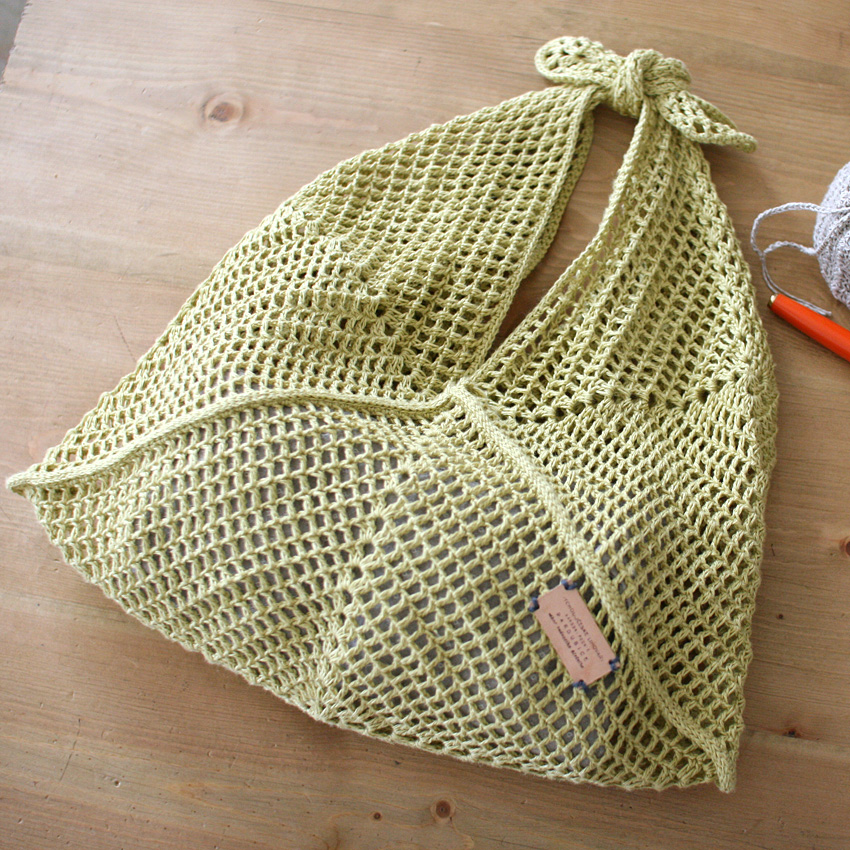
Crochet "Crochet Azuma Bag" Knitting Pattern
Azuma bags are made by combining motifs.
This motif is easy to knit even for beginners.
This is perfect if you want to knit something a little larger.