Index
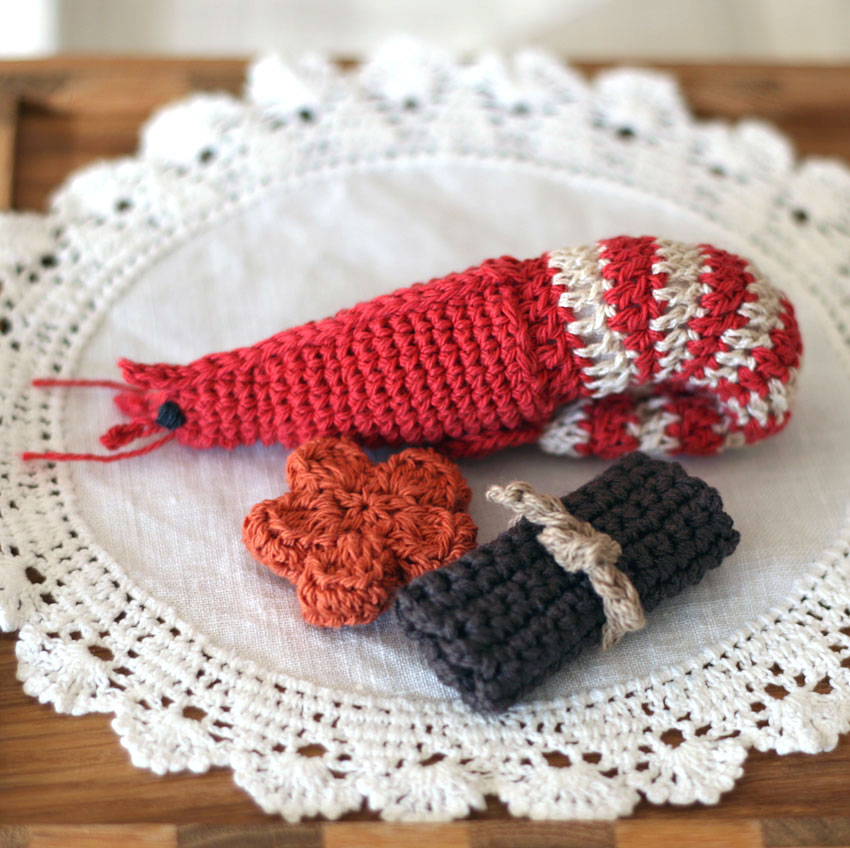
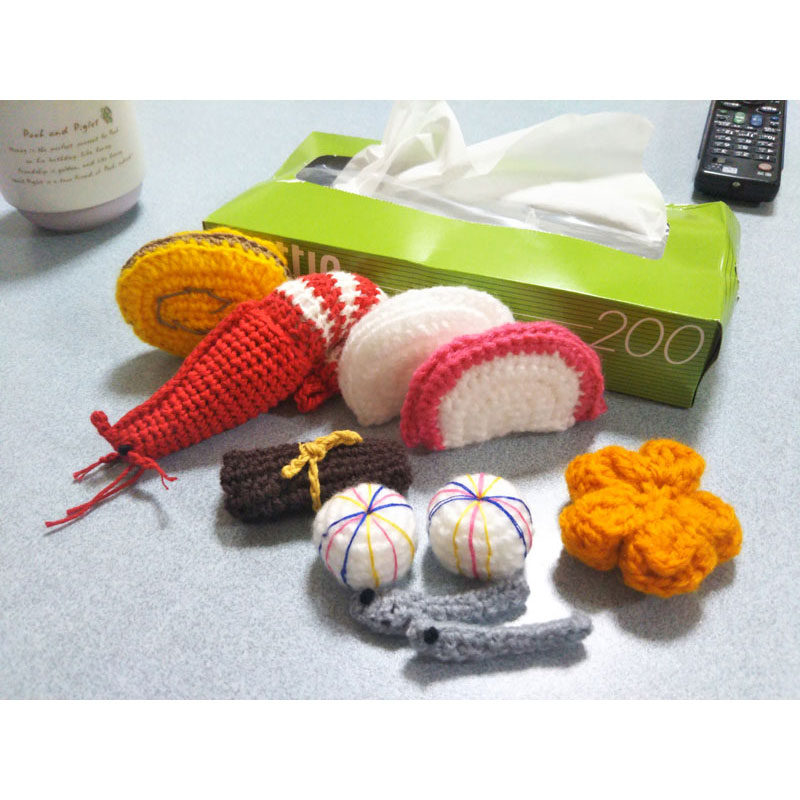
This is a crocheted piece.
This year, I tried crocheting New Year's dishes.
As the end of the year approaches, advertisements for New Year's dishes start to appear.
There is a wide variety of items and they are so colorful that you will want to try knitting a variety of them.
If you look closely, you'll see that many of them seem difficult to create.
First, let's start with the shrimp, which is a must.
I'd like to make two of each and (if possible) put them in a knitted bento box.
I used medium-weight thread for the konbumaki because I had some left over, but since it's just a square weave and roll, any thread will do.
Yarn and Crochet Hook Size
Medium-fine cotton thread (red, off-white, orange)
Medium-weight cotton thread (brown, beige)
Shrimp eye thread (medium thickness charcoal gray)
Size 3/5 crochet hooks (size 3 for medium-thin stitches and size 5 for medium-thick stitches)
Sewing needle
Polyester wadding
Finished Size
Shrimp length 10.5cm Carrot diameter 3.5cm Konbumaki 5 x 2.5cm
Crochet Pattern
Shrimp body knitting pattern
Carrot knitting pattern
Instructions
[Shrimp]
①To make the shrimp's head, start by casting on a loop and then crochet 5 square stitches.
From the second row onwards, increase the number of stitches as shown in the table below.
Leave a long end of the yarn at the end of the knitting to use when joining the shrimp's head and body together.
For instructions on how to knit the shrimp head decoration, see the bottom of the page.Explanation with imagesPlease see the detailed explanation in the section below.
| Number of steps | Increasing or decreasing the number of stitches |
| 12 to 19 | 20 (±0) |
| 11 | 20 (+5) |
| 8 to 10 | 15 (±0) |
| 7 | 15 (+5) |
| 3 to 6 | 10 (±0) |
| 2 | 10 (+5) |
| 1 | 5 |
②The shrimp's body isCrochet PatternPlease check.
Start by casting on a loop, then work 12 double crochets in the first row. Work the same number of stitches up to the third row, then from the sixth row onwards, change the colour of the yarn every other row.
For rows 7 to 13, knit using a mixture of double crochets, double crochet stitches and quarter crochets to make the shrimp's tail curve.
Add the cotton while you are knitting.
The blue part of the knitting pattern goes on the belly side (inside the rolled up part).
Once you have knitted up to the 17th row, thread the yarn through the top of the stitch of the final row and tie it off.
③Next, attach thread to the area where you squeezed the thread and knit the shrimp's tail.
Start with 4 chain stitches, crochet 3 double crochets, then slip stitch through the third double crochet to return to the base.
Knit again in the same way so that there are two tails lined up, then tie the yarn at the base.
④ Once you have knitted the shrimp's head and body, stuff a little cotton into the tip of the head, then insert the body and sew the shrimp's tail in place with thread to prevent it from slipping out of the body.
[Carrot]
① Carrots tooCrochet PatternPlease refer to.
Start by casting on a loop, and in the first row, alternate between knit stitches and chain stitches.
② Knit two pieces of ①, and once you have finished knitting the second piece, continue knitting the gusset without cutting the yarn.
To make the gusset, pick up just one stitch on the other side of the top of the chain stitch in the second row and crochet it around once with double stitches.
③ Once you have knitted the gusset, leave the end of the yarn long and use it to wrap around another piece of fabric and secure it in place.
In this case, too, scoop up and sew just one stitch on the gusset side of the second row of the other part.
I didn't add any batting, but if you want to fluff it up, try adding it before closing the knitting.
[Kombu rolls]
①Cast on 12 chain stitches and work 16 rows of round knit stitch.
This is simply a rectangle that is folded in thirds, so adjust the number of stitches to suit the thickness of the yarn. The konbumaki being knitted here uses medium-thick konbu and kanpyo.
② To make the kanpyo, knit 24 stitches into a chain and pass the end of the thread through the back of the chain to finish the thread.
Again, adjust the number of links on the chain to get the appropriate length according to the size of the kelp.
Fold the konbu into thirds, press it down carefully to maintain its shape, and tie the kanpyo into a knot.
Explanation with images
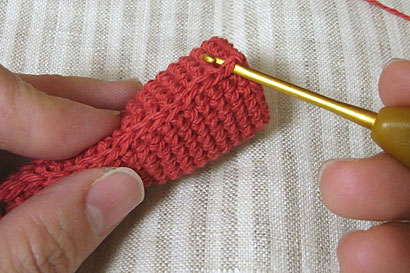
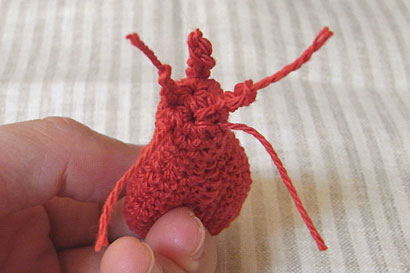
We will explain how to knit the lines that can be seen on the shrimp's head.
It is difficult to express this stitching well in a knitting pattern, so please refer to this.
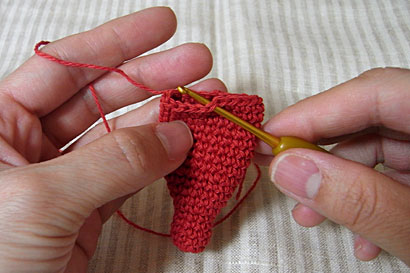
① Attach the yarn to the center of the open side of the shrimp's head (around 10 stitches from the start of knitting out of the 20 stitches) and knit one chain stitch.
② Continue knitting the slip stitches, going straight down one row at a time.
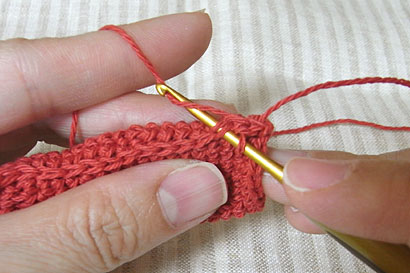
③The knitted fabric is diagonal, so try to knit it in as straight a line as possible (although this is just a rough idea).
The stitches will be made with a slip stitch line as shown in the photo.
This is where you cut the thread.
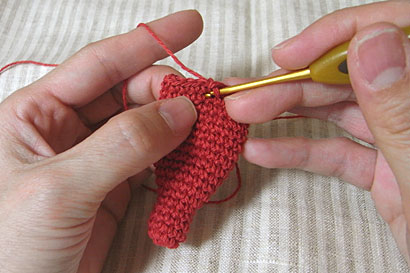
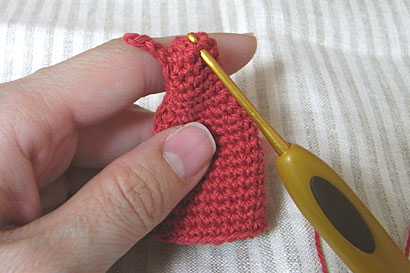
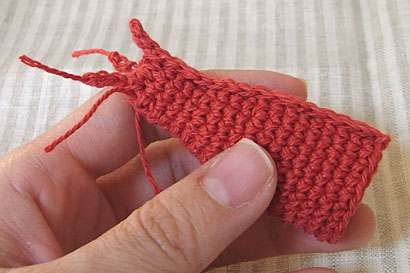
④ Next, attach new yarn and insert the needle sideways into the slip stitch you just made (photo), and make another slip stitch.
⑤ As shown in the photo, continue knitting using slip stitches.
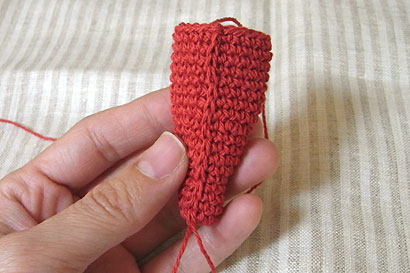
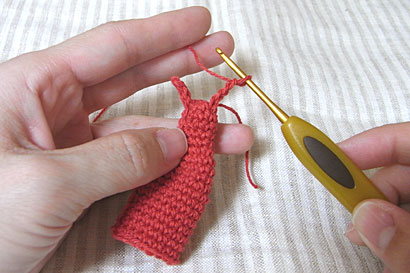
Once you have finished the slip stitch, continue by knitting three chain stitches with the same yarn (knit so that it jumps out into the space where there is no knitting), then pull the chain back with a slip stitch and finish the yarn at the base.
The final chain link will pop out as shown in the following photo.
⑥At the tip of the shrimp's head, below the chain that pops out, attach the yarn to two symmetrical places and crochet four chain stitches.
At this time, when you attach the yarn, leave the yarn that you will not be using to knit a little longer.
⑦At this point, you can either pass the end of the knitting yarn through the back of the chain stitch, or leave it as it is.
⑥ Use a crochet hook to pull out the unused yarn that you left long in step 6 so that it comes out just below the chain stitch, and cut it to the right length for the beard.
⑧ If you look at the shrimp's face from the front, it will look like this if you don't handle the thread in step ⑦.
For balance reference.
9. Here is a side view of the shrimp's head.
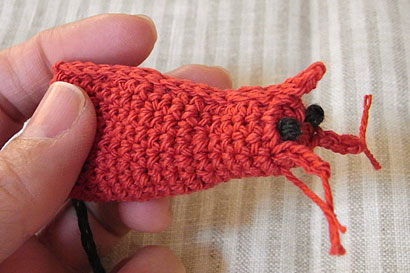
⑩Next, attach the eyes as shown in the photo.
Your work
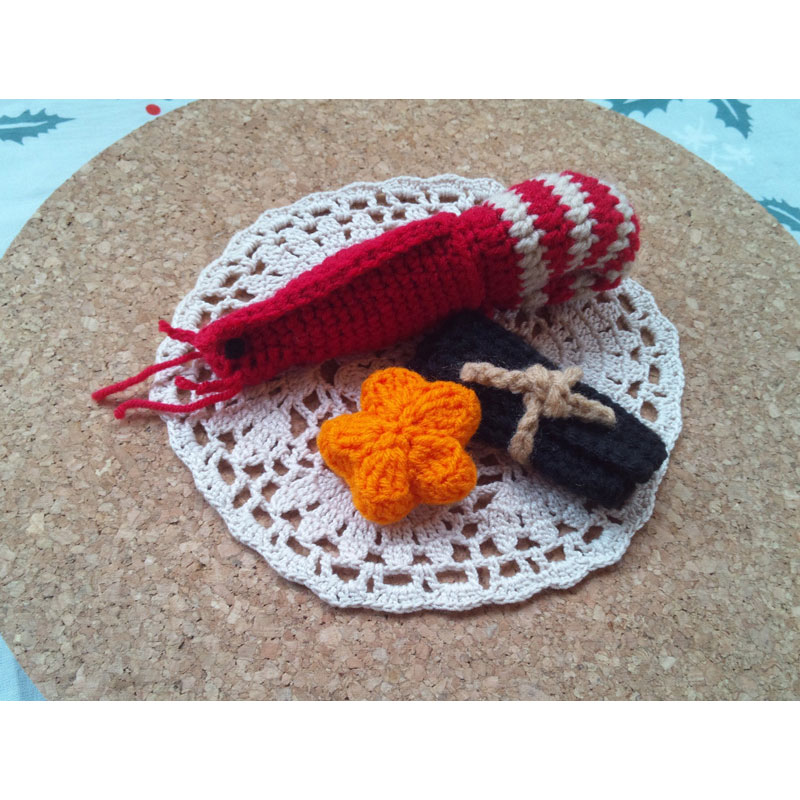
Rico's "Osechi cuisine (shrimp, carrots, and kelp rolls)"
I was completely blown away by the exquisiteness of the shrimp knitting pattern.
It's finished looking very delicious ♪
*Rico*Rico* Diary
http://ricocrochet.blog.fc2.com/
▶Rico's solo exhibition page
Mii.'s "Osechi cuisine (shrimp, carrots, kelp rolls)"
I did my best
I'll buy some weights and pack them in now.