Index
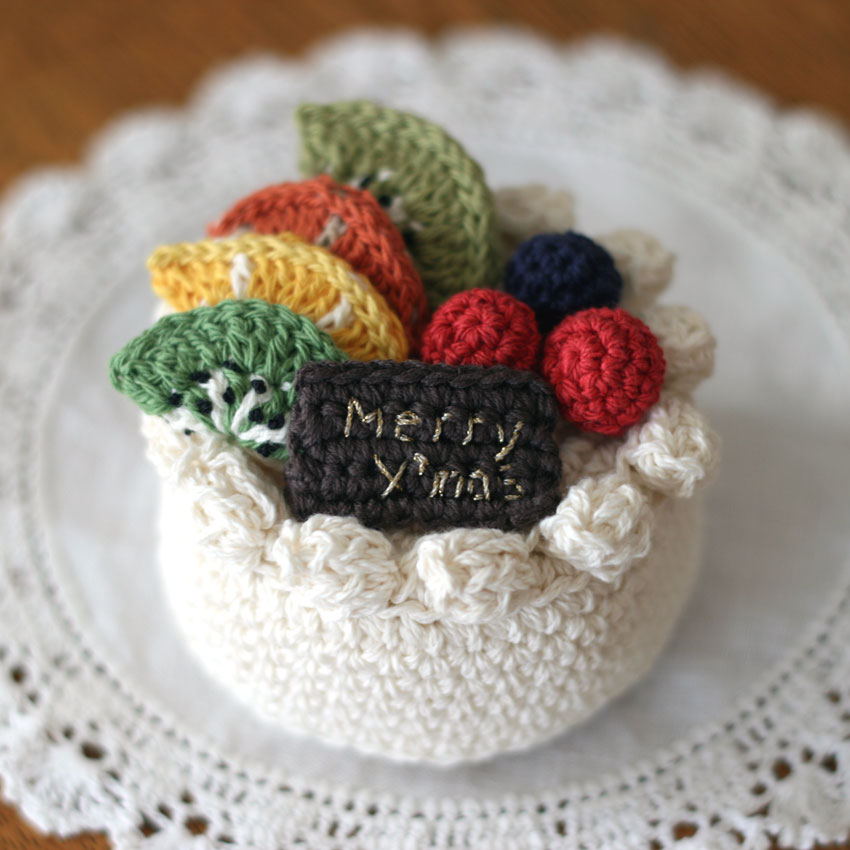
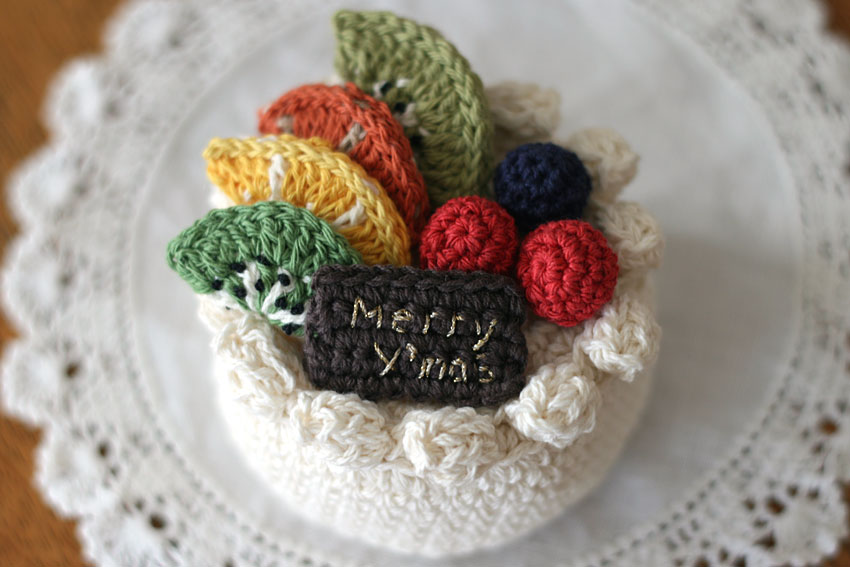
This is a crocheted piece.
I'm becoming addicted to the charm of crocheted sweets.
The beautiful colors are also part of the fun.
I was thinking how amazing it is that pastry chefs are able to create cakes that are both stylish to look at and delicious to eat, and after much trial and error, I settled on this shape.
From now on, I think I'll be even more interested in the sweets in the world.
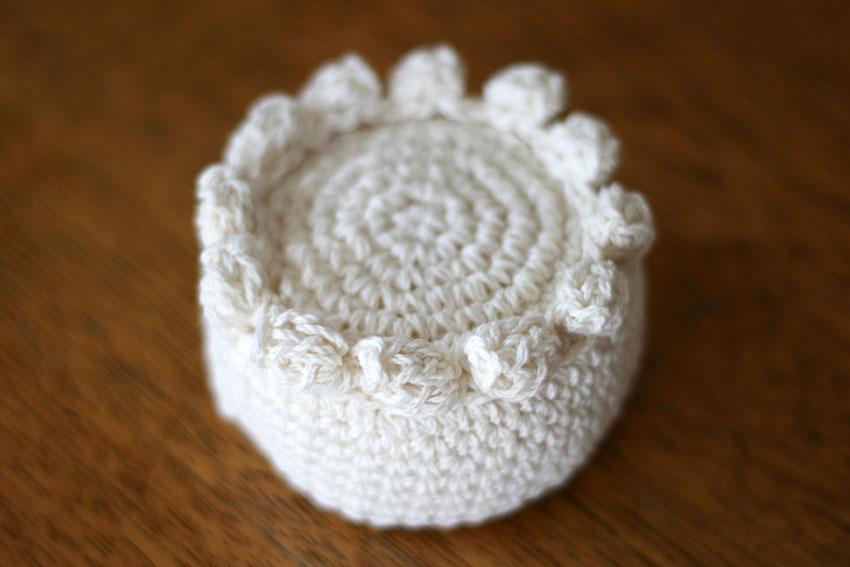
The base cake is knitted with medium thickness, so it will be completed much faster than the small cake box using a different recipe.
After the strawberry shortcake, I added some citrus fruits.
I wanted the decorative fruit to be more delicate than the base, so I used medium-thin braids.
Yarn, materials and crochet hook size
Medium-weight cotton thread (white, brown)
Medium-fine cotton thread (2 types of green, yellow, orange, off-white, black, red, navy blue)
Gold thread for embroidering the chocolate, sewing thread for fastening the decorations
Size 3/5 crochet hooks (size 3 for medium-thin stitches and size 5 for medium-thick stitches)
Sewing needles
Polyester wadding
Finished Size
Diameter 8cm Height 6cm
Crochet Pattern
Kiwi, mandarin orange, and lemon knitting pattern
Instructions
① Knit the base of the cake.
Start by casting on a loop, then crochet 6 stitches in the first row.
From the second row onwards, increase or decrease the number of stitches as shown in the table below.
In the 8th and 14th rows, scoop up just one stitch on the other side of the previous row and make a streak stitch.
Before closing it, put the filling inside. After you finish knitting the 20th row, thread the yarn through the final stitch and tighten it.
| Number of steps | Increasing or decreasing the number of stitches |
| 15 to 20 | -6 |
| 14 | -6 (stitched knitting) |
| 9 to 13 | ±0 |
| 8 | ±0 (stitched knit) |
| 2 to 7 | +6 |
| 1 | 6 |
②The cake base was used with the beginning of the weave on the top and the end of the weave on the bottom.
Attach the yarn to the top of the cake base and knit popcorn stitches to resemble whipped cream all around. In this example, I knitted 12 pieces.
At this time, hold the edge of the cake base towards you and make a slip stitch at a suitable point to pull out the yarn before starting to knit.
For the knitting instructions, see the instructions for knitting fresh cream at the bottom of the page.Explanation with images Please see.
Please use the number of popcorn stitches and their placement as a guide only.
You may also want to try crocheting a medium-length ponytail, so please adjust it as you see fit.
③Next, knit raspberries and blueberries for decoration (both are knitted in the same way).
Cast on the loop and crochet 6 stitches in the first row.
From the second row onwards, increase or decrease the number of stitches as shown in the table below. Add the batting before closing the knitted fabric.
Once you have knitted up to the fifth row, thread the yarn through the stitches of the final row and tighten it.
| Number of steps | Increasing or decreasing the number of stitches |
| 5 | -6 |
| 3-4 | ±0 |
| 2 | +6 |
| 1 | 6 |
④Kiwi, mandarin orange, lemon,Crochet PatternPlease check.
Start by making a cast-on loop, then work double crochets in the first row, changing yarn colors.
Once you have knitted the second row, fold the knitted fabric in half and sew it together with a slip stitch.
The kiwi seeds are embroidered with black thread.
⑤For the chocolate decoration in the middle, try knitting it in a round-trip stitch until it is the size you like.
To get the right length, cast on a chain and work back and forth knit stitches until you get the right balance.
Simply embroider your favorite words, such as "Merry Christmas" or "Happy Birthday," onto the chocolate and decorate it to finish.
In addition, there is a separate recipe page:Small cake boxHave fun arranging the toppings, such as garnishing with the strawberries on top.
Explanation with images
Here we will explain how to knit popcorn stitches to resemble whipped cream onto the base of a cake.
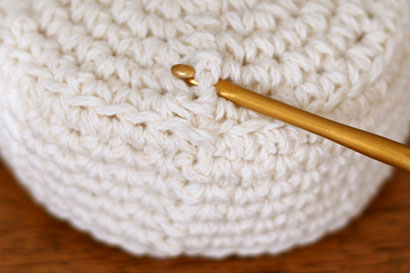
1. Insert the needle into the base of the knit stitch on the cake base as shown in the photo and make a slip stitch.
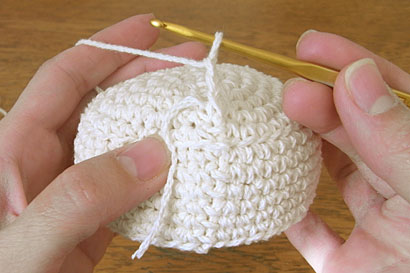
② After the slip stitch, crochet three chain stitches.
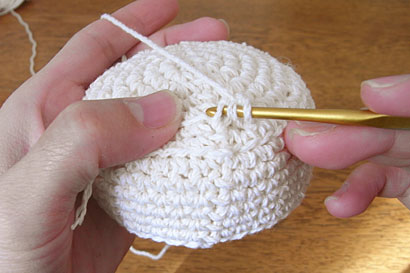
③ Crochet four double crochets around the base of the first chain.

④The first double crochet is now complete.
⑤You have knitted 4 double crochets.
From here, crochet one chain stitch and you'll have completed one popcorn stitch.
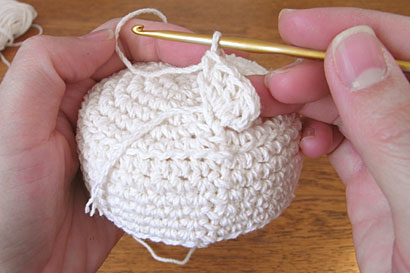
⑥Once you have completed one popcorn stitch, make a slip stitch in a suitable place.
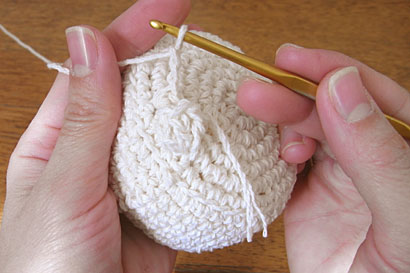
⑦ After the slip stitch, crochet three chain stitches, then crochet popcorn stitches in the same way.
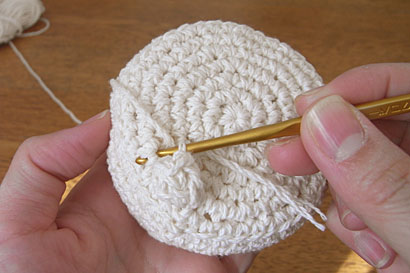
To finish knitting, make a slip stitch in an inconspicuous place near the base of the first stitch.