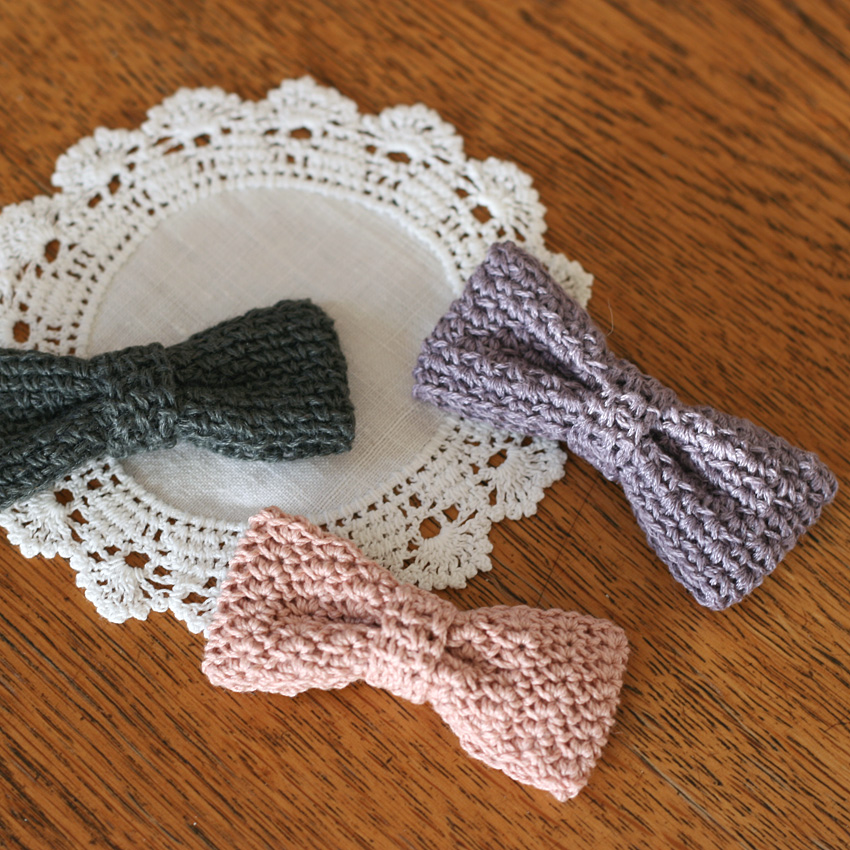
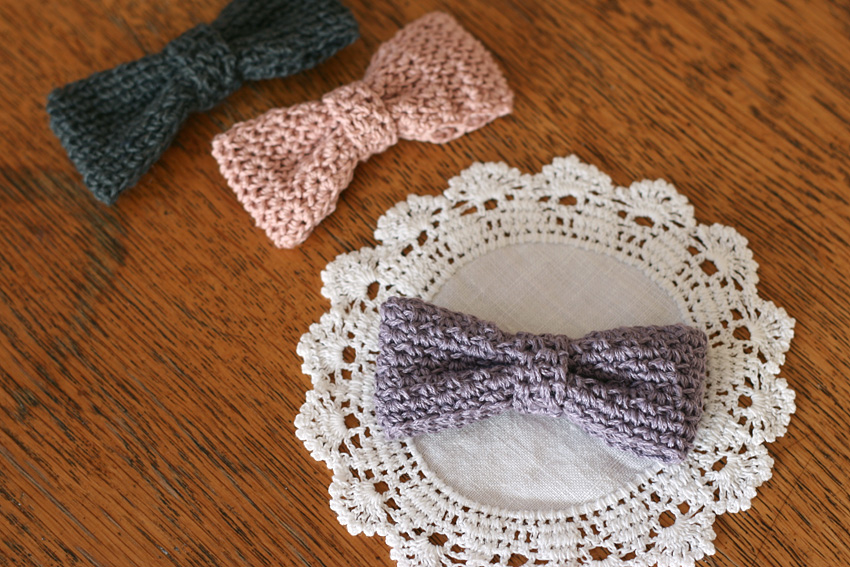
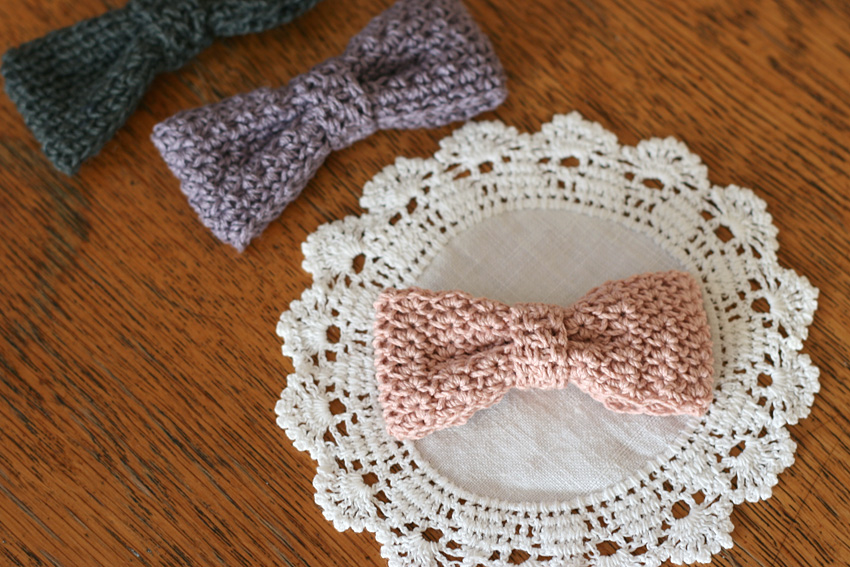
This is a crocheted piece.
This is a crocheted ribbon. I sorted out the excess yarn I had over the New Year holidays.
This is knitted with cotton yarn and cotton linen yarn.
Depending on the season, knitting with wool or mohair yarn will give it texture and a cute finish.
I tried adding a little variation to a simple ribbon using knitted fabric based on knitting stitches.
All three are subtly different.
You can use it as a hair accessory by threading a rubber band through it, or as a decoration for your bag by attaching a pin to it. Of course, it's also great for children.
Yarn and Crochet Hook Size
Medium-thin thread (deep green, purple, pink)
2.3 mm (JP 3/0)
Finished Size
Length 3-3.5cm, width 7-7.5cm
Crochet Pattern
Ribbon A (Deep Green) Knitting Pattern
Ribbon B (Purple) Knitting Pattern
Ribbon C (Pink) Knitting Pattern
Instructions
Please see the knitting pattern along with the instructions below for how to make it.
① For all three types, start by casting on the chain. Knit 48 stitches, then pull through the first stitch to form a loop.
When making a loop of a chain, scoop up one strand on the other side of the chain loop and the back of the knot and pull it out. In the same way, scoop up these two strands and crochet the first row.

② For Ribbon A, alternate chain stitches and quarter stitches every other row (yawn stitch). Knit the same number of stitches up to row 10, then cut the yarn, leaving the ends long.
③For Ribbon B, alternate between knit stitches and chain stitches on odd-numbered rows.
On even-numbered rows, gather the chain from the previous row into a bundle and knit two quarter stitches in. Knit the same number of stitches up to row 11, and cut the yarn end in the same way, leaving it long.
④ For ribbon C, repeat the knitting method of "crocheting 3 round stitches".
From the second row onwards, knit three small crochets into the middle stitch of the three small crochets knitted in the previous row.
Knit up to the 8th row without increasing or decreasing the number of stitches, then cut the ends of the yarn, leaving them long.
⑤ Once you have finished knitting the ribbon, fold it so that the rising stitch is in the center (to hide the rising stitch by wrapping it in the knotted knitting), and then shape it.
Gather the center of the ribbon vertically and press it down with your hand, then wrap the long end of the thread that you left at the end of knitting around it to temporarily secure it in the shape of a ribbon.
To prevent the thread from coming loose at the end of the winding, pass the end of the thread under the wound thread.
⑥ Knit the knot part and wrap it around the center of the ribbon that you previously secured with the end of the thread so that it covers the entire area. Line up both ends of the knitted fabric and secure with a roll stitch.
Your work
"Adult Ribbon" by Salvia-rij
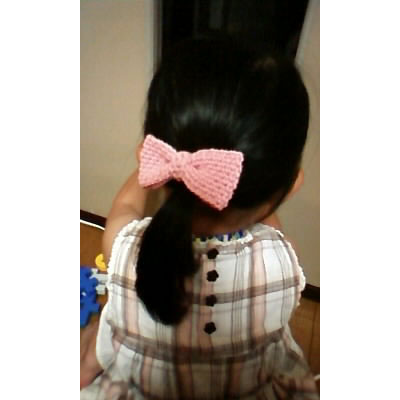
I knitted this for my daughter, who is just starting to become interested in fashion. She really likes it, and the first thing she does when she wakes up in the morning is bring it to me saying, "I want to make a bow!"
Rico's "Adult Ribbon - 3 Types"
I tried knitting all three types.
All of them are cute♪
It was a gift for my friend's daughter.
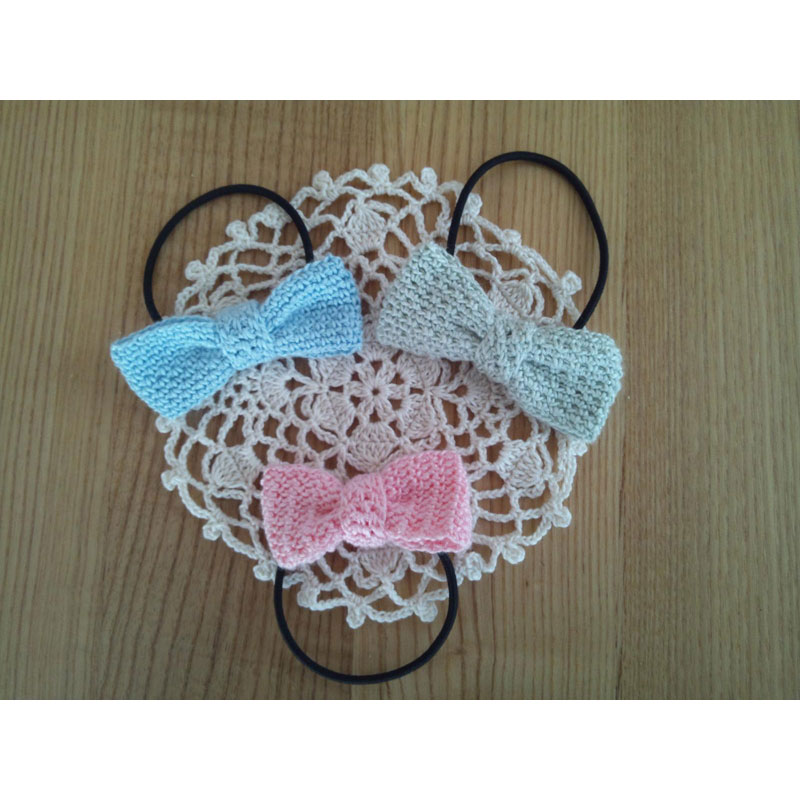
Blue (Ribbon A)
Green (Ribbon B)
Pink (Ribbon C)
*Rico*Rico*Diary
http://ricocrochet.blog.fc2.com/
▶Rico's solo exhibition page
![編み物屋さん[ゆとまゆ]さんの「おとなリボン・3タイプ」](https://ronique.jp/wp-content/uploads/2021/01/ga01_041_003L.jpg)
"Adult Ribbon - 3 Types" by Knitting Shop [Yutomayu]
We named them "The Mustard Three Sisters."
I used my favorite mustard color to express "adulthood" through color. The three types of knitting are very beautiful. I had fun knitting. Thank you.
http://ameblo.jp/doubleychan/
Knitting blog by Knitting Shop [Yutomayu]
▶Knitting shop [Yutomayu]'s solo exhibition page