![かぎ針編み [4000いいね!記念] 仕切り付きフラットポーチ](https://ronique.jp/wp-content/uploads/2016/05/IMG_1989-1.jpg_2-1.jpg)
This is a crocheted piece.
I tried knitting a pouch using two crochet motifs.
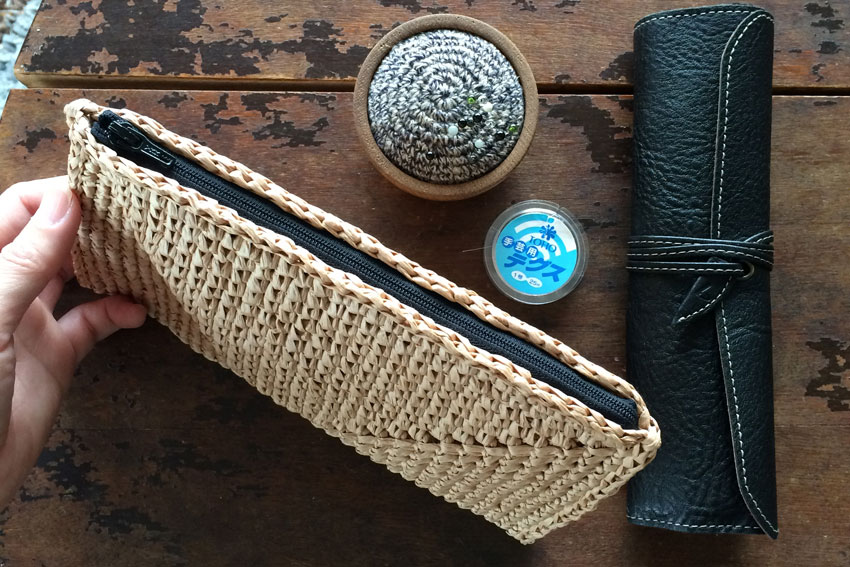
This flat pouch is woven from a raffia-like material and looks like a smaller clutch bag.
I love simple projects like this that are knitted with summer materials.
There are two key points about this pouch!
First, there is a divider inside.
The dividers make it sturdy and lightweight. The dividers are also made of motifs and can be easily inserted when sewing.
Second, the standing position is not noticeable.
It actually feels really good that the finished product looks beautiful from any angle.
I'm sorry if you find the zipper a little difficult to use.
However, if you zip it up, you can use it like a wallet, like a collection bag.
It's the perfect size for a pencil case or makeup pouch.
It's large enough to fit a bankbook with ease, but not enough to fit a maternal and child health handbook. I'm thinking about using it as an accounting bag for an event, but I'm still undecided.
I hope you all find the perfect use for it.
Yarn and Crochet Hook Size

Manila Hemp Yarn [col.507/Straw] ... 37g (2 balls)
No. 7 crochet hook
Zipper (black/20cm/scissor-cut type)...1 piece
Fishing line (No. 1)...a little
sewing needle
Finished Size
When laid flat, it is 20.5cm wide and 12cm tall.
Crochet Pattern
Divided Flat Pouch Knitting Pattern
Instructions
Please also check the knitting pattern along with the instructions.
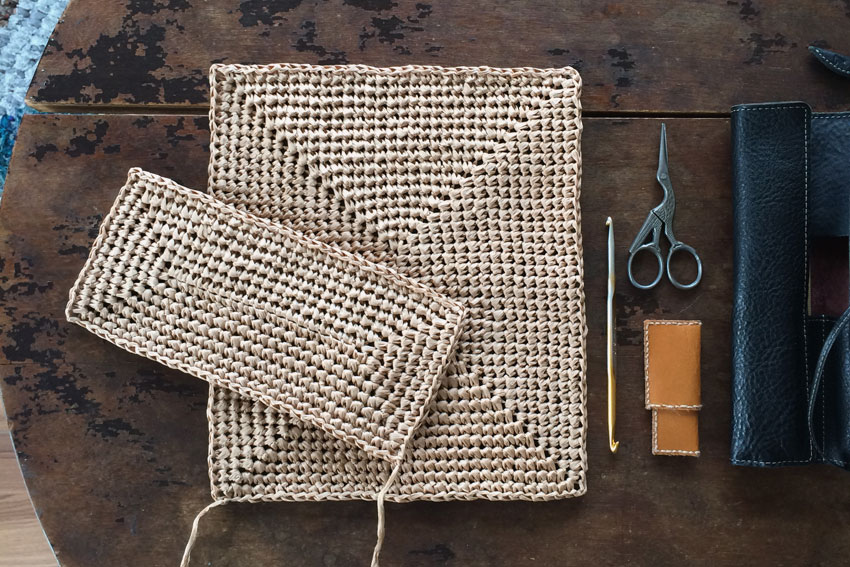
① Start by knitting a motif for the divider in the pouch.
Start by casting on 18 chain stitches, and for the first row of knit stitches, in the first half you will pick up one strand on the other side of the cast-on chain and the back of the crest, and in the second half you will pick up the remaining strand that you did not pick up in the first half.
The corner at the end of the row is made up of one double crochet and two chain stitches, and here you insert the needle into the rising stitch and crochet another double crochet.
②At the beginning of the second row, knit a chain to start the work, then gather the stitches from the previous double crochet into a bundle and knit one small crochet.
Increase the corner stitches in each row and work your way up to row 7. At the end of row 7, instead of working a double crochet, crochet two chain stitches and pull them through to the starting stitch. Cut the yarn when you have finished knitting this far.
③Knit the pouch body.
Cast on with 6 chain stitches and knit in the same way as for the divider in step 1 up to row 16. For this motif, knit only in row 16, knit 2 chain stitches at the end and pull through to the starting stitch, but do not cut the yarn afterwards and leave it attached.
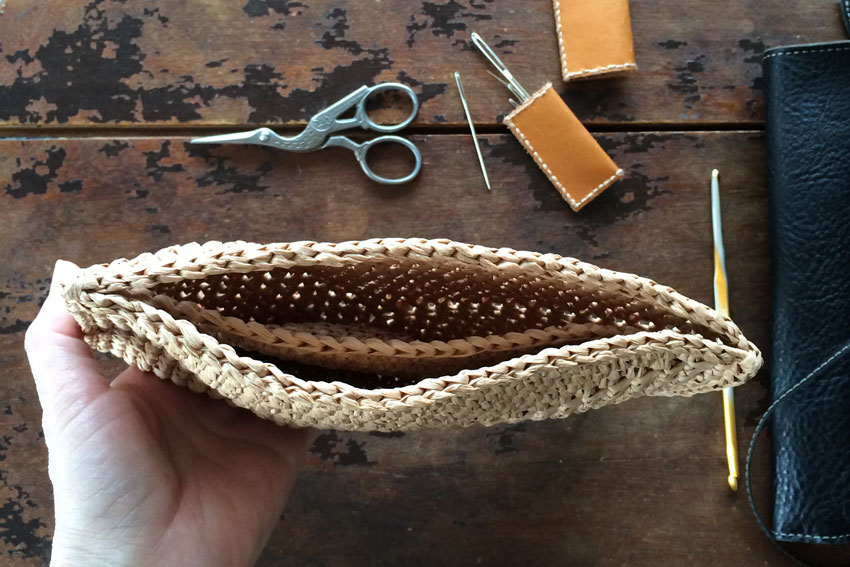
④Next, sew together the sides of the pouch.
Please refer to the knitting pattern for more details.
As shown in the knitting pattern, combine and layer the motifs, continue using the yarn from the main pouch body, and pull and sew off one edge.
At this time, pull out the chain stitch at the opening of the pouch and the three knit stitches (pink symbols in the knitting pattern) without sandwiching the divider in between, and from the next stitch onwards, three pieces of knitted fabric overlap, so insert the needle through all three pieces and pull out and sew.
The two stitches at the bottom of the pouch are also pulled out and ripped off without inserting the divider.
⑤ For the other edge, attach a thread from the bottom of the pouch and begin pulling it apart.
Once you have finished cutting out the sides, continue using the same yarn to do a slip stitch on one piece of knitted fabric on one side of the pouch opening.
When doing this, pull the yarn out while looking at the inside of the pouch (so that the back of the slip stitch is on the outside of the pouch) and cut it.
⑥ For the other opening of the pouch, attach yarn and knit in the same way.
⑦ Cut the zipper to fit the opening of the pouch and sew it in place with a backstitch. Make sure to sew the ends, which will be subject to stress, tightly.