This is a crocheted piece.
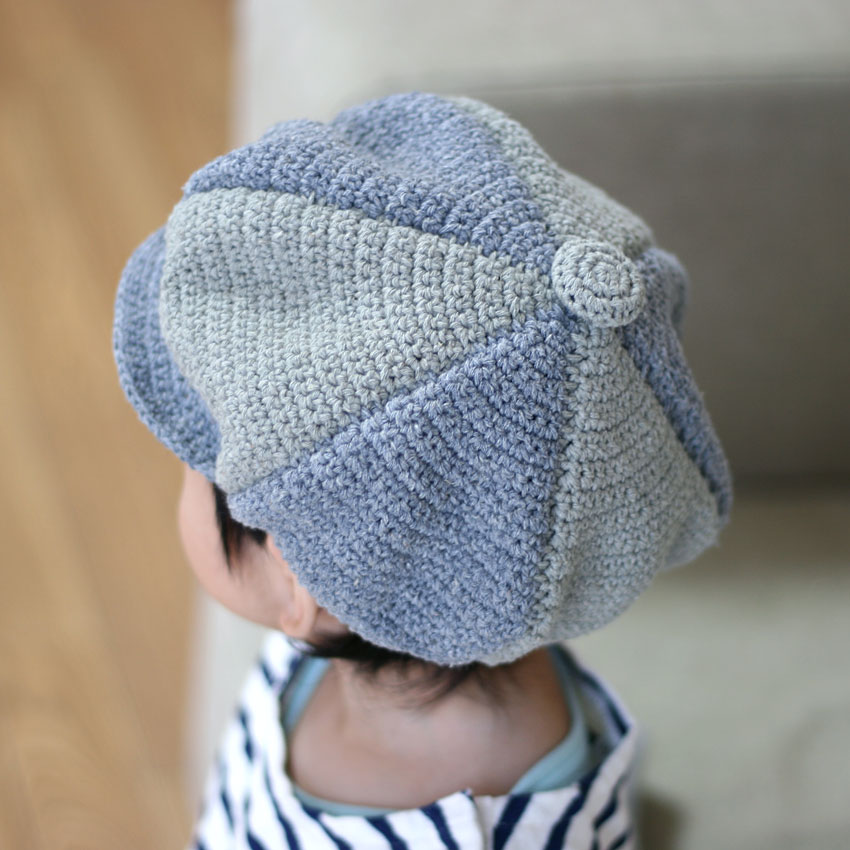
This is a crocheted newsboy cap I made for my younger brother, who is 1 year and 8 months old.
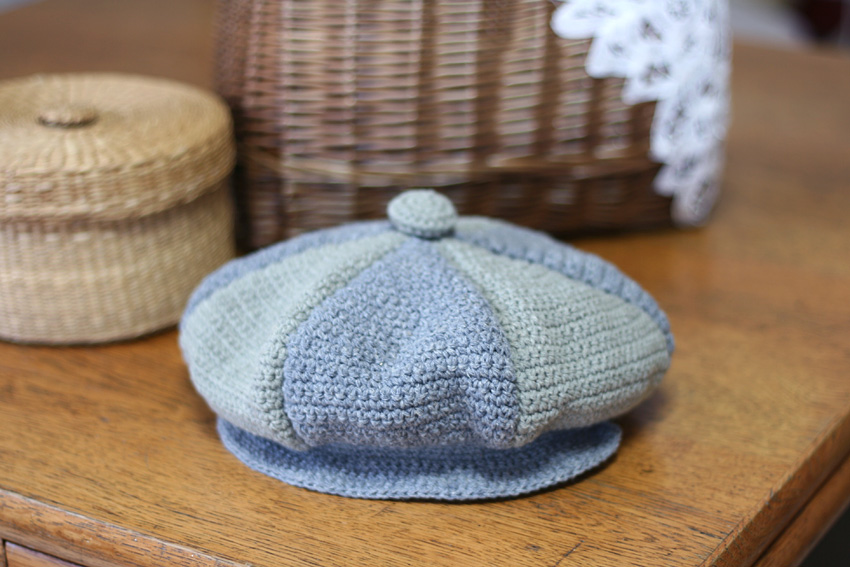
I tried piecing together six pieces.
It folds flat, so you can easily slip it into your bag.
It's hard to imagine the size and the finished product until you sew the six pieces together, but it somehow looks similar. If you don't knit the brim, it can be used as a beret.
It has a large bulge, so I think it would look cute on a girl too.
It's difficult to proceed while checking the size, but I would definitely like to try applying it to adult sizes next time. I feel like there are many other ways to use it by cutting six pieces together, and I'm starting to feel the possibilities.
Yarn and Crochet Hook Size
Two medium-weight cotton-linen threads (40g balls, approx. 97m)
I used two colors: gray and khaki.
Button for knitted covered buttons, diameter 22mm x 1
3.0 mm (JP 5/0)
Finished Size
Head circumference: approx. 45cm
Total weight: 70g
Crochet Pattern
Top Knitting Patterns
Side knitting pattern
Brim knitting pattern
Instructions
There are three types of knitting patterns, so please check them out along with the explanations below.
① First, knit six pieces of the same stitching parts to be used for the top part.
Start by casting on one chain stitch, then knit back and forth using the knit stitch, increasing stitches as you go up to the 24th row.
Knit rows 25 to 31 without increasing or decreasing the number of stitches, then decrease the number of stitches at both ends of row 32.
The number of stitches in the 33rd row is 22.
②Once you have knitted the six top pieces, sew the knitted fabric together using a knit stitch.
When sewing pieces together, it looks nice if you keep the number of stitches the same while checking the balance.
Since the front and back of the knitted fabric are both knitted back and forth, there is not much difference between them, so I think it would be fine to just make one side the same (odd-numbered rows facing out, even-numbered rows facing out, etc.).
After the knitted fabric is sewn together, the sewn side (the protruding side of the knit stitch) is used as the inside, and the concave side of the sewn part is used as the outside.
③ Pick up stitches from the edge of the sewn top and knit the sides using a knit stitch.
The number of stitches to be picked up is 22 stitches from each of the 6 parts, so that there are 132 stitches in one round (Side knitting pattern reference).
Decrease the number of stitches in the second row, and knit the same number of stitches in rows 3 to 6.
④Brim:Brim knitting patternAttach the yarn from the position shown and knit back and forth in a circular stitch pattern, increasing or decreasing the number of stitches.
For rows 6 and 7, decrease the number of stitches only at both ends (beginning and end of knitting), and knit the rest of the rows without increasing or decreasing the number of stitches.
⑤ Attach a button wrapped in a loop stitch to the top of the hat and it's finished.