![定番小物からはじめる かぎ針編み初心者コース[第6回]](https://ronique.jp/wp-content/uploads/2022/02/bigginer_title0602.jpg)
In the previous 5th lesson of the beginner's crochet course, we featured a slightly voluminous piece: a knit market bag.
With the thick yarn I've used in my previous projects, my hands and eyes have gotten used to it, and I think I'm starting to feel comfortable counting stitches.
So this time, I chose a small piece knitted with slightly thinner yarn.
When you think of crochet, many people probably think of motif-connected pieces.
Motif-connecting works are popular because they are made by connecting many small, multicolored parts together, so just looking at the colorful colors is fun.
However, changing the color of the thread requires additional thread processing, and the process of stitching the motifs together can be extensive depending on the piece, so it is a technique that is a matter of personal preference.
The best way to find out if you like it is to try knitting it once! So, this time, let's try a motif-jointed project that is relatively easy to do.
It can be completed in a short amount of time, so please try knitting it whenever you feel like it or in your spare time.
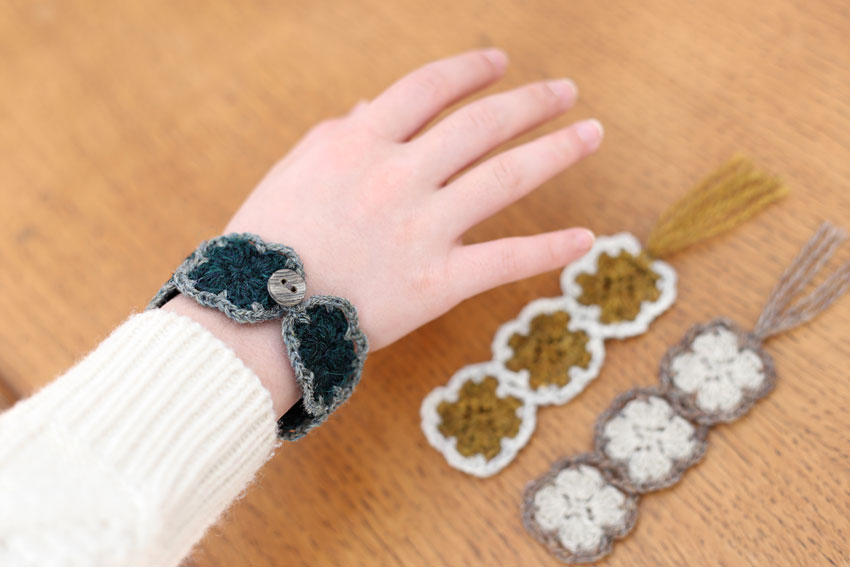
The piece on the left of the title image is an example of an arrangement in which multiple motifs are connected together to make a bracelet.
Please refer to the instructions at the end of the page on how to arrange it.
By applying this technique, you can also connect the motifs together using thicker thread to make a long belt.
Depending on the number of motifs and how they are connected, you can create a variety of items other than bookmarks and bracelets.
Just by connecting them in a square shape, the possibilities are endless, such as a basket privacy cloth or a scarf.
The wide range of possibilities that lies within is what makes motif-connecting works so interesting.
I hope you will enjoy this as your first step into the world of motif connection.
Index
First, prepare your tools and yarn.
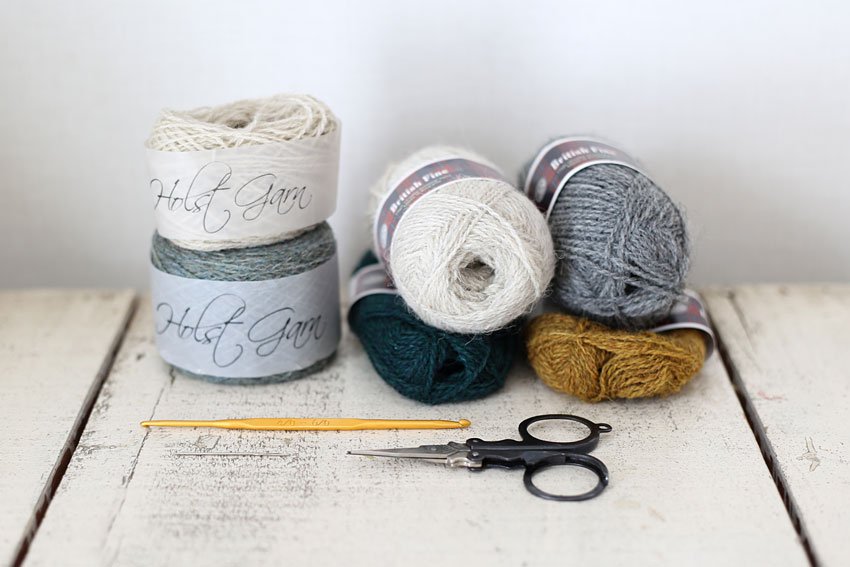
What you will need
Here's what I prepared to knit this piece:
- Medium-fine yarn, 2 colors, 2g each (3g each for bracelets)
・Size 4 crochet hook
• Tapestry needle (yarn needle)
• Scissors
The yarns I used this time were "Puppy British Fine" and the Danish yarn "Holst Garn supersoft", which I chose after much deliberation about color matching.
British Fine is a yarn with just the right amount of tension that makes it easy to use for knitting small items, and it's easy to obtain as it can be purchased at large craft stores or online.
Holst Garn is a thin yarn, somewhere between fine and medium-fine, and can be purchased online in Japan from select shops that carry imported yarns.
There is a wide variety of colors available, so this may be one of the yarns that knitting enthusiasts will come across as they try out different yarns.
For this project, any medium-fine yarn will do, so please use this as a reference to show that such thin yarns exist.
Which crochet hook do you recommend?
The yarn used is medium-fine, so you'll want a size 3 to 5 crochet hook (I use a size 4 crochet hook).
This is a small project, so if your hands get too tight and it's difficult to knit, try using the next larger size.
In terms of strength, knitting a piece tighter will make it stronger, so it may be better to knit it a little tighter than too loosely. Try adjusting it while also checking the size.
What yarn weight do you recommend?
If you are using it as a bookmark as in this piece, thick yarn will make it too thick, so medium-thin yarn would be best, but it would also be nice to try knitting it with even thinner lace yarn.
If you are using thinner yarn, it is easier to knit with yarn that has a certain degree of stiffness, so please keep this in mind when choosing yarn.
What yarn material do you recommend?
This time I used wool yarn, but summer yarns such as linen are also recommended.
Summer yarns tend to be stiffer than winter yarns, so they make it easier to knit accessories and the finished product will be sturdy.
Also, if you use glitter thread to knit the bracelet, it will look even more like an accessory.
What yarn color do you recommend?
This is the first thin yarn project in the beginner's course (of course, it's a good idea to try knitting with thick yarn first), so if you're a little hesitant to see the fine details, it's a good idea to choose a lighter color.
This is a project where you knit multiple copies of the same motif, so you will quickly get used to it. Once you get the hang of it, try knitting it in your favorite color combinations!
A Closer Look at the Project and How to Make It
Why did we choose motif-connecting bookmarks for the 6th edition?
Since I had just finished a larger piece, I decided to make something that could be knitted in a short amount of time.
If you're into crocheting, this is probably a motif you'll want to try at least once.
And this time, the piece uses two colors.
I hope you enjoy the thought-provoking process of matching colors.
In terms of techniques, this is the sixth session and we have already cleared the high-priority items, so from here on, rather than climbing up the steps, the idea is to expand horizontally and try out various things.
So this time, I chose motif joining as a way to expand my horizons.
What is the size of the work?
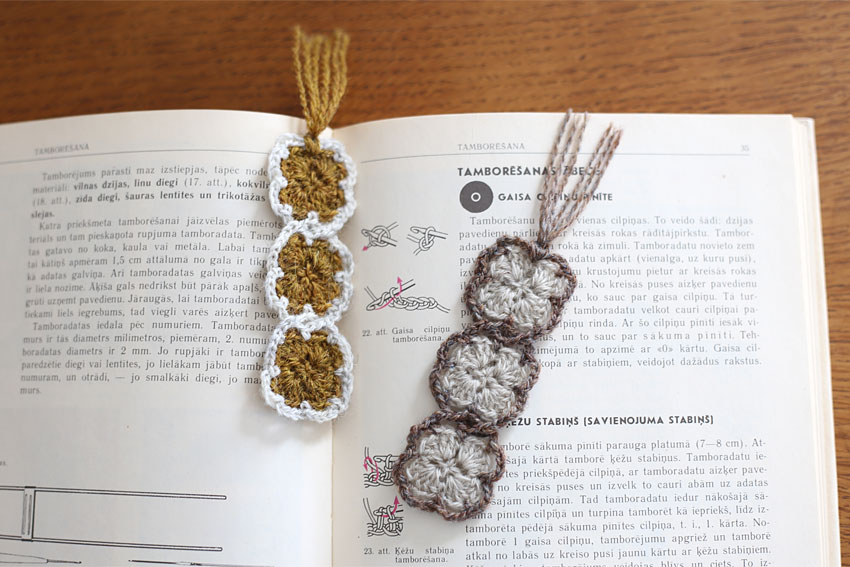
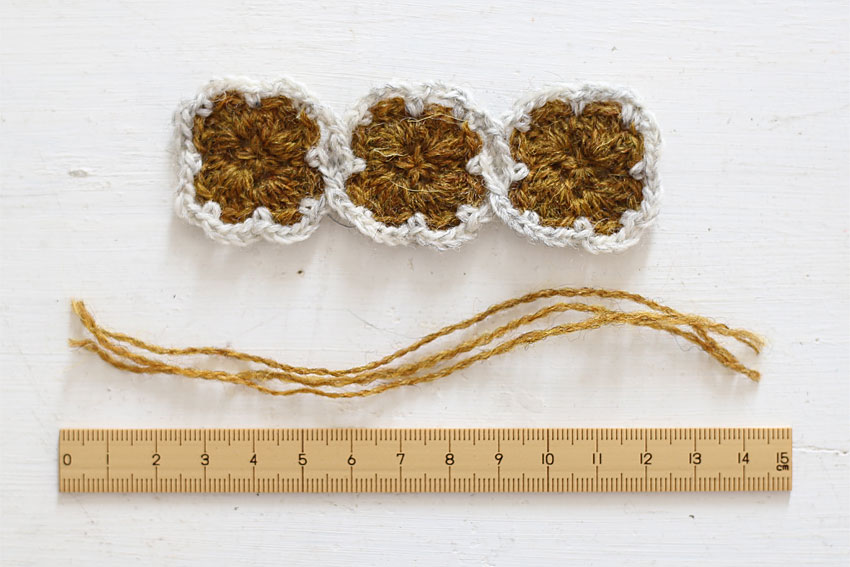
Each motif measures approximately 3.5cm x 3.5cm.
The three bookmarks strung together measure 10cm long x 3.5cm wide. With the tassel attached, the total length is about 15cm.
The bracelet is 16.5cm long x 3.5cm wide. With the button loop, it is about 17.5cm long.
How do you knit a motif-connected bookmark?
The motif begins with a cast-on loop, and when you make a slip stitch at the end of the second row, you change to a different color yarn. Then, knit the third row with a different yarn.
From the second motif, when knitting the third row, you will continue knitting by connecting it to the completed motif.
Once the main body is complete and the tassels are attached, use a floating steam iron to settle the knitted fabric.
What is the point of this piece?
The motif this time is a piece that incorporates elements of patterned knitting, such as alternating double crochet and quarter crochet.
You can crochet five double crochets in one stitch of the previous row, or gather the chain loops into a bundle and crochet.
I hope that as you move your hands you will get a sense that patterned knitting is made up of the combination and repetition of several knitting techniques.
Another point about this piece is that you can connect the motifs as you knit them, which saves a little energy.
How to Read the Crochet Chart
▶The knitting pattern is available as a PDF file.
Motif-connecting bookmark knitting pattern
For this project, taking the yellow piece as an example, you will knit the first two rows from the cast-on using yellow yarn, and the third row using white yarn.
To change the yarn, after finishing the second row, change to white yarn and pull it through when you make a slip stitch on the first stitch (the starting chain).
Therefore, the knitting pattern symbols for "cutting the yarn" and "attaching the yarn" are located next to the slip knitting symbol in the second row.
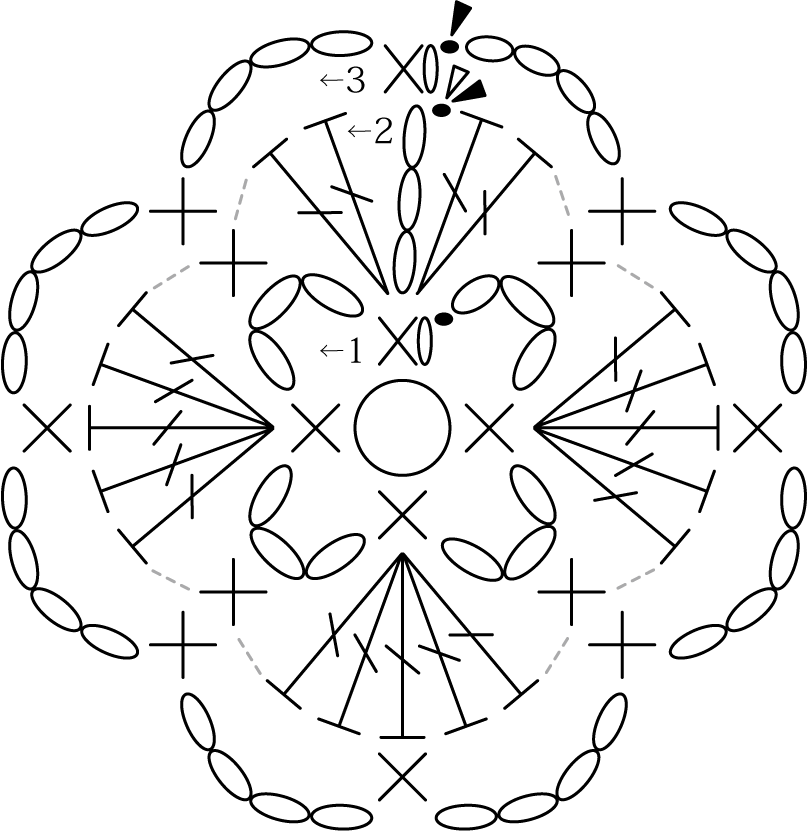
・What do the crochet chart symbols mean?
The following six symbols appear in this knitting pattern:
Chain

Slip Stitch

Single Crochet

Double Crochet

Cutting the thread

Attach the thread

As before, the numbers and arrows indicate the row number and knitting direction.
This time, the piece will be knitted flat, just like how the knitting pattern looks.
It can be difficult to tell from the knitting pattern which is the first row and which is the second row, so we have prepared knitting patterns for each row, with each row indicated by a bold symbol, so that you can see which stitches to knit in each row.
After this, I will explain how to knit each row while looking at the knitting pattern for each row.
• How to make the foundation ring
Start knitting from the center of the motif by casting on a loop.
The circle written in the center of the knitting pattern represents the cast-on stitch.
This time, I tried slowly knitting how to make a loop by watching the video.
・How to knit the first row
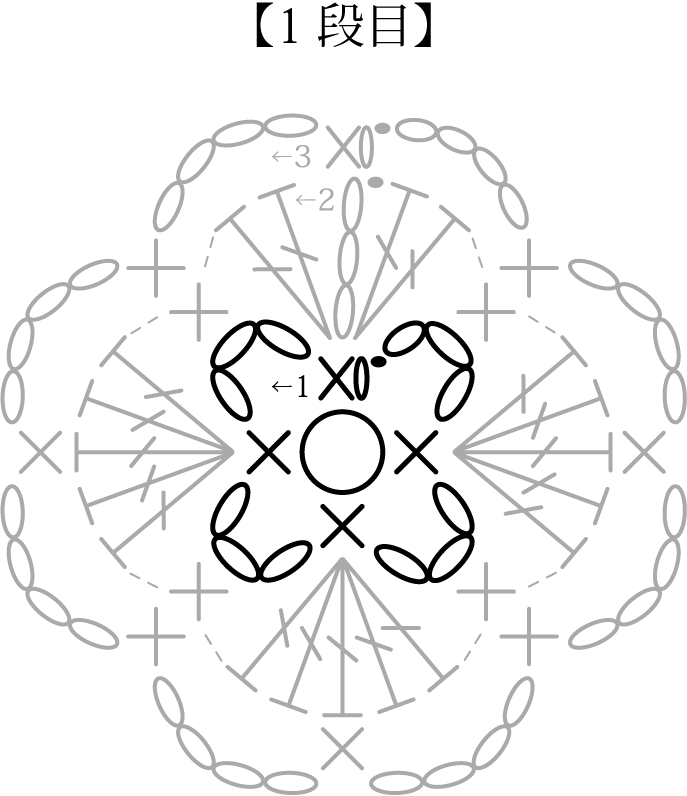
For the first row, cast on a loop and make one chain stitch to start, then insert the needle into the cast on loop and crochet one small stitch, then crochet three chain stitches.
Similarly, crochet 1 stitch → chain 3 stitches → crochet 1 stitch → chain 3 stitches → crochet 1 stitch → chain 3 stitches, then insert the needle into the first crochet stitch and work a slip stitch.
Tighten the excess yarn from when you cast on the loop and the first row is complete.
・How to knit the second row
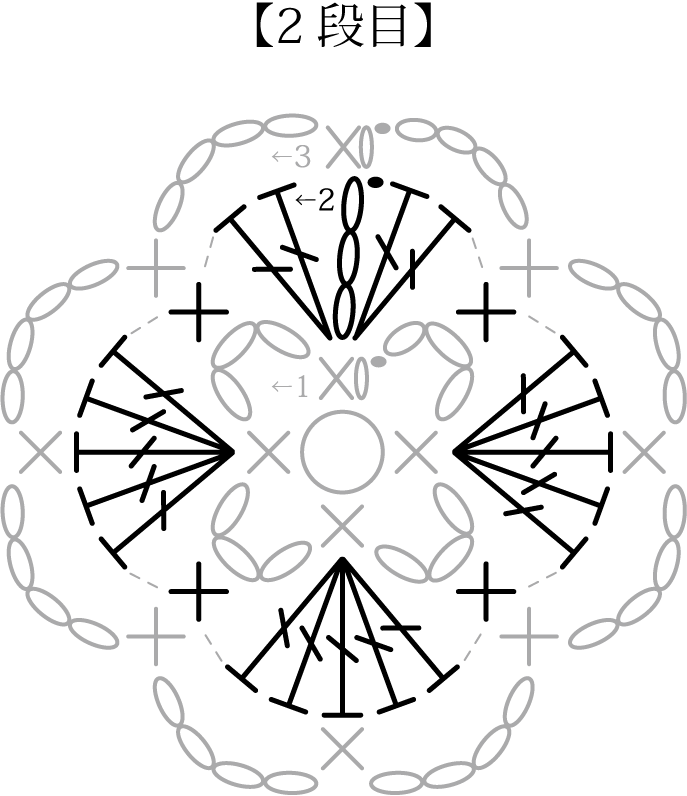
For the second row, start with three chain stitches, insert the needle at the base and crochet two double crochets.
Gather the three chain loops you made in the previous row into a bundle and knit one knit stitch.
Next, insert the needle into the knit stitch from the previous row and knit five double crochets, then gather the chain loop into a bundle and knit one knit stitch.
Similarly, crochet 5 double crochets → 1 double crochet → 5 double crochets → 1 double crochet.
Finally, insert the needle in the same place as the two double crochets you crochet after the starting chain and crochet two double crochets.
Insert the needle into the starting chain, switch to a different yarn, and knit through the thread to complete the second row.
・How to knit the third row
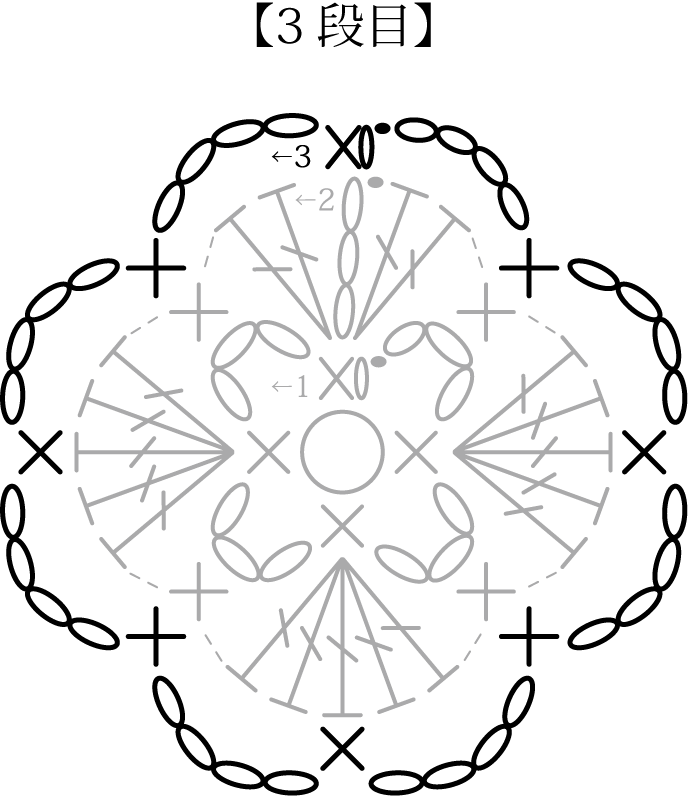
Knit the third row with a different yarn.
Start with one chain stitch, then crochet one small stitch, then crochet four chain stitches.
Insert the needle into the knit stitch from the previous row and knit one knit stitch, then knit four chain stitches.
Next, insert the needle into the middle stitch of the 5 double crochets in the previous row (3rd double crochet) and crochet one quarter crochet.
Repeat this process until you have knit four chain stitches, then insert the needle into the first knit stitch and knit a slip stitch.
This is how to knit the first motif.
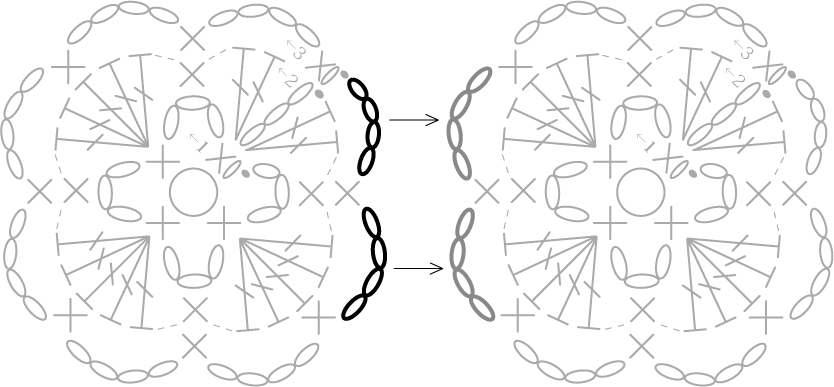
- How to knit the third row of motifs from the second sheet onwards
From the second motif, when knitting the third row, you will proceed by knitting together another completed motif along the way.
As shown in the knitting pattern below, when knitting the last two chains in the third row, connect them to another motif.
The video explains how to connect the devices more clearly, so please refer to the video explanation.
Now let's actually get crocheting!
Crochet Video Tutorial
This video explains the steps to complete a motif-joined bookmark, from casting on to joining the motifs. This video has subtitles but no audio.
Some steps explained in the beginner's course videos from 1 to 5 may not be explained in full, so please be sure to check out the other videos as well.
This explanatory video is about 13 minutes long.
You can check the video only for the parts that are difficult to understand.
For the second row, be careful where you place the stitches!
For the second row, insert the needle into the knit stitch of the previous row and crochet a double crochet. Be careful not to insert the needle in the wrong position.
Also, when you gather the chains from the previous row into a bundle and knit a knit stitch, be careful where you insert the needle.
Don't forget to connect the motifs from the second piece onwards in the third row!
For motifs from the second piece onwards, knit the motifs together in the second half of the third row.
If you forget to connect a motif, it only takes a small amount of time to untie it, so just go back to the knitting point and connect it to another motif.
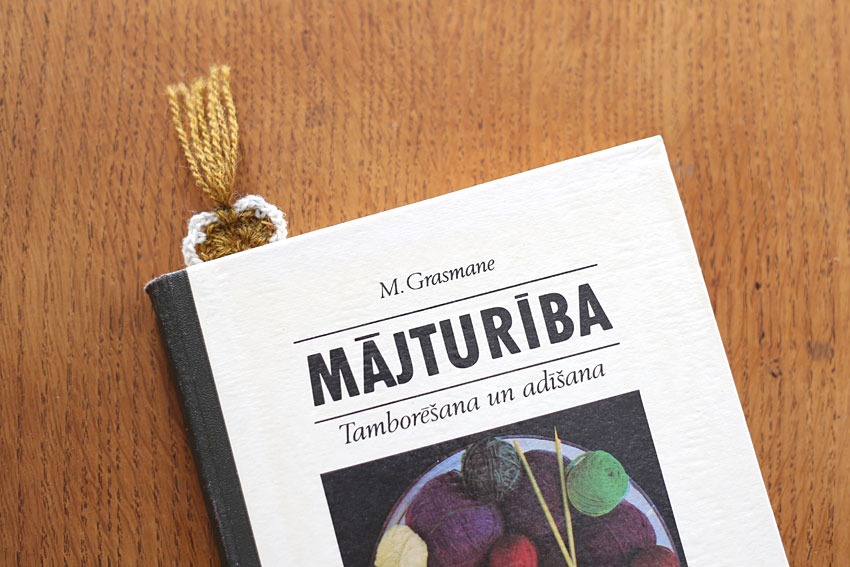
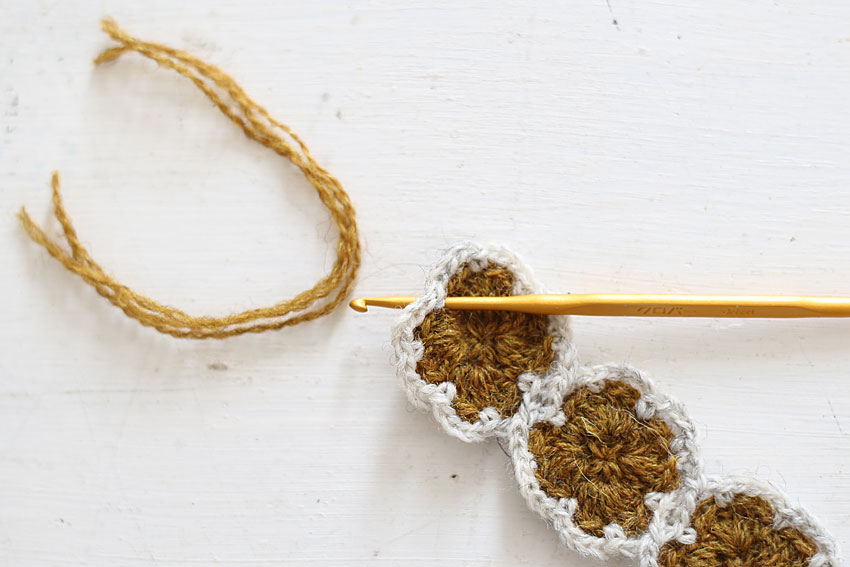
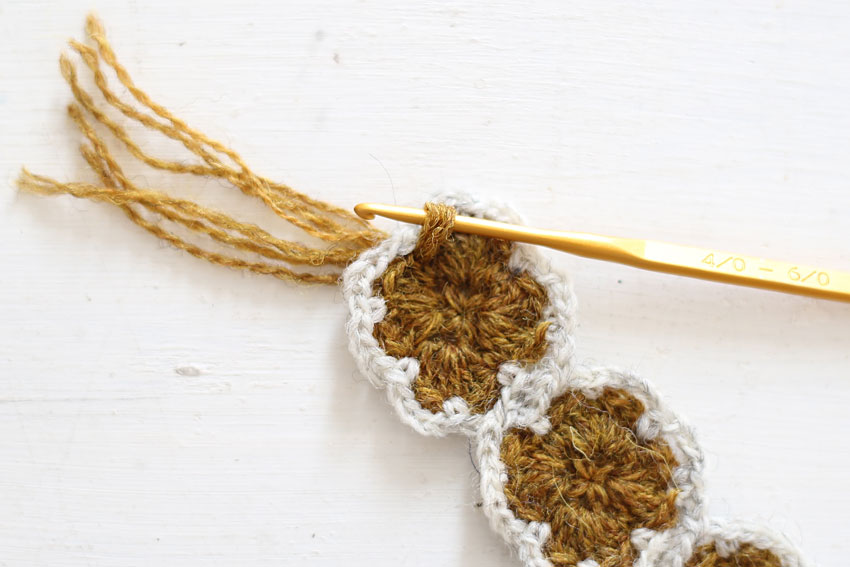
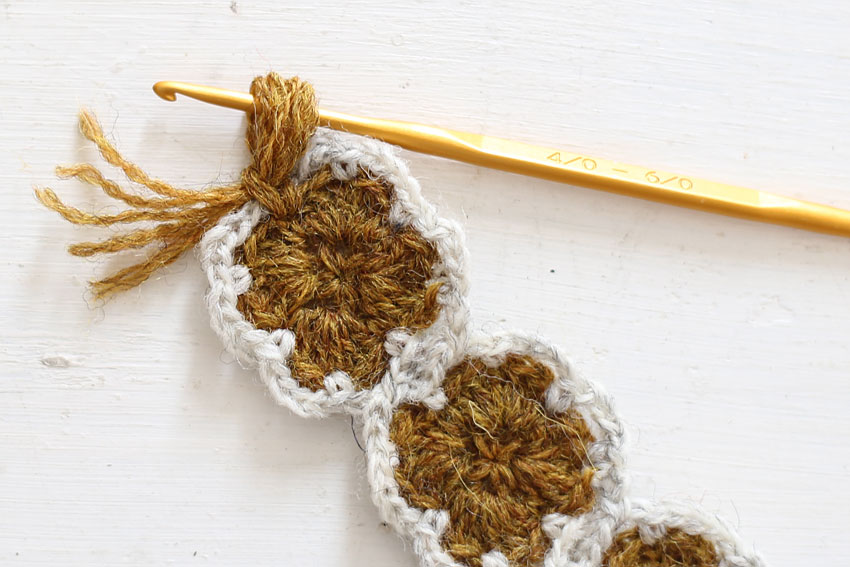
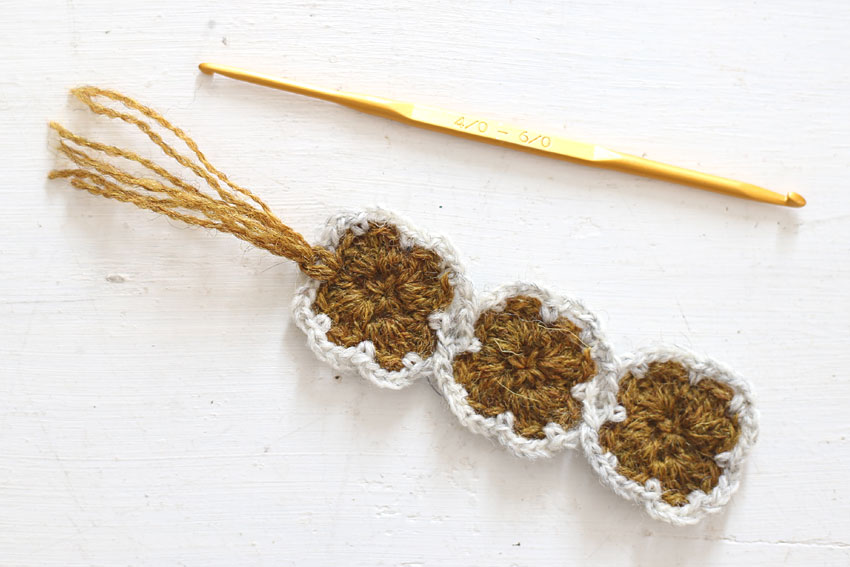
This is how you attach the bookmark tassel!
Once the three motifs are connected and the main body is complete, the threads are all processed.
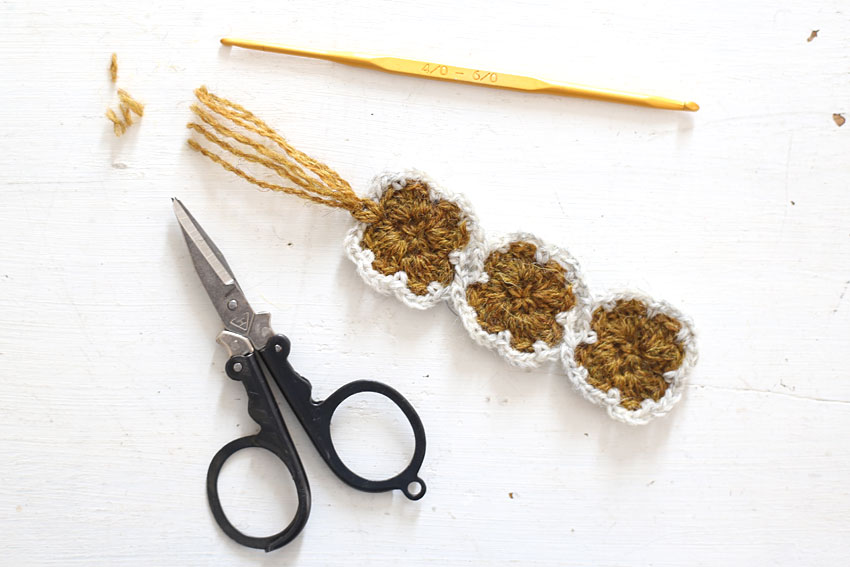
After finishing the thread, a tassel is attached to the top of the bookmark.
Here we will explain how to attach a tassel using three threads. You can adjust the number of threads to your liking.
Simple arrangements that can be made by connecting motifs
How to arrange it into a bracelet?
A. Connect the motifs until you reach a length that fits your arm!
The sample bracelet is made by connecting five motifs.
Even if the number of motifs increases, the way they are connected remains the same.
I made it into a buttoned bracelet, so I attached a button to one end of the motif and a button loop to the other end.
The button loop is attached by knitting 7 chain stitches and then knitting a slip stitch at the base.
When knitting the third row of the motif for which you want to add a loop, knit a loop on the opposite side of where the motif is connected, or if you forget to add a loop and finish the piece, attach new yarn and knit a chain loop.
Can I stitch motifs together to create different shapes?
A. Depending on how you connect them, you can create different shapes!
To make the bookmark, I connected only one side of the motifs so that three of them were lined up vertically, but if you increase the number of sides where the motifs are connected to two (whether you connect one side or two sides depends on the position of the motif), you can also make it into a square, a large rectangle, or even a triangle.
You can also string together a bunch of them to knit a basket cover cloth, shawl, blanket, etc.
