Index
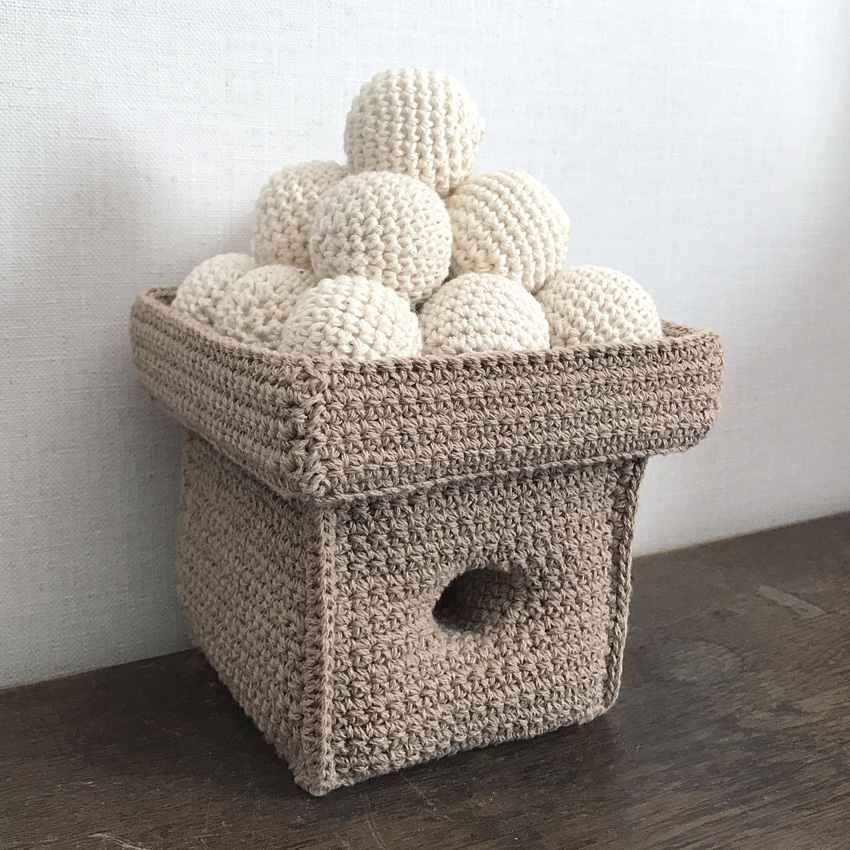
This is a crocheted piece.
When it comes to autumn events, the first thing that comes to mind is the Mid-Autumn Festival and moon viewing.
Hoping that this custom would remain in the back of children's minds, I decided to make some crocheted Tsukimi Dango.
I'd like to prepare some real edible dumplings and enjoy the full moon.
As for the work, I just wanted to create something, so I think the instructions on how to make it might be difficult to understand.
However, if you are familiar with crocheting, please use this as a reference for ideas.
We also have knitting patterns available.
Yarn and Crochet Hook Size
Medium-weight cotton thread (white, beige)
3.0 mm (JP 5/0)
Polyester wadding
cardboard
Finished Size
Dango...diameter 4cm
Three sides...15cm x 15cm (maximum)
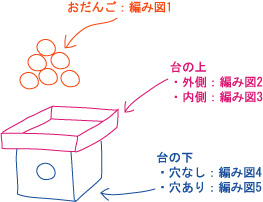
Crochet Pattern
Bun knitting pattern
Knitting pattern for the top (outer) side of the three sides
Knitting pattern for the top (inside) of the three sides
Knitting pattern for bottom of three sides (no holes)
Knitting pattern for bottom three sides (with holes)
Instructions
[Dumplings]
① Start by making a loop cast-on and then knit 6 round stitches.
② Add cotton along the way and stack up to 12 rowsBun knitting patternKnit as shown. Thread the yarn through the stitches in the last row and tighten. I made 15 dango in total.
[Top and outer sides of three sides]
①Here too, make 24 stitches by casting on a loop.
②Knitting pattern for the top (outer) side of the three sidesAs shown above, work up to the 6th row using double crochets and chain stitches, increasing the number of stitches by 16 each row.
③ Work a quarter crochet in the seventh row, and at the chains on the four corners, scoop the yarn into a bundle and work four quarter crochets into it. Work a quarter crochet around the entire circle and then cut the yarn.
④ Attach thread to each of the four sides.27 eyesI pick it up, but only in the first row,The one on the other sideJust scoop up the strands and knit them.
⑤ Knit the knit stitches in rows 2 to 7, and cut the yarn when you finish row 7.
⑥Sew the four corners together with an overlock stitch.
[Top and inner sides]
① Make 20 loop stitches.
②Knitting pattern for the top (inside) of the three sidesAs shown above, knit in double stitches up to the 6th row, increasing each row as you go.
③ Work a quarter crochet in the 7th row, and work two quarter crochets at the four corners. Once you have completed one full circle, cut the yarn.
④ Attach thread to each of the four sides.26 eyesI pick it up, but only in the first row,The one in the foregroundJust scoop it up and knit it.
⑤ Knit the knit stitches in rows 2 to 6, and cut the yarn when you finish row 6.
*The outside and inside of the base will be fastened with a hem, and cardboard will be placed in between, so adjust the number of layers so that the height is just right when the cardboard is inserted.
⑥Sew the four corners together with an overlock stitch.
⑦Make the cardboard to fit the shape that will be sandwiched between the outside and inside of the base.
⑧ Place a piece of cardboard between the outside and inside edges and sew them together using a knit stitch. The number of stitches on the outside and inside edges will be different, so adjust accordingly.
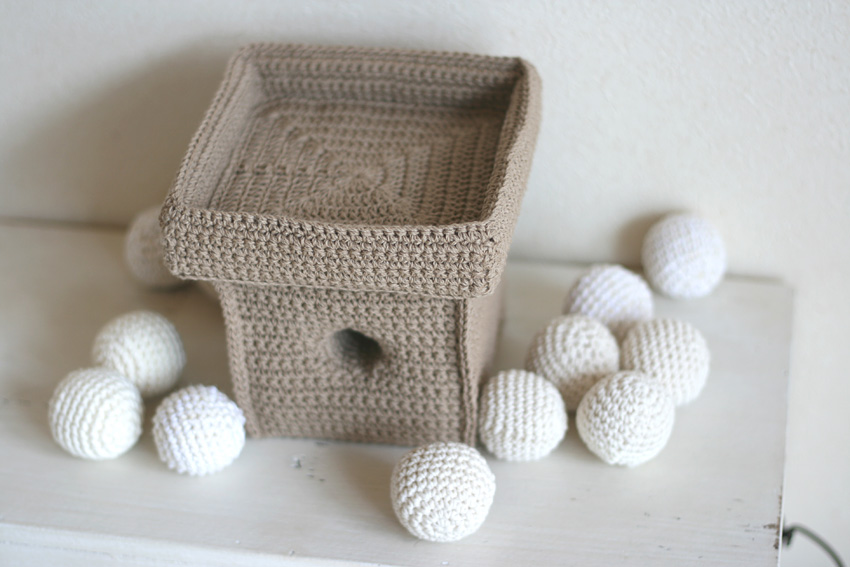
[Bottom on three sides, no holes]
①Cast on the chain and make 19 stitches.
②Knitting pattern for bottom of three sides (no holes)Knit the knit stitches until you reach 21 rows without increasing or decreasing the number of stitches, then cut the yarn. Make three of these.
*When I make it, it becomes an exact square with these number of stitches and rows, but please look at the gauge and find the number of rows that will make it a square.
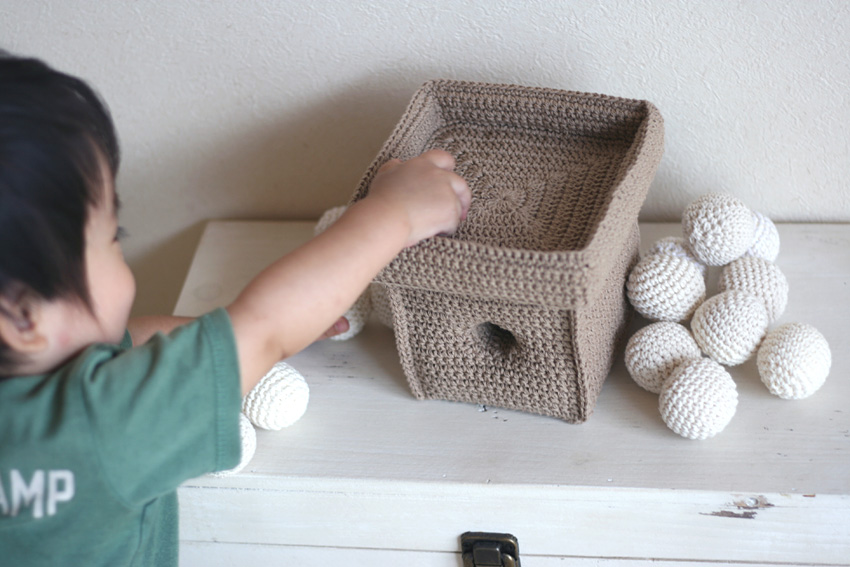
[Three sides with holes]
①Cast on the chain and make 19 stitches.
②Knitting pattern for bottom three sides (with holes)As shown, knit the knit stitches up to the 8th row without increasing or decreasing the number of stitches, and from the 9th row onwards knit so that a round hole is created. Make two of these.
③Go all the way around the hole and pick up 17 stitches using a knit stitch from the back of the knitted fabric (the end of the thread from the cast-on stitch is on the right).
Continue knitting 10 rows of knit stitches.
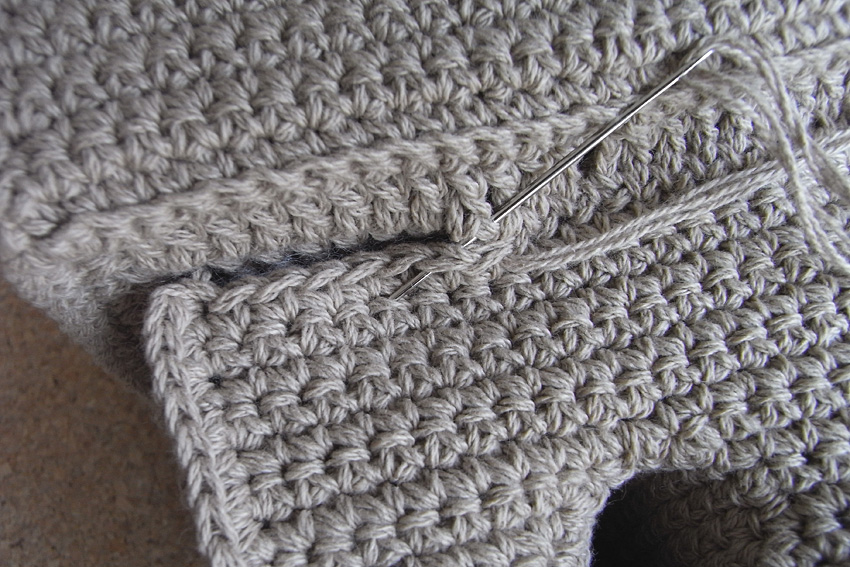
Knit both pieces of fabric with holes in this way, and then secure the tubes together with an overlock (see illustration on the right).
④ Use a knit stitch to stitch together the left and right sides of ③ with knitted fabric without holes, and do the same to the bottom with knitted fabric without holes.
⑤ Make the cardboard to put inside.
⑥ Put cardboard and cotton inside the knitted fabric, shape it, and secure it on the table with a roll stitch.
Your work
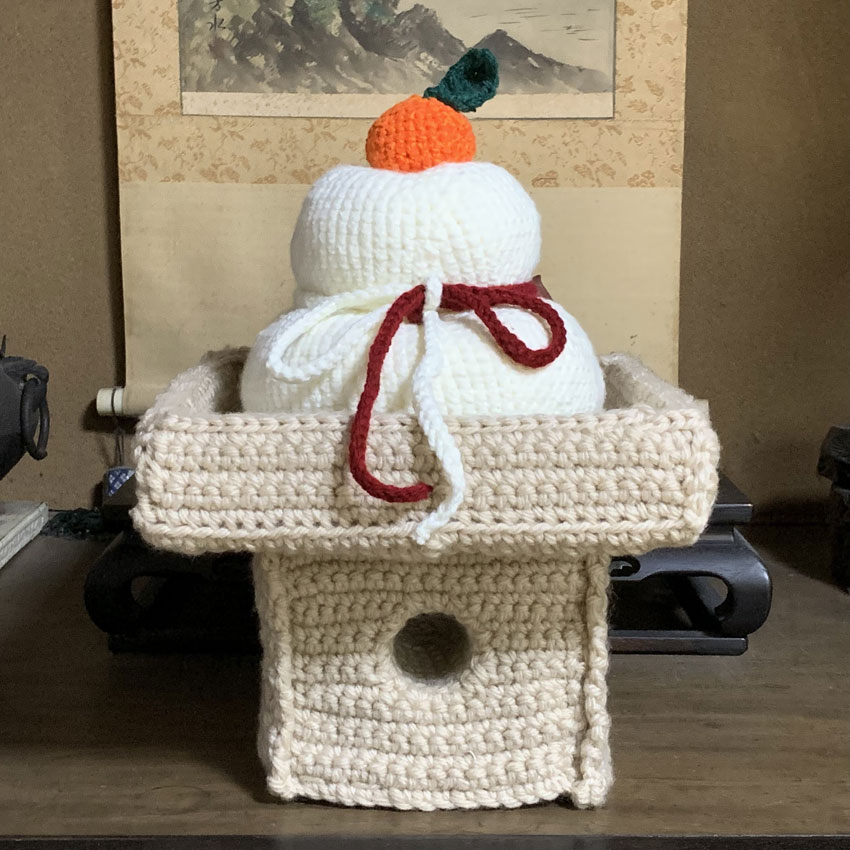
Kumako's "Tsukimi Dango Sanpo"
I knitted this because I wanted to match the three sides of a kagami mochi I had knitted previously.
Because the kagami mochi was quite large, I had to change the size of the top and bottom, so it's not quite balanced, but I managed to get it to look like this and I'm very happy with it.
There are some parts where the recipe doesn't quite follow the recipe exactly, but please forgive me.