Index
This is a crocheted piece.
Hooked Zpagetti is something that many crochet enthusiasts have probably used before.
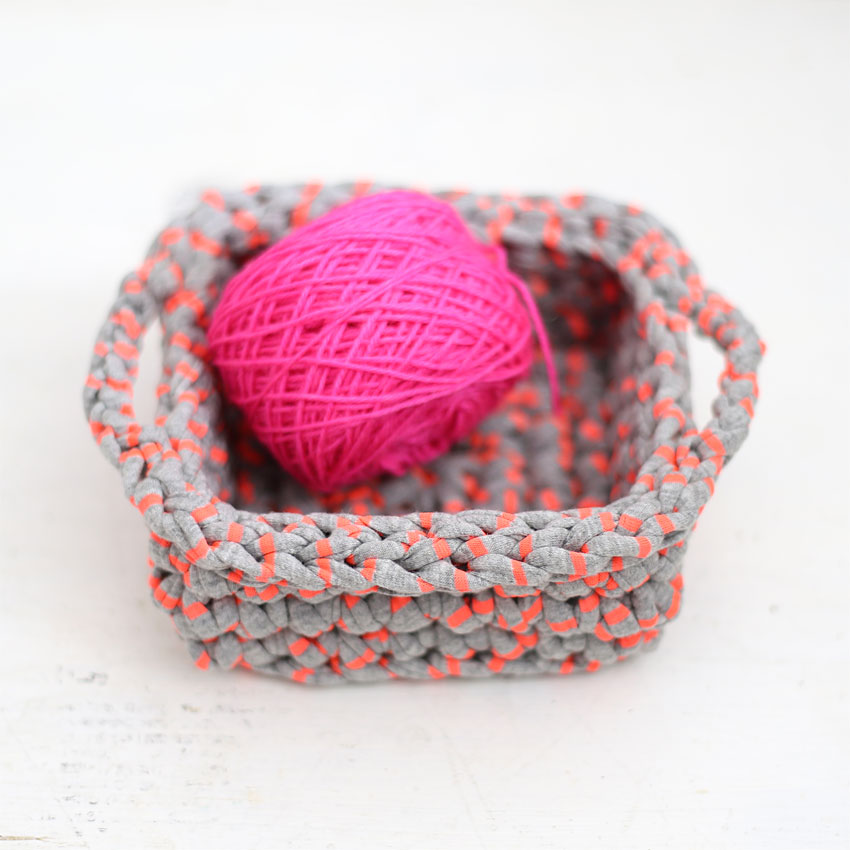
The other day, I stopped by a craft store and fell in love at first sight with some Zpagetti, a soft shade of fluorescent pink, so I bought a small, cute roll to take home.
One of the fun things about visiting a craft store is the opportunity to make such discoveries.
It had been a while since I last knitted Zpagetti, so I wasn't sure what to knit, but this time I decided to knit a square basket.
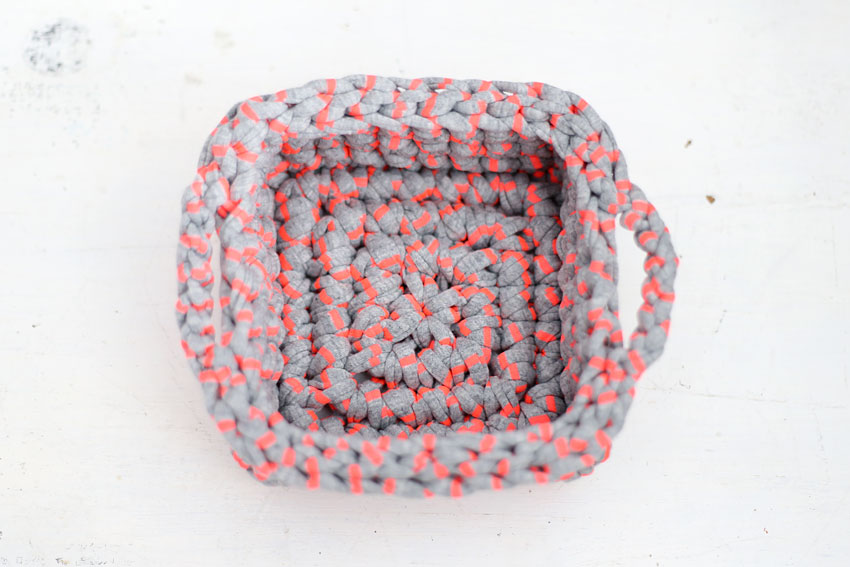
Although it has a simple design, the corners are sharp and the knitted surface is exposed in visible areas, giving it a subtle and beautiful look.
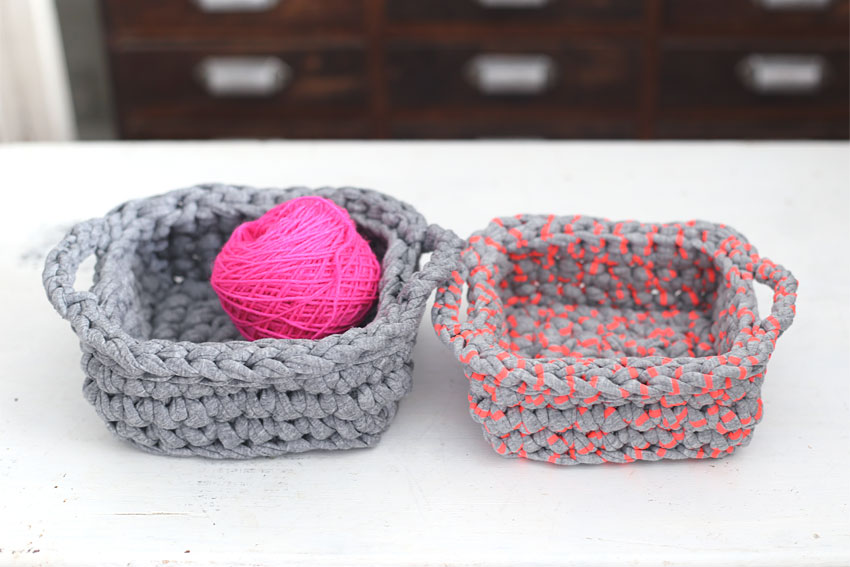
The basket I originally had, which I woven using solid gray Zpagetti yarn, was a little thicker than the fluorescent pink one, so it ended up being a little larger.
It's also heavy, so you could knit the sides higher and use it like a yarn bowl.
The fluorescent pink one is sized so that it can be used as a small item holder in your room or placed in your entrance hall as a place to store your keys.
The square at the bottom can be knitted in the same pattern every row, so you can knit it larger if you like.
Feel free to knit it to your desired size depending on how much yarn you have.
Yarn and Crochet Hook Size
DMC Hoooked Zpagetti...Fluorescent Pink: 161g, Gray: 185g
8.0 mm crochet hook
Finished Size
Fluorescent pink: 14.5cm long x 17.5cm wide
Gray: 16cm long x 20cm wide
Crochet Pattern
Square Basket Knitting Pattern (PDF)
Instructions
Please refer to the crochet pattern along with these instructions.
① Start knitting by casting on a loop, then increase the number of stitches at the four corners of each row until you reach the fourth row.
②For the 5th row, turn the knitting over and start knitting, picking up just one stitch on the other side of the previous row and knitting it around in a single stitch.
For the corner chain, pick up only one strand on the other side and weave it.
③For rows 6 and 7, work in a circular stitch without increasing or decreasing the number of stitches.
④ After you finish knitting the seventh row, continue with a slip stitch to create an edge. At this time, pick up only one stitch on the front side of the previous row and make a slip stitch.
In two places along the way, knit 7 chain stitches to attach handles.
Once you have finished knitting the edges, cut the yarn and finish it off.
