This website offers crochet tutorials and free patterns.

エコアンダリヤ タッセル・ガーランドの作り方

Free Crochet Patterns: Lifestyle & Decor

Free Tutorial: Eco-Raffia Tassel Garland

October 23, 2016

*This site uses affiliate advertising and advertising distribution services (Google AdSense).

Notice: This page is automatically translated. We are working on manual refinement.

It's not crocheted, but here's what I made:

This is not a crochet recipe...
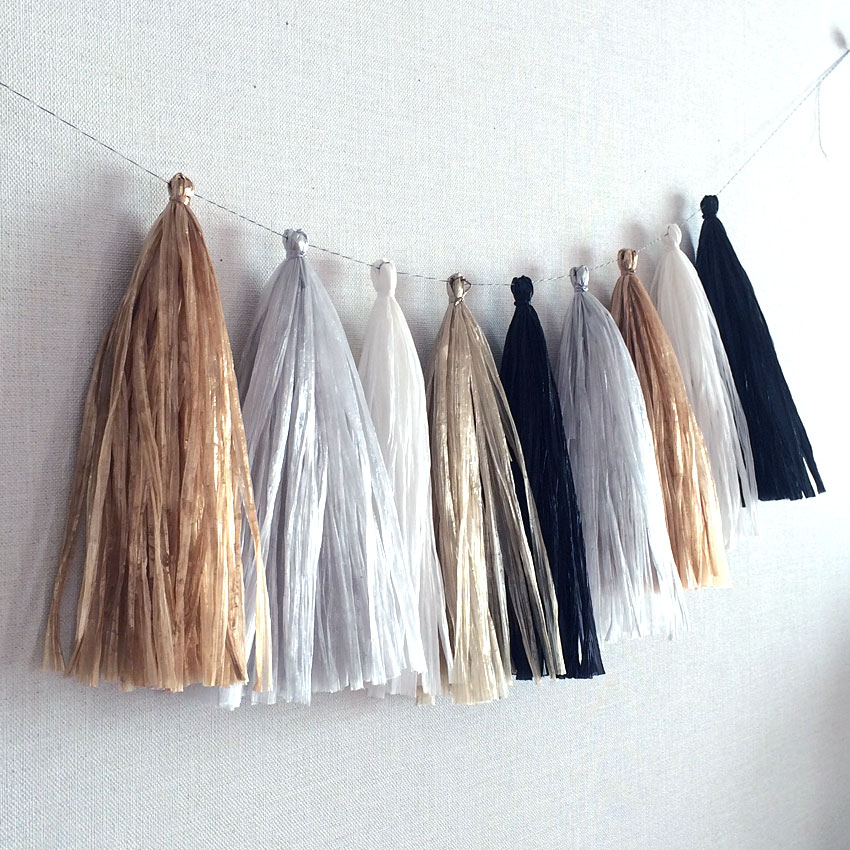
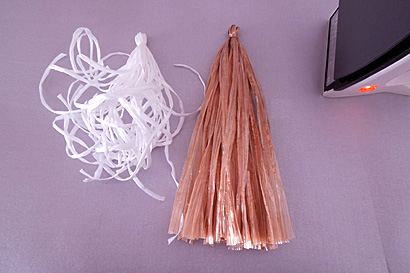
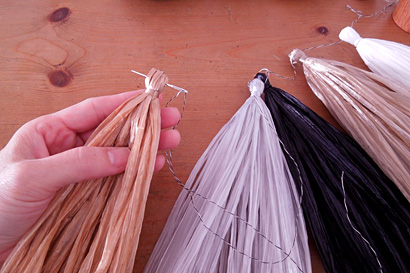
I made a tassel garland, which is often seen at parties and decorations overseas!

I was so happy to discover a different way to use Eco Andaria, which is very popular for knitting, that I decided to make a recipe out of it.
There are many natural raffia-like threads available, but I think the great thing about Eco Andaria is that it is a natural metallic thread.

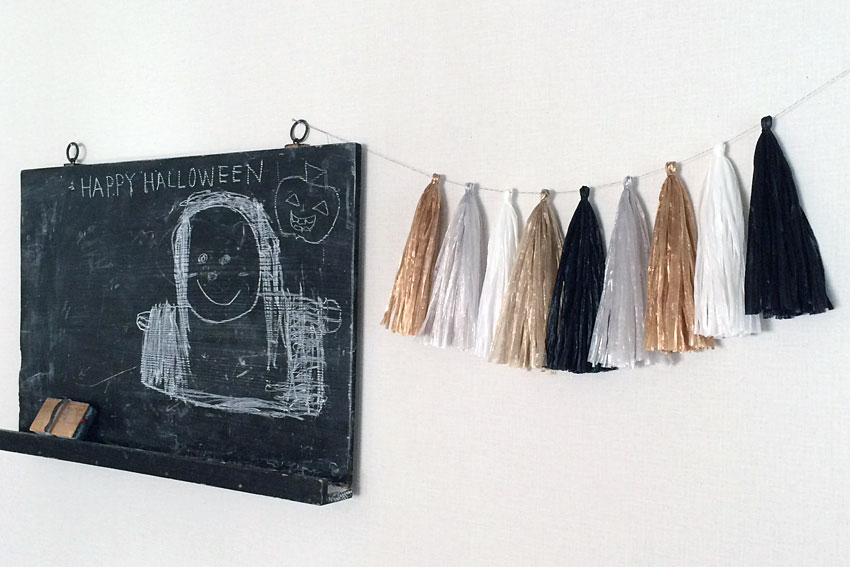
This time I added black to get into the Halloween mood.
Eco Andaria comes in a wide variety of colors, so choose the color that best suits your needs and the atmosphere you desire.

エコアンダリヤで 大人カラーのフラックガーランド

Yarn used

Hamanaka Eco Andaria - several colors to your liking (one ball makes about 9-10 tassels)
Thin thread (for threading the tassels) as needed

tool

A4 notebook, scissors, staples, trash can,
Steam iron

Instructions

①A4ノートに糸を巻き、カットしておく糸を2本用意します
1. Wrap the Eco Andaria (hereafter referred to as thread) around the side of an A4 notebook and cut it to a length that is slightly longer than the full wrap, as shown in the image.
Make two of these.
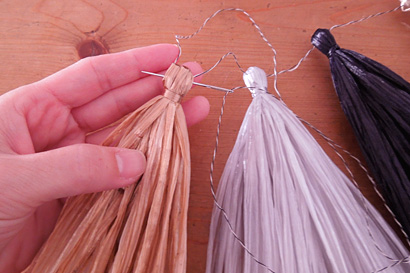
One is to tie the tassel together on top of the head, and the other is to be used as a string to tie to form the head of the tassel (see below).

②糸を1本挟んで、A4ノートに糸を巻きます
② To make the tassel bundle, wrap the thread around an A4 notebook (landscape), sandwiching one of the threads cut in ① (see image).

③糸の端をノートにはさみます
③At this time, if you pinch the end of the thread to the notebook, it will be easier to wind the thread.

④糸の巻きはじめをノートに挟みます
④ When you first start winding the thread to make a bundle, if you clip it into the notebook like this, it will be easier to work without it getting twisted up.

⑤糸を20回巻きます
If you do not follow the instructions in ⑤③④, the ends of the thread will curl up like this.
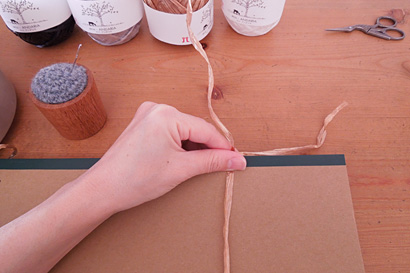
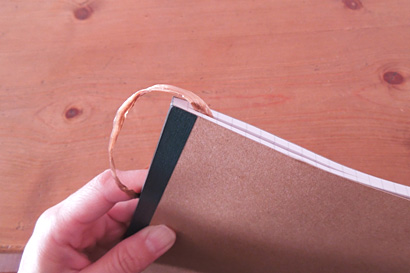
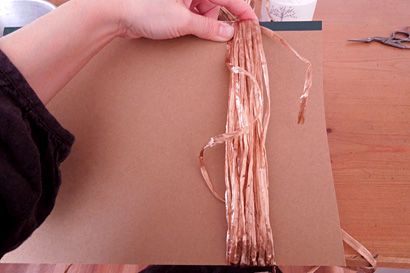
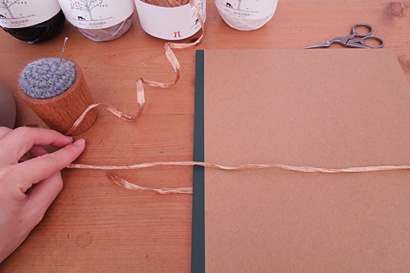
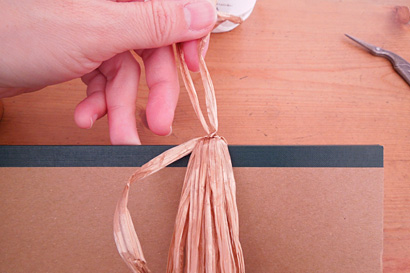
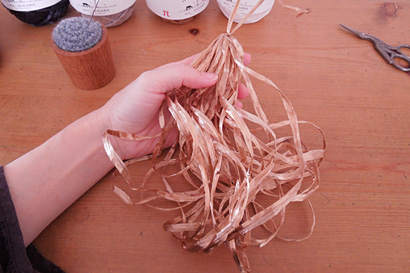
Wrap the thread around the notebook 20 times.

⑥タッセルの頭の上をしっかりと結びます
⑥ Use thread ②, which is sandwiched between the wrapped thread, to tie the top of the tassel tightly.
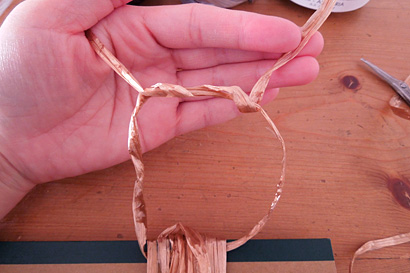
This thread will be mixed into the bundle later, so tie a knot in the center of the thread.

With a regular knot, the thread you tie the first time tends to loosen, so if you wrap the thread twice when tying the first knot, you can tie it tightly and it won't loosen, making it easier to tie the second knot.

⑦結びました
⑦It will look like this.

⑧ノートの台紙から糸をはずしました
⑧When you remove the thread from the notebook backing, it will look like this.

⑨タッセルの頭を作るように結びます
⑨ Bring the thread tied in ⑥ down and mix it with the tassel thread bundle, and tie it in the position shown in the image with the other thread cut in ① to form the head of the tassel.

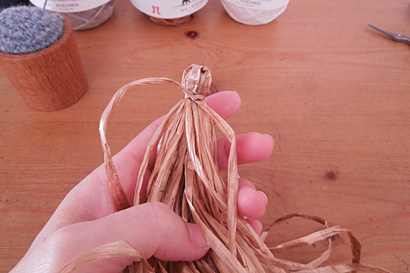
In this case too, it is easier to tie it like ⑥.

⑩糸端をとじ針に通し、結び目にくぐらせます
⑩Thread the end of the thread tied in ⑨ through the needle and pass it under the knotted thread as shown in the image to mix it into the bundle of threads.

⑪糸束のわを切ります
⑪Cut the loop in the thread bundle below the tassel.

⑫浮かせながらスチームアイロンをかけます
⑫ Heat the steam iron and heat it while holding the tassel above the fabric to avoid the iron sticking to it.

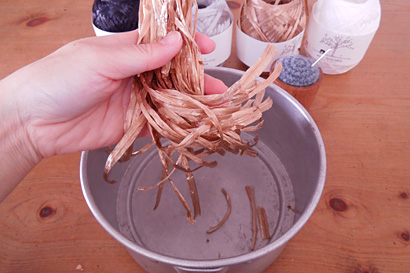
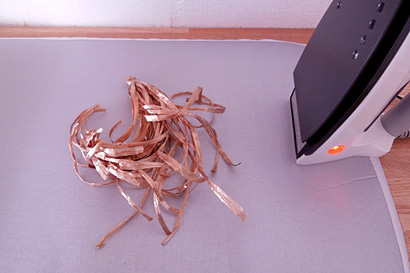
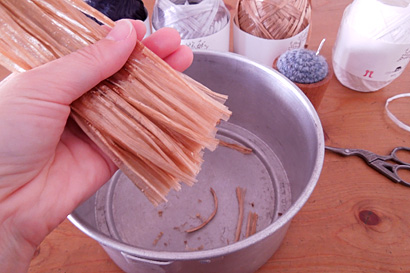
At first, the bottom of the tassel will be curled up, so it's easier to gather it together and hold it down while applying steam.

Please be careful not to get burned by the iron or steam, and wear gloves when handling.

⑬スチームアイロンできれいになりました
⑬It takes time, but if you use a steam iron carefully, it will become this straight.

⑭タッセルのすそを切りそろえます
⑭ Trim the bottom of the tassel to the same length.

⑮細い糸でタッセル同士をつないでいきます
⑮Thread the needle through the thin thread that will connect the tassels together.
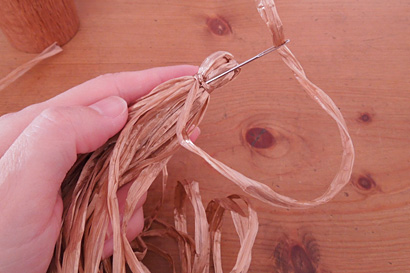
Insert the needle around the thread tied at the top of the tassel and thread the thin thread through.

⑯もう一度同じところに針を入れます
⑯ Insert the needle into the same place again and thread it through.

⑰5cmくらい間隔をあけて糸にタッセルを通します
⑰Thread the tassels through, leaving about 5cm between each.

Share
  • The author of this article

Ronique

I am a crochet artist with years of experience in design, having authored 5 books and contributed to over 70 co-authored publications. In addition to my social media presence, I currently share my patterns on Etsy, Ravelry, and my own shop. My mission is to explore and create designs that are both joyful to crochet and a pleasure to use in daily life.▶Profile and Achievements

-Free Crochet Patterns: Lifestyle & Decor
-, ,