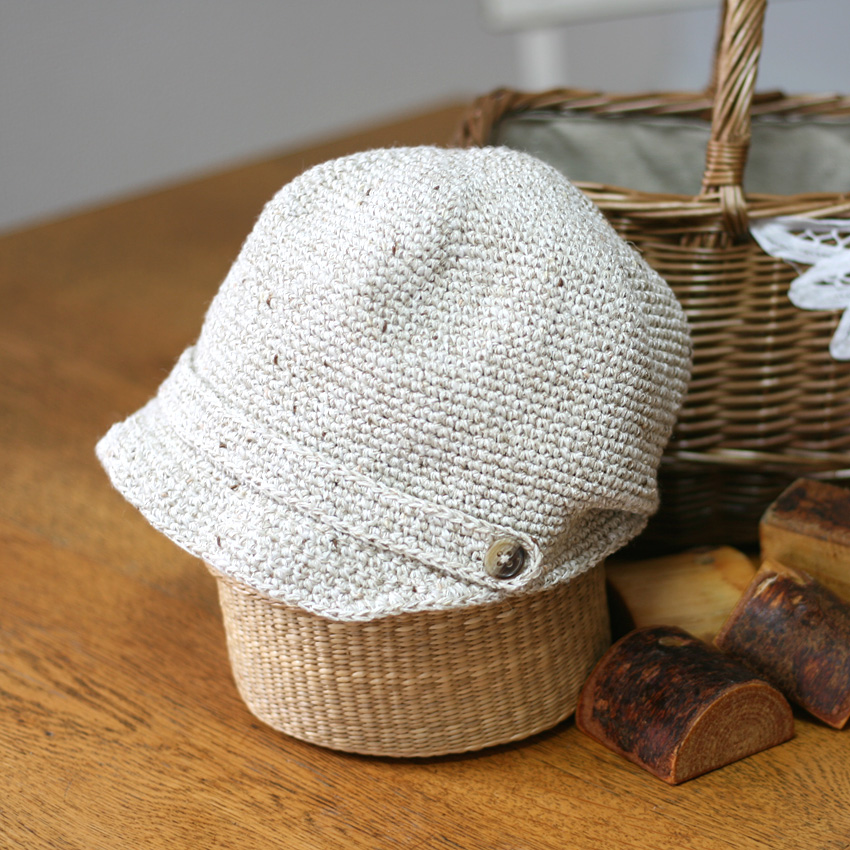
This is a crocheted piece.
I love a cloth cap that has a very orthodox design and is very easy to use, and it's very convenient when I want to style my hair in a more refined way.
I wanted to make a casquette like that, so I decided to try crocheting it.
It's difficult to achieve the same lightness as fabric, but I tried using a summery blended yarn.
The back of the hat is folded like a gather, so you will need to knit quite a few rows on the sides.
So it's difficult to re-knit something if the size doesn't fit.
The instructions also mention the size, so please refer to them and check the size early on.
Yarn and Crochet Hook Size
Medium-thick thread
(Please refer to the total weight below for the amount of use)
Two buttons (14mm)
*Technoroth (shape-retaining agent) and heat-shrinkable tubing
(Using this will result in a cleaner brim.)
3.5 mm (JP 6/0)
Finished Size
Head circumference (bottom of hat) 58cm
Total weight: 110g
Crochet Pattern
Instructions
① Start knitting the hat from the top. Knit all the fabric using knit stitches.
Make 6 stitches to create a loop, then increase the number of stitches from the second row onwards as shown in the table below.
| part | Number of steps | Increasing or decreasing the number of stitches |
| side | 20 to 44 | ±0 |
| top | 8 to 19 | +6 |
| 7 | ±0 | |
| 2 to 6 | +6 | |
| 1 | 6 |
The top is made closer to a hexagon by increasing the number of stitches in certain places on each row.
For example, for the third row, knit one stitch and increase one stitch, repeating this process six times to complete one round.
For the fourth row, repeat "knit two stitches and increase one" six times.
For the fifth row, repeat "knit three stitches and increase one" six times.
For the 6th row, repeat "knit 4 stitches and increase 1" 6 times.
If you knit according to this rule, the number of stitches will increase in the same place with each row, resulting in a hexagonal-like knitted fabric.
The size of this hat, when finished, is such that it fits snugly, covering almost all of your ears, but is also a little loose.
My head circumference (measured from just above the ears to the forehead) is about 54cm. When I finished knitting the top of this hat (up to the 19th row), the diameter was about 18cm.
② After increasing the number of stitches at the top, continue knitting without increasing or decreasing the number of stitches until you find the right depth when you put it on.
While you are knitting, try putting it on to check that there is enough room around your head.
As a way to adjust the size, you can change the size of the crochet hook, change the thickness of the thread, etc.
If you want to increase the size, it is a good idea to continue increasing the stitches in the same way for several rows after the top 8th row.
If you want to make it smaller, try reducing the number of rows you increase at the top.
After you finish knitting this hat, you will fold the back of the knitted fabric over and sew it down, so once you have knitted up to the row that you think is mostly finished, before cutting the yarn, try folding the back over and holding it in place, then put it on to check the size.
If it doesn't seem deep enough, adjust the number of rows you knit by adding a few more.

③ Once you have finished knitting the base, next you will knit the brim.Crochet PatternPlace the yarn in the position shown and begin knitting.
Knit 7 rows, decreasing at both ends and increasing in the middle in each row.
Once you have knitted the brim, attach the yarn to the center of the back of the hat (see knitting pattern) and knit the edge all around using a knit stitch.
If you want the brim to be a little more defined or to give it a more defined shape, you can wrap the techno-rot around the brim in the final row or when knitting the hem (at the brim).
This is my second piece, and when I was knitting the edge at the end, I tried wrapping Technorot (a shape-retaining agent) around the base of the brim.
I recommend adding Technolot as the finish is much better.
④ Knit the decorative string that will be attached to the brim. Again, all the knitting is done in knit stitch. Cast on with 70 chain stitches,Crochet PatternKnit like this.
⑤ When viewed from the front, the hat is designed so that one corner of the hexagon faces forward. The hat itself rises almost directly behind.
While checking the balance, sew a decorative string onto the brim and attach your desired buttons to both ends of the decorative string.
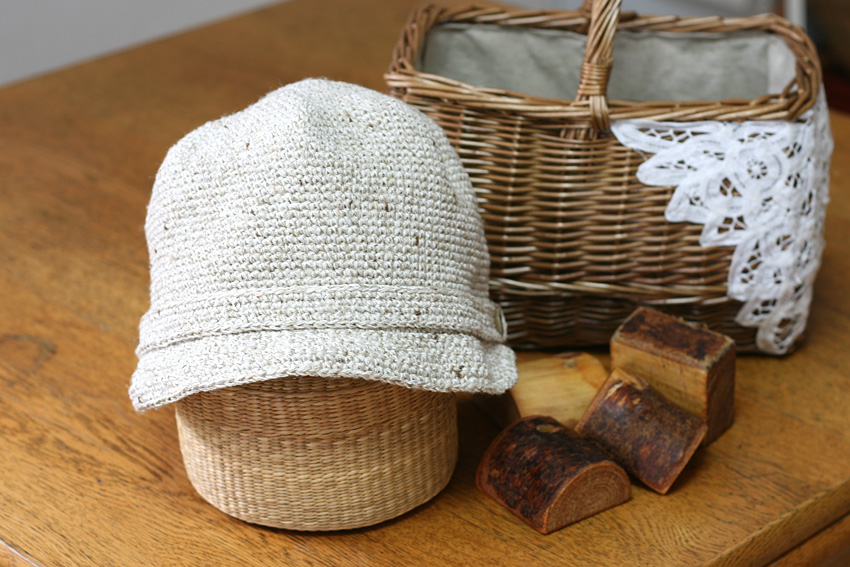
⑥ Using the photo below as a reference, fold the knitted fabric directly behind the hat and sew it in place to complete it.
By the way, I sewed 7.5cm wide and 2.5cm long.

Your work
Barahime's "Fabric Design Casquette"
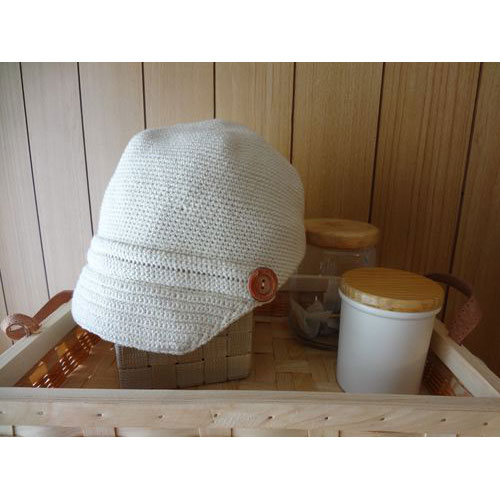
I tried making a newsboy cap ♪
I wanted a new hat for the coming spring and summer, so I knitted this one using off-white cotton yarn.
I really like the design and functionality, and more than anything, I'm happy to be able to knit something that fits my head perfectly *^^*
◆blog "Rose Princess' Handmade Items Exhibition"
http://chebrose.exblog.jp/18067801/
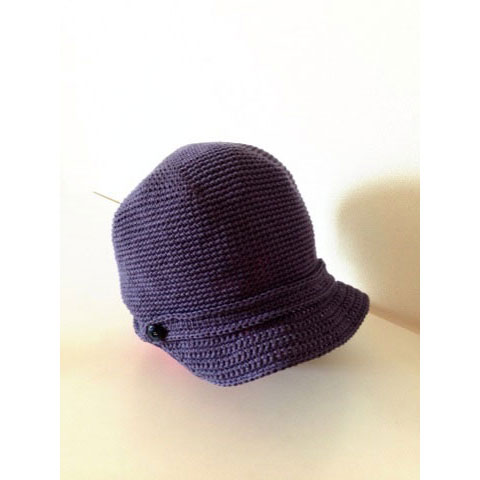
koala's "Fabric Design Casquette"
I've been thinking about this for a while, so I decided to knit it for the upcoming season.
It is a cotton yarn mixed with washi paper.
I love the beautiful design.
I have a big head, so it's hard to find ready-made items that fit, so I'm happy that I can knit something that fits perfectly.
I posted it on my blog.
m.blogs.yahoo.co.jp/nori5697/32679772.html