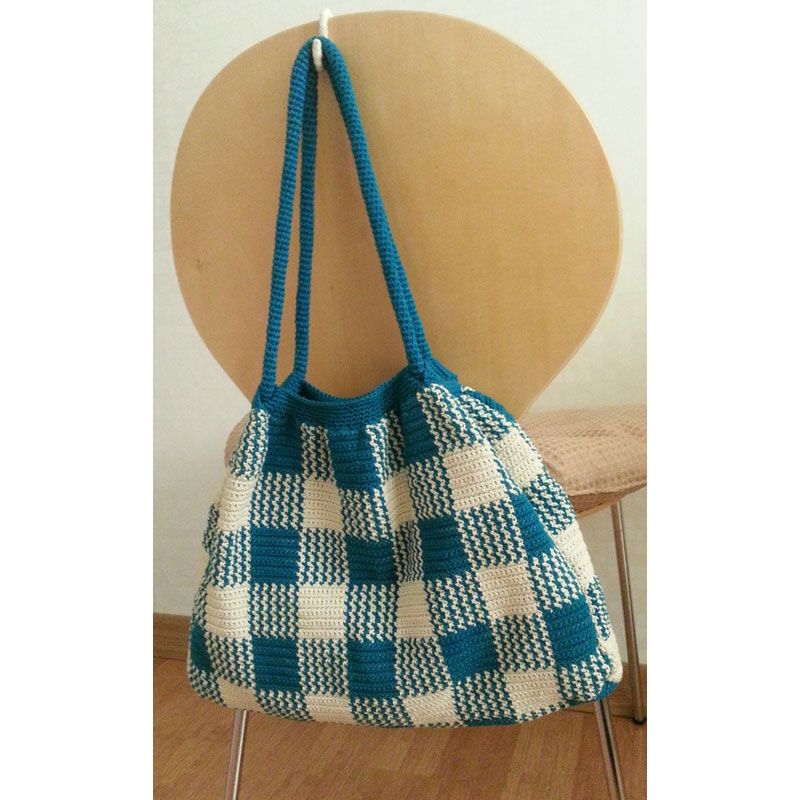
This is a crocheted piece.
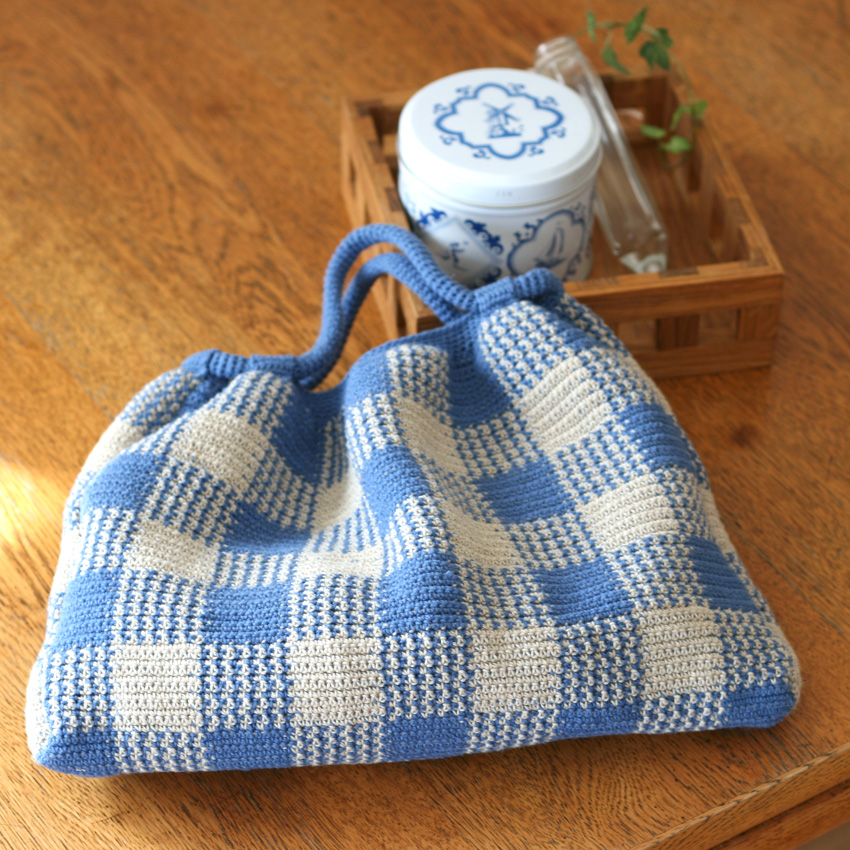
This crocheted bag is made from carefully knitted gingham check fabric with gathered stitches.
All of the knitting was done using knit stitches.
It is made by weaving a single strand of yarn that is not visible on the outside, so it is thick and sturdy.
Before being made into a bag, the knitted fabric is a simple rectangle.
Since it's a gingham check, I gathered the fabric to give it a cute look. There are separately knitted gussets on the left and right sides, which gives it a casually three-dimensional silhouette.
I also tried making the handle a type that I've never made before.
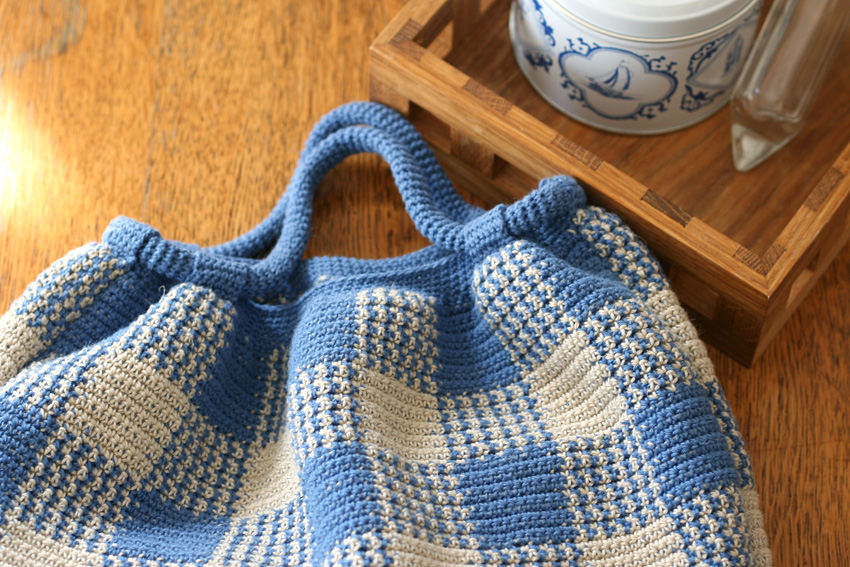
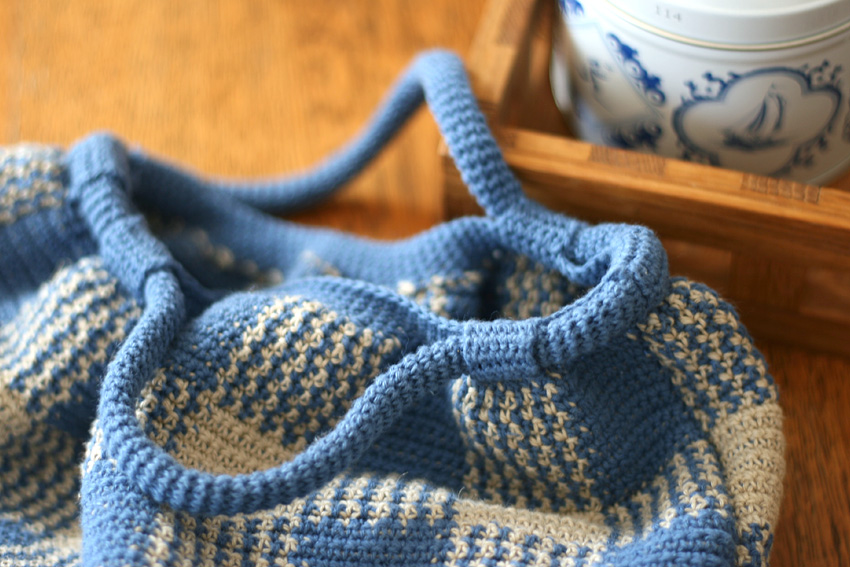
It takes a lot of time to knit the gingham check fabric, so we've taken the time and effort to make the handle, which is made with a long, circular knit stitch.
There are three loops on each side for the handles to pass through. When you pull the handles tightly, the gaps between the loops on the left and right sides shrink, creating a gathered look.
It takes time to knit the fabric, but other than that I don't think there's anything particularly difficult about it.
Yarn and Crochet Hook Size
Medium-fine linen/cotton thread (blue/natural)
40g ball, approx. 155m, 2 of each color
String for the handle core (See step 5)
2.5 mm (JP 4/0)
Threading
Finished Size
Length 24cm, width 24cm (bag opening), 33cm (bottom)
Total weight: 150g
Crochet Pattern
Configuration diagram, knitting pattern (Main unit、gusset、Bag opening and loop)
Instructions
Please check the instructions, as well as the construction diagram and knitting pattern for how to make it.
① The parts that make up the bag are one large piece of knitted fabric that forms the main body, and two pieces of gusset on the left and right (see construction diagram).
Start knitting both the main body and the gusset by casting on a chain.
For the main body, cast on with 99 chain stitches and knit back and forth using a knitted knitting pattern.Body knitting patternand,Gusset knitting patternWhen knitting, wrap the unused colored yarn around the knitting (no yarn will come out on the back of the knitted piece).
This braiding is a painstaking process, and if you make a mistake with the number of stitches, it can be quite a shock to have it come undone (I've done it a few times...), so make sure you check that the number of stitches is correct as you go along.
② Once the main body part and two gussets are completed, the next step is to secure the knitted fabric of the main body and gussets together with a knit stitch.
With the wrong sides facing each other, sew together the knitted fabric. At this point, you can decide which side is the front and which side is the back, but try to make sure that the front and back of the knitted fabric of the main body and the gusset are the same (either odd-numbered rows are the right side or even-numbered rows are the right side).
How to join them:Configuration diagramPlease check.
③The rough shape of the bag is now complete.
Next, knit the opening of the bag.Bag opening and loop knitting pattern As shown, attach the yarn at the point where you joined the main body and gusset with a small knit stitch, and knit once around the opening of the bag, decreasing by one stitch every two stitches and one stitch every three stitches.
This will create gathers at the opening of the bag.
④ After you have completed six rows of knit stitches for the opening of the bag, knit the loop for the string.
Attach the yarn to six places in total, three on each side, to create the string loops.
Bag opening and loop knitting patternPlease refer to the position shown in the image when knitting.
Knit the loop up to row 6 using a round knit stitch, then cut the yarn, leaving the end long. Using this yarn, sew the final loop row (row 6) to around the first row of the bag opening (front).
⑤ Start knitting the bag handle by casting on a chain.
Once you have knitted 8 chain stitches, pull it through to the first stitch to make a loop.
In the first row, crochet the chain on the other side of the cast-on chain and the back of the crest, then from the second row onwards, crochet in a circular motion without crocheting a chain to start up.
I knitted until I reached about 56cm without counting the rows.
Please adjust the length to your liking.
Once you have knitted the handle to the desired length, use a needle threader to insert the core string into the hollow part of the knitted handle.
I threaded two strands of thread cord made from two strands of the same yarn (you can make the same thing by stitching all the chains in a slip stitch).
At first, I was thinking of using thread cord as a handle for the bag, so I had some that I had knitted as an experiment, and so I used that, but it would be a lot of work to knit thread cord just to stuff it inside, so I think a thick string like the ones you can buy in stores would be fine.
After inserting the interfacing into the handle, thread the string through the six loops. Line up the two ends of the knitted handle and secure with an overlock to complete the process.
Pattern published: November 23, 2011
Your work
![編み物屋さん[ゆとまゆ]さんの「ギンガムチェックのギャザーバッグ」](https://ronique.jp/wp-content/uploads/2021/01/ga01_028_001L.jpg)
"Gingham Check Gathered Bag" by Knitting Shop [Yutomayu]
I worked diligently on knitting, and it was my first time finishing with gathering. There were many things I learned from knitting, and I learned a lot. Gathering also seems to be very practical. Ronique's checked bag and flat bag version are also featured in "Bags and Hats Knitted with Linen Yarn." Of course, I bought it! I'd like to learn from my mistakes and try it again. Thank you very much.
Knitting blog by Knitting Shop [Yutomayu]
http://ameblo.jp/doubleychan/
▶Knitting shop [Yutomayu]'s solo exhibition page
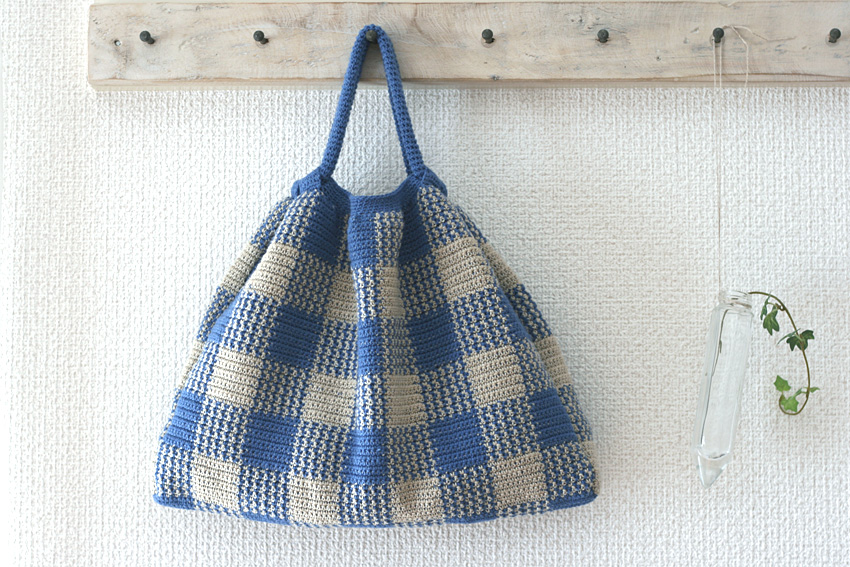
Yukari's "Gingham Check Gathered Bag"
It's so cute and I've always wanted to try knitting it.
I happened to buy some yarn on sale and thought it might be just right, so I almost gave up halfway through but persevered!
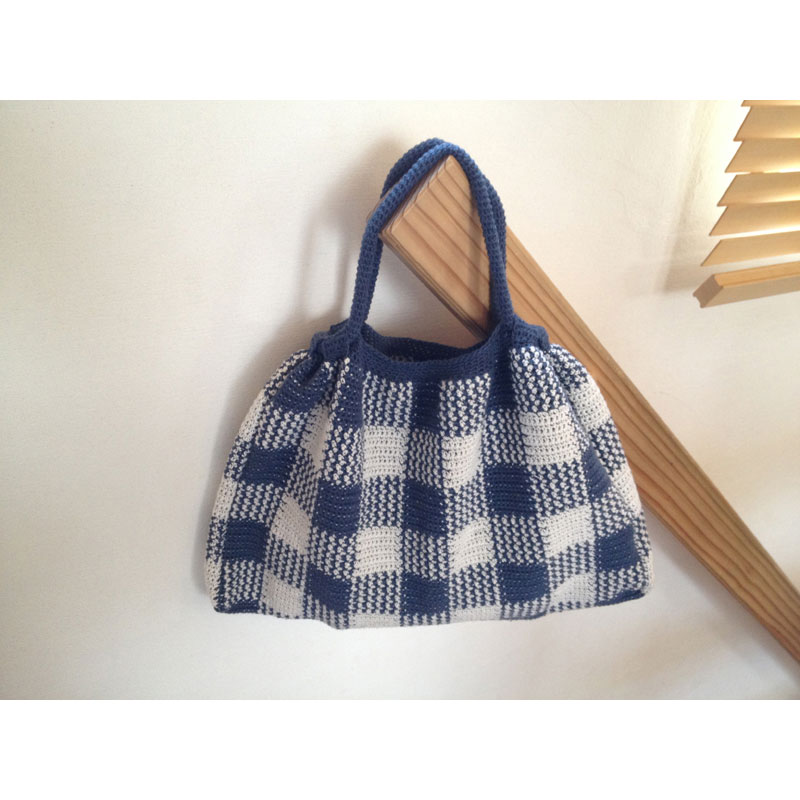
kar's "Gingham Check Gathered Bag"
nice to meet you.
The gingham checked gathered bag was so cute, I fell in love with it at first sight.
I made it using a recipe.
Thank you very much m(_ _)m
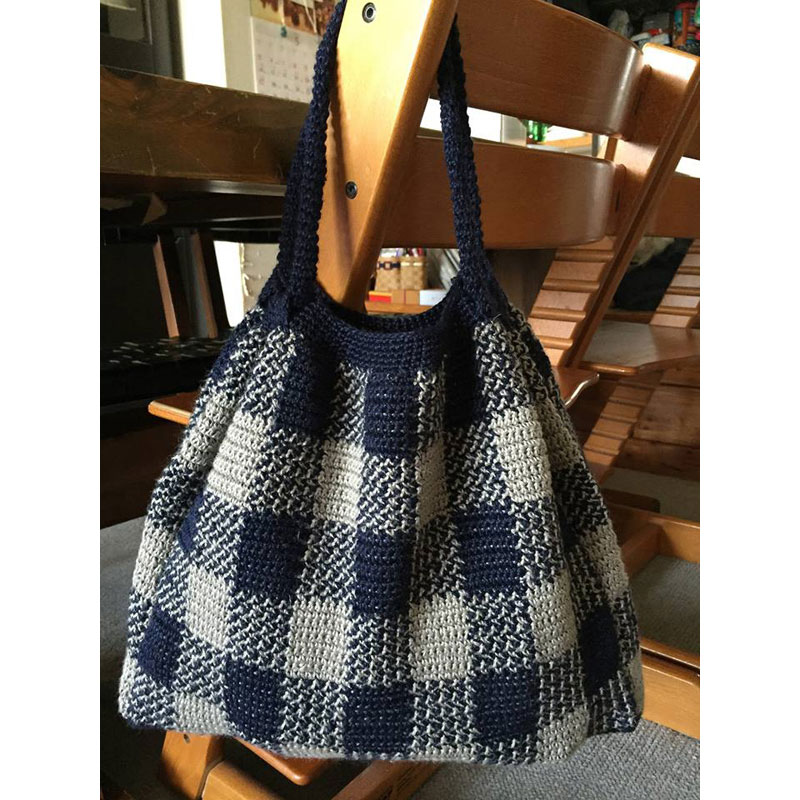
Shukichi's "Gingham Check Gathered Bag"
I thought it was cute the moment I saw it!
It was my first time braiding, so it took quite a while to complete the main part, but I managed to finish it.
I didn't like the color of the yarn so I dyed it in coffee to finish it off.
Thank you for the wonderful recipe.