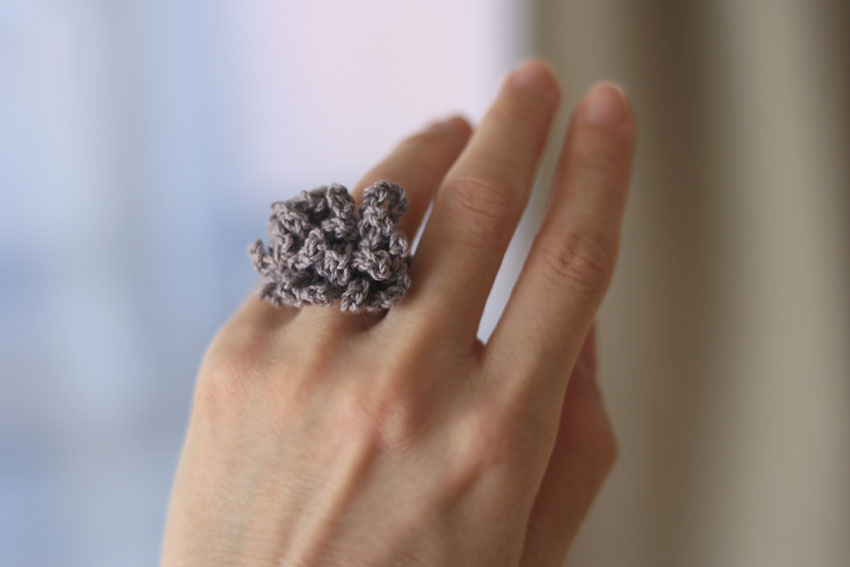
This is a crocheted piece.
I tried crocheting a ring.
This project can be completed with just a little bit of yarn and a short amount of time, so it's a great way to use up leftover yarn.
This ring is fluffy and soft, and depending on how you look at it, it looks like a flower.
How about a soft impact on your hands?
Since having children, I have completely stopped wearing rings.
My beloved diamonds are hardly ever used.
I felt uneasy about wearing it while worrying about those hard-looking nails getting on my child.
With a knitted ring like this, you don't have to worry about that, so you can relax.
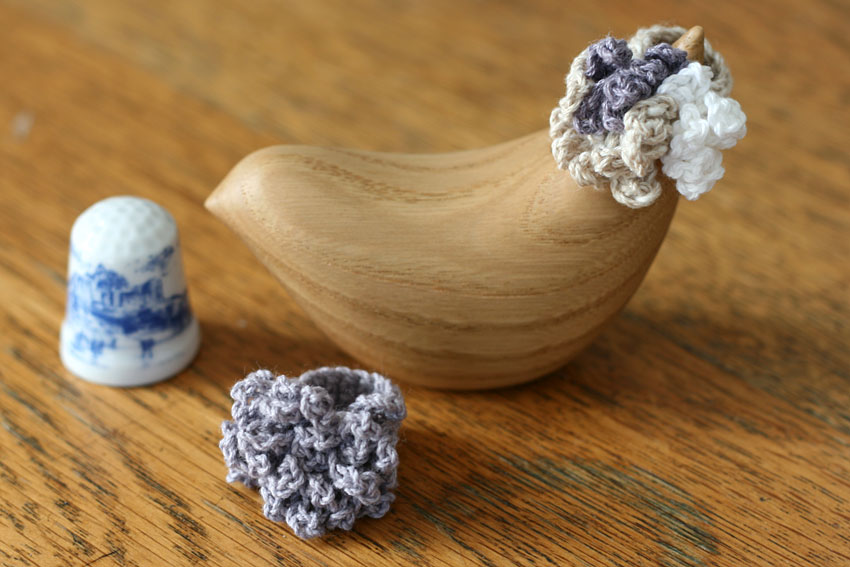
I used one plain color of yarn for this one, and three colors for the other, but it would also look great if you knitted it with thin yarns pulled together or with glitter yarn.
It might be fun to add a little extra effort and weave beads into it.
Even if it's a small piece, accessories are still fun! That's why I wanted to share this recipe with you.
Yarn and Crochet Hook Size
Your favorite medium-thick thread
2.3 mm (JP 3/0)
Finished Size
Height 3.5cm Width 3cm
Crochet Pattern
Instructions
The knitting pattern is very difficult to read, so please check it along with the explanation below.
① Start knitting by casting on the chain. After knitting 16 stitches, pull it through to the first stitch and make a loop.
The number of chains you cast on will determine the size of the ring, so adjust the number of chains to fit the finger you want to wear it on.
② For the first row, knit one stitch on the other side of the cast-on chain and the back of the knot. In the ring in the photo, 16 knit stitches are knitted.
③For the second and third rows, without increasing or decreasing the number of stitches, pick up just one stitch on the other side of the previous row's knit stitch and make a single stitch.
4. While looking at the front of the ring, pick up the horizontal stripe of the stitch (the part where one thread is visible horizontally) and attach the yarn, then knit a chain stitch.
At this point, the place where you attach the thread will become mushy and hidden, so it doesn't matter where you attach it.
The idea is to knit 7 chain stitches for each of the 6 straight stitches, and then knit two loops at a time. I reduced the number of chain stitches to 6 only on both ends.
You can knit any number of chains here, so try changing the number of stitches to adjust the volume to your liking.
⑤For the three-color version, I sometimes run out of yarn halfway through (even though it's small!), so I change the color of the yarn halfway through the chain loop.