Index
Crochet for Christmas!
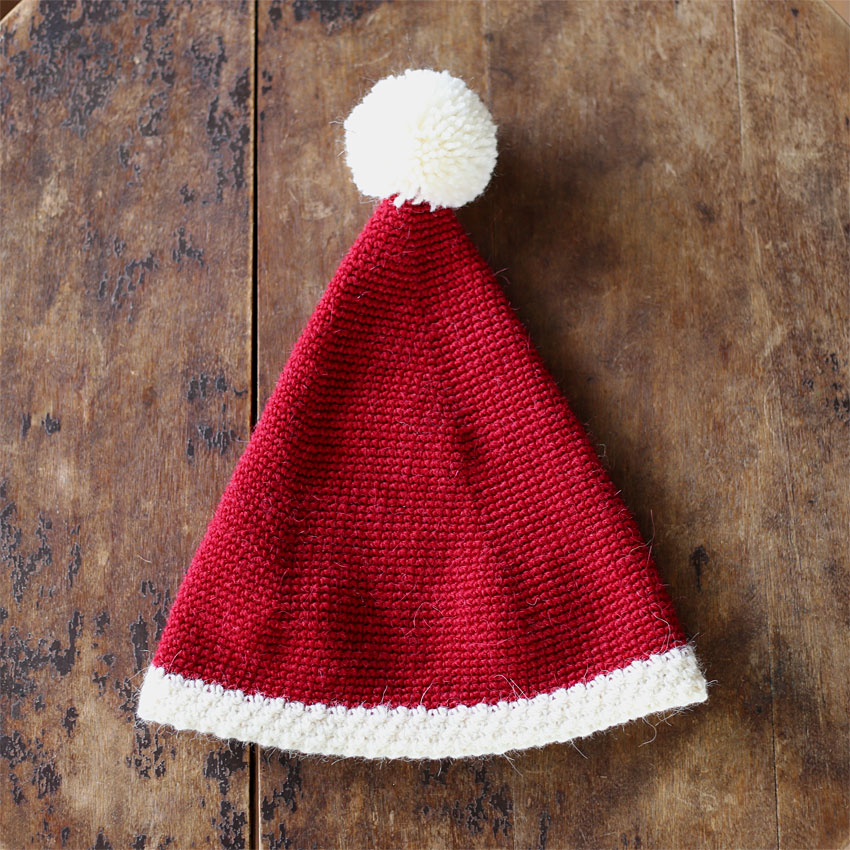
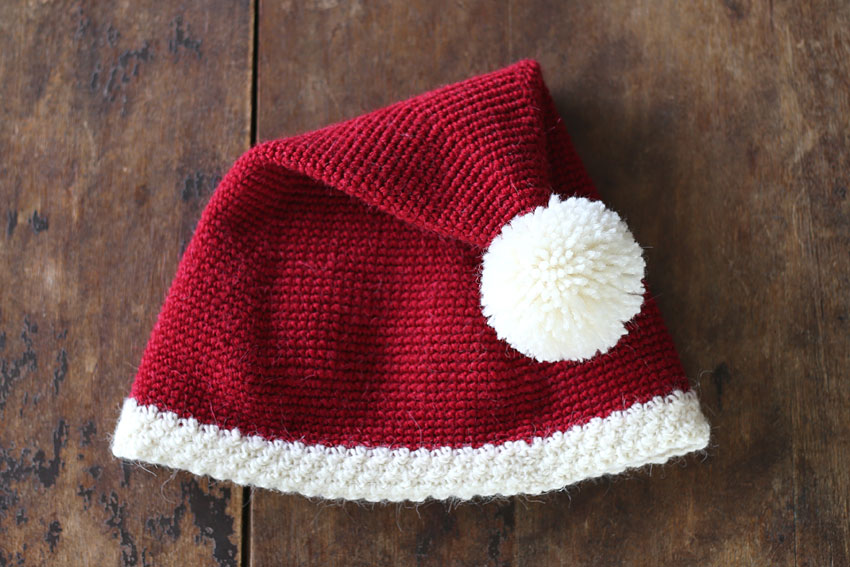
This is a crocheted cap inspired by Santa Claus' hat.
As Christmas approaches, I always feel like knitting something.
This is knitted in adult size, but I put it in the "kids" category as it will be used for children to dress up as Santa Claus.
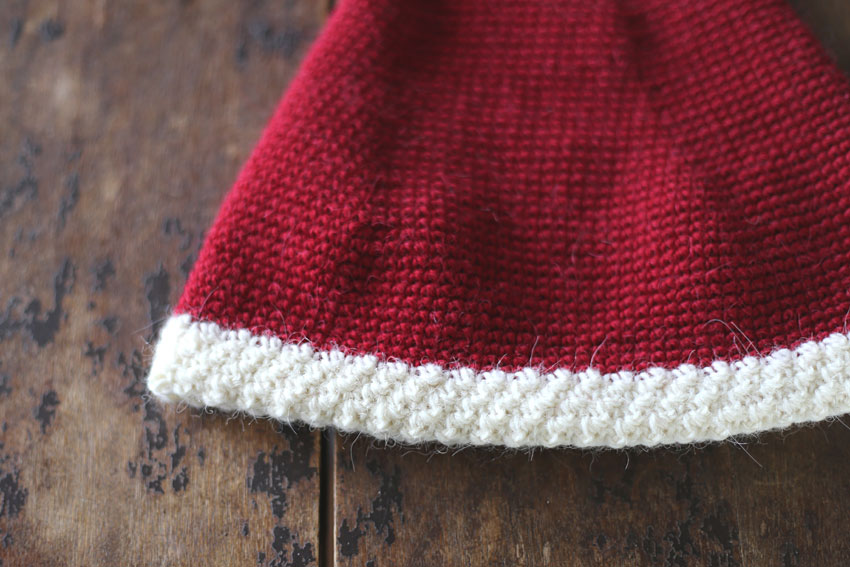
This hat has a slightly three-dimensional knitted edge that adds an accent.
All the red parts are knitted.
Since it only uses basic crochet techniques, I don't think there's anything particularly difficult about it.
I knitted this using Motohiro's wool alpaca yarn, which has a slightly rustic feel.
I chose this thread because it has a beautiful, deep, muted red!
It's a slightly thin, medium-weight yarn that seems versatile.
This hat is knitted from the top down, increasing stitches.
So you can try it on while you're thickening the stitches to check the size.
You can also knit a smaller size by stopping the increase when you reach a comfortable size.
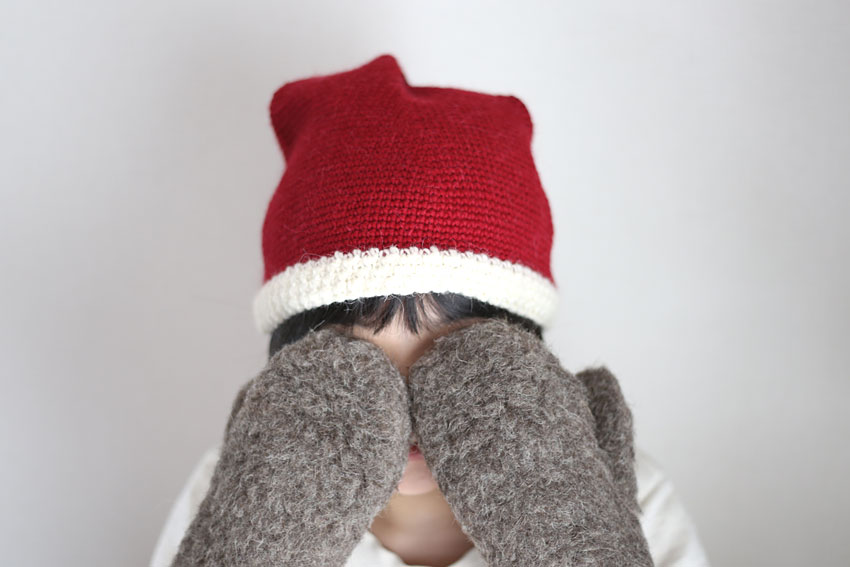
The sample is a loosely knitted adult size, but it would be fun to knit a child's size or make it into a parent-child pair!
In the image above, a child model is wearing the adult size.
This is knitted in Christmas colors, but if you change the colors it could also be used as an everyday hat for children.
I hope you enjoy it according to your needs!
"Santa Hat" Yarn and Crochet Hook Size/Materials
Motohiro mini sports Alpaca30 (30g Tamamaki 72m)...Red [Col.4] 3 balls (90g), White [Col.1] 1 ball (30g)
4.0 mm (JP 7/0)
Finished size of "Santa hat"
Head circumference 55cm Model wears it loosely
When laid flat, it measures 32cm in height (excluding bonbons) and 30cm in width
Bonbon diameter 7.5cm
"Santa Hat" knitting pattern
Santa Hat Knitting Pattern (PDF)
How to make a Santa hat
Please refer to the crochet pattern along with these instructions.
① Start knitting by creating a loop.
For rows 2 to 35, increase stitches in two places in each row.Knitting pattern (circle)It is knitted according to the following rules (the number of stitches is different, but the idea is similar).
②For the three rows from 36 to 38, knit the same number of stitches.
③From the 39th row, continue knitting by increasing stitches in two places in each row.
In the sample piece, the stitches continue to increase up to the 56th row.
It's a good idea to try it on halfway through to check the fit and then decide how much you want to increase the stitches.
No matter how many rows you increase, the number of stitches will match the edge knitted with white yarn, so don't worry.
④For the 9 rows from 57 to 65, work in a circular stitch without increasing or decreasing the number of stitches.
When I knitted it by hand, I ran out of red yarn just up to this point, so I made row 65 the final row of red yarn. This part is knitted without increasing or decreasing the number of stitches, so even if the number of rows changes slightly, it doesn't have a big impact, so I think it's fine to adjust the number of rows you knit while taking into account the remaining yarn.
If you have any red yarn left over, knit the same number of stitches until you reach the desired depth, then cut the yarn.
⑤To knit the edge, turn the red yarn knitting over and add the white yarn and begin knitting.
The pattern knitted with white yarn has bumps on the back, so it is knitted like this.
After knitting four rows of edge stitches, cut the white yarn.
You can also adjust the number of rows you knit for the edge to suit your taste.
⑥ Attach a pompom to the top of the hat and it's done.
This time I accidentally made the pompoms too big and ended up having to cut a lot of yarn lol
For this reason, the amount of white thread used is listed as being larger than usual, but if you are good at making pompoms, you probably won't need to use even a whole ball (30g).
Decorations that go well with crochet: wool pompomsThere are instructions on how to make it on the page, so please feel free to use it as a reference.

Pattern release: December 4, 2022