Index
The story of knitting circles
Round knitting is a technique that frequently appears in crochet recipes.
Among circular knitting patterns, the circular knitting pattern is the most orthodox.
This most classic knitting technique, the circle, is actually a bit tricky.
The finished circular knitting will vary depending on the size of the circle being knitted and how tightly the knitter's hands are knitting.
Furthermore, the circle is made using a method called dispersed increase, where stitches are added in several places per row, so the extent to which the circle spreads out will change depending on how many stitches are added.
The pattern I often use is to add 6 stitches each row.
This stitch count is perfect for my hands, and whether I knit small or large, it creates a flat, neat knitted piece.
On the other hand, if you add 8 stitches each row, the knitting will look pretty neat when you knit small circles, but as the circle gets larger, the knitted fabric will spread out too much, resulting in a gathered, fluttery circle.
This will vary depending on the knitter's skill, so some people may find that using 6 stitches results in a circle that doesn't lie flat and ends up curling up, while others may find that 7 or 8 stitches are a perfect fit.
Also, the number of stitches you add each row can vary depending on the piece you want to make.
When knitting, I often divide things into two pieces (like bag handles), and the units for knitting patterns are often even numbers, such as 4 stitches per pattern or 6 stitches per pattern, so I prefer to use even numbers of stitches.
So when it comes to seven (and it's a prime number!), I feel like it would limit my design flexibility, so I tend to avoid it.
When you think of knitting circles, you might think of something simple, but when you dig deeper, you'll find that it's actually quite deep.
Circles and hexagons
Earlier, I wrote that when I knit a circle, I often add 6 stitches to each row, but now the question arises: "where to add stitches?"
Knitting and counting stitches are inseparable, so when you are knitting in a pattern that changes with each row, such as a circle, you will need to count the stitches.
In such cases, having a pattern makes counting easier and reduces confusion and mistakes.
For example, if you are knitting by adding 6 stitches each row, first cast on with 6 stitches, then add 6 stitches each row.
The rule here is that in the second row, knit two stitches into every stitch to add six stitches, in the third row, knit two stitches every other stitch to add six stitches, in the fourth row, knit two stitches every two stitches, and in the fifth row, knit two stitches every three stitches...
By increasing the number of stitches using this simple rule, you will create a hexagonal knitted fabric.
But if you want to knit a smoother circle, you'll need to think a little about where you increase the number of stitches.
Here I would like to explain a method for changing the position of the increase while maintaining a certain regularity.
The difference between knitting patterns and knitting patterns
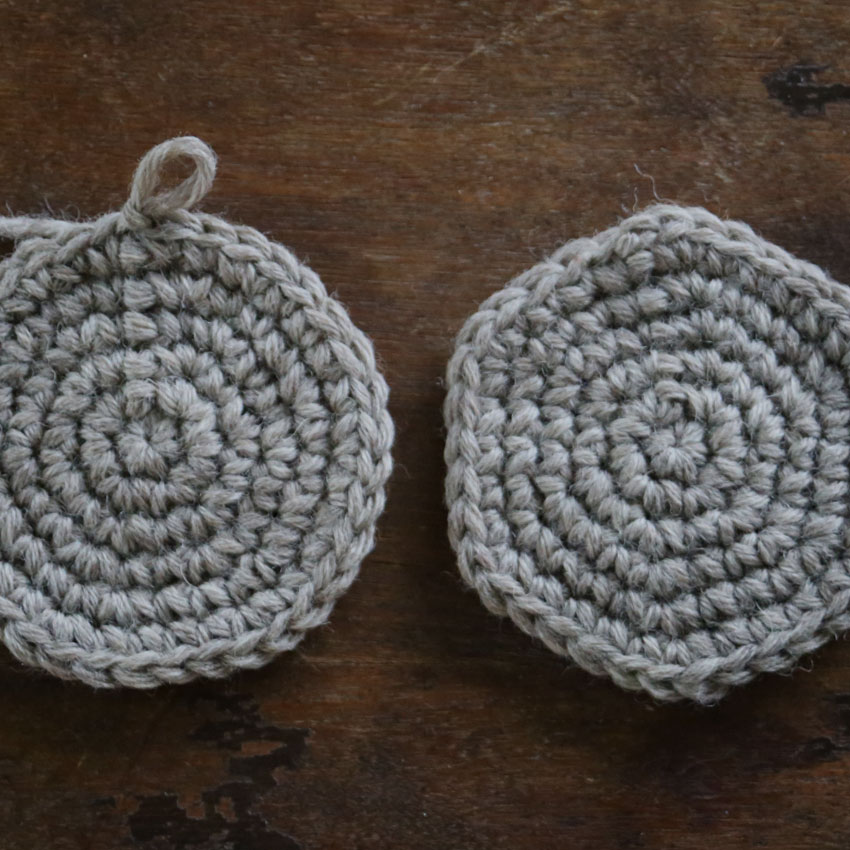
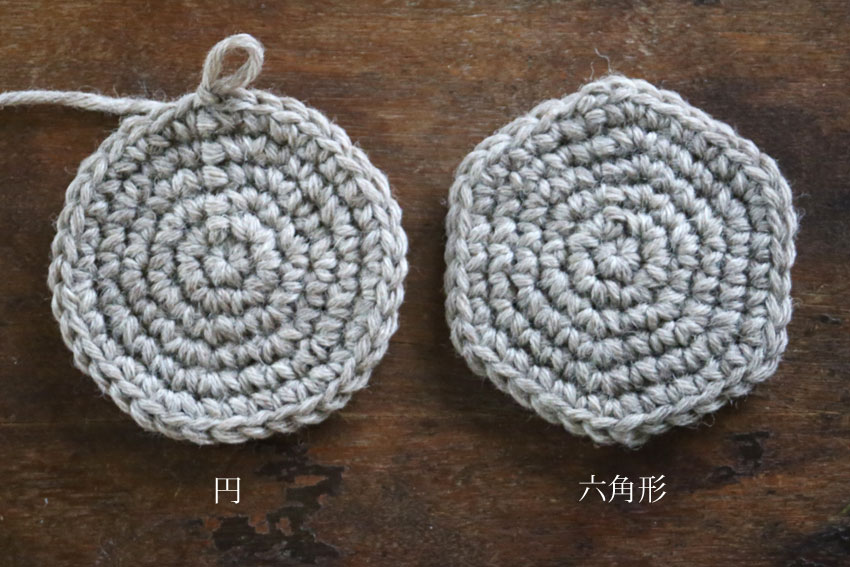
In the image below, can you see that there is a circle on the left and a hexagon on the right?
It may not be very obvious since it's still a small piece of knitting, but the difference will become more apparent the more you knit.
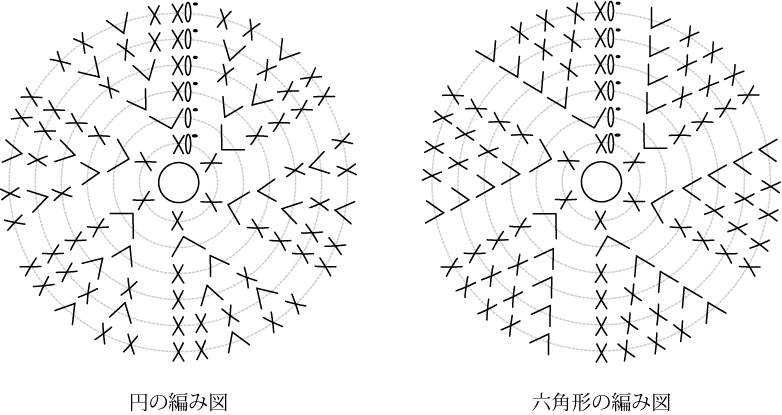
Now let's take a look at the knitting pattern that is the basis for this knitted fabric.
The knitting pattern for a circle is on the left below, and the knitting pattern for a hexagon is on the right.
The hexagon on the right is neat and tidy, and it's clear at a glance that there seems to be some pattern to it.
The knitting pattern makes it easy to count the number of stitches.
What about the knitting pattern for the circle on the left? It may be difficult to understand at first glance, but this one also follows a pattern, and the positions of the increases are cleverly distributed.
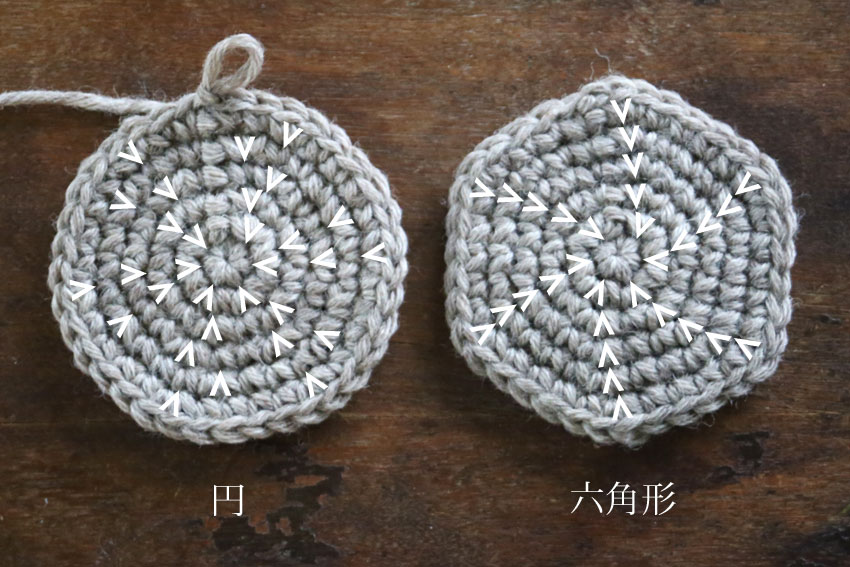
If you apply the positions of the increase stitches in these two knitting patterns to the knitted fabric, you will get the arrangement shown in the image below.
The key to knitting a beautiful circle is in the position of the increase stitches.
The positions of the increase stitches in each row are staggered, rather than overlapping. This prevents corners from forming in the knitted fabric, making it closer to a smooth circle.
Can you get a rough idea of what it is?
The law of increasing yen
The interpretation of the knitting pattern below is the law of increasing stitches for a smooth circle.
If you look closely, you'll see that this is the same knitting pattern as the circle pattern we saw above.
This may sound complicated when put into words, but when increasing a stitch every other even number of stitches, such as every 2nd, 4th, or 6th stitch, you shift the position of the increase so that the position of the increase stitch alternates every other row.
It may not be as simple as a hexagon, but if you think about how it will turn out to be a nice circle, I think it's a pattern that makes it easy to knit.
This rule applies not only to circles that increase by 6 stitches per row, which fits my hands perfectly, but also to circles that increase by 7 stitches per row and circles that increase by 8 stitches per row.
So, please try knitting a beautiful circle using the number of stitches that suits your hand.
I hope this rule will be helpful as one way to knit circles!