Index
This is a crocheted piece.
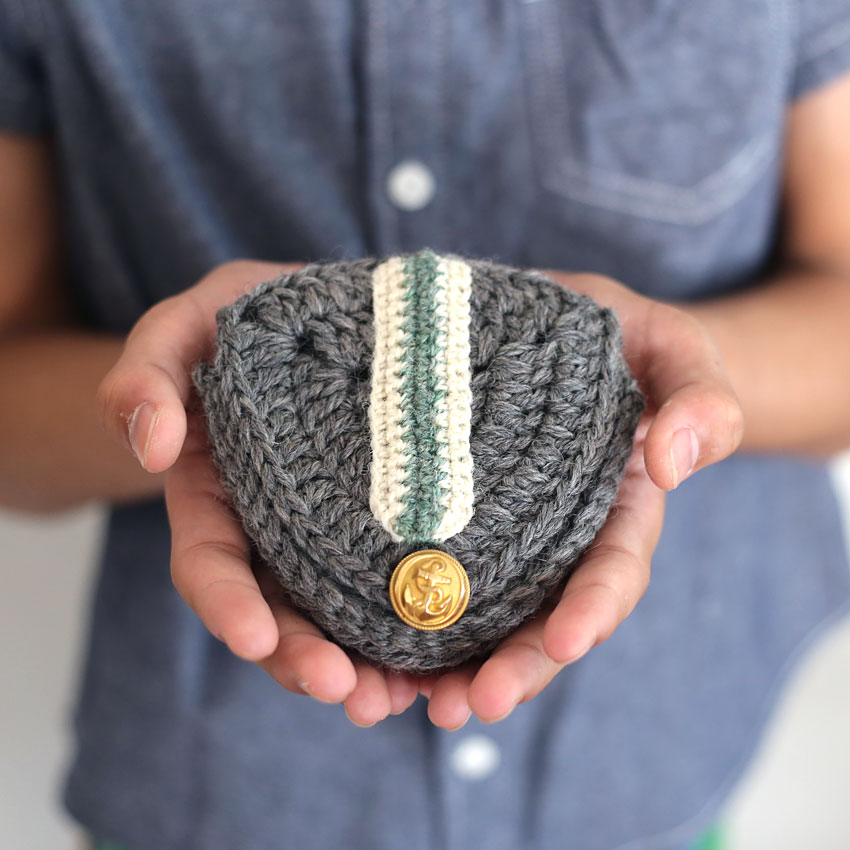
This is a crocheted mini pouch made with extra thick leftover yarn.
It has a simple design, with the idea being to knit three pieces of the same motif together.
I added ribbon-like decorations and gold medal-like buttons to make it look like an emblem.
You can put sweets or treasures inside the pouch, and depending on how you use it, it looks like a little world will unfold inside the pouch!
This pouch can be used by both boys and girls, and would also make a great pouch for moms.
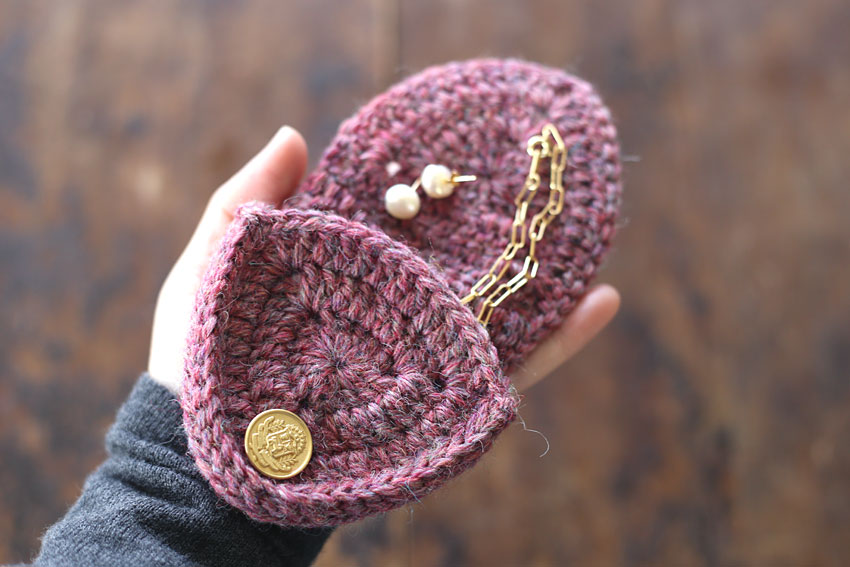
If you attach a string to the side, you can use it like a mini pouch.
My model is quite large, but the size seems like it would suit a slightly smaller child.
For adults, it could also be used as an accessory pouch or coin purse.
This is an item that can be enjoyed with either summer or winter yarn, but this time I used wool yarn.
The main body is made of extra thick yarn and the decorative ribbon is made of medium-thin yarn, so you may want to choose the yarn based on how much leftover yarn you have.
It can be knitted in a short amount of time, so try using it as a convenient little gift!
Yarn and Crochet Hook Size
Extra thick yarn: 20-30g
Medium-fine yarn...about 1g of each color
Button: 1
Size 7-8 crochet hook
Finished Size
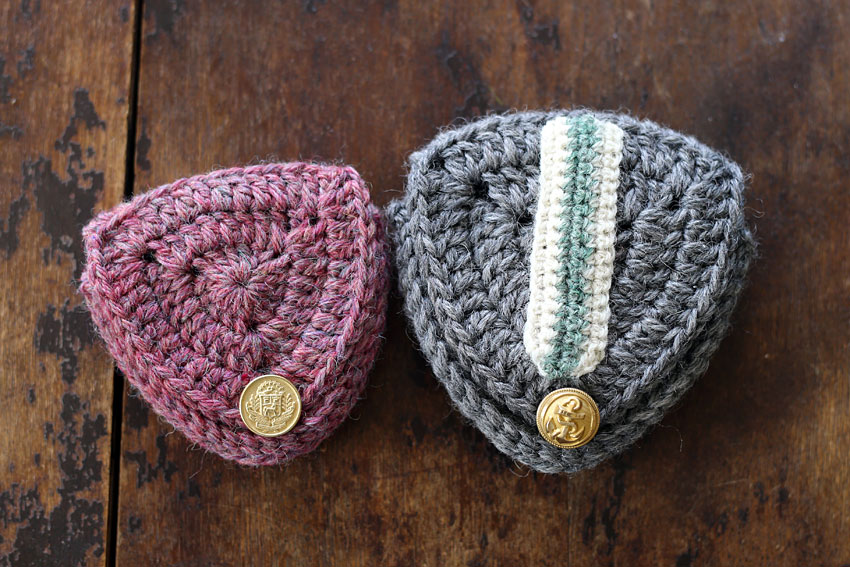
Gray: 10cm long x 11cm wide
Pink: 8.5cm long x 9cm wide
Crochet Pattern
Emblem Pouch Knitting Pattern (PDF)

Instructions
Please refer to the crochet pattern along with these instructions.
① Knit the motifs in the order A→B→C.
Start by making a loop and increase the number of stitches each row until you reach the third row.
For A, cut the yarn after knitting up to the third row.
② For B, once you have completed the third row, continue on to the fourth row (edge). For the double crochet in the fourth row, pick up just one stitch on the other side of the previous row and crochet.
At the chain point in the previous row, pick up one strand on the other side and work a double stitch.
Once you have completed the fourth row, continue knitting with the same yarn and slip stitch motif A (the stitching method is explained in detail in the explanation with images below).
For this slip stitch, knit motif A while keeping it in front of you, then pick up only one stitch on the far side of each motif A and motif B (picking up the two stitches on the inside of the seam at the same time), and slip stitch half a stitch.
Now motifs A and B are connected, forming a bag shape.
Once you have finished pulling out the stitches, cut thread B.
④ Next, knit motif C. Once you have knitted this up to the third row, continue knitting the fourth row (edge).
Here, as in step ③, scoop up one strand from the other side of the previous row and make a striped stitch.
Once you have completed the fourth row, continue with the same yarn and slip sew motif B together (again, the stitching method is explained in detail in the explanation with images below).
Here, with motif B in front, scoop up each of the pieces B and C that are on the inside of the seam, as in step ②, and sew them together by pulling them out halfway.
Once you have finished pulling the fabric out, cut the C thread.
⑤ Attach the button at the desired position.
⑥To make the ribbon decoration, start by casting on a chain using white medium-fine yarn.
The sample has 17 chain stitches cast on, but you can cast on any number of stitches.
Test the pouch halfway through making the cast-on and find the right number of cast-on stitches to get the right length.
For rows 1 to 3, increase a stitch on one side for each row, and for rows 4 to 6, decrease a stitch on one side for each row.
When completing the last knit stitch in the second row, change to green yarn and pull through.
Knit the 3rd and 4th rows with green yarn.
When completing the last stitch of the fourth row, pass the white yarn through the back of the knitting, change it to white yarn and pull it out.
Cut the green thread.
Once you have completed the sixth row, cut off the white yarn.
⑦ Sew the ribbon onto the pouch lid and it's finished.
I sewed it by hand using sewing thread.
Explanation with images
We will explain how to sew the three motifs together.
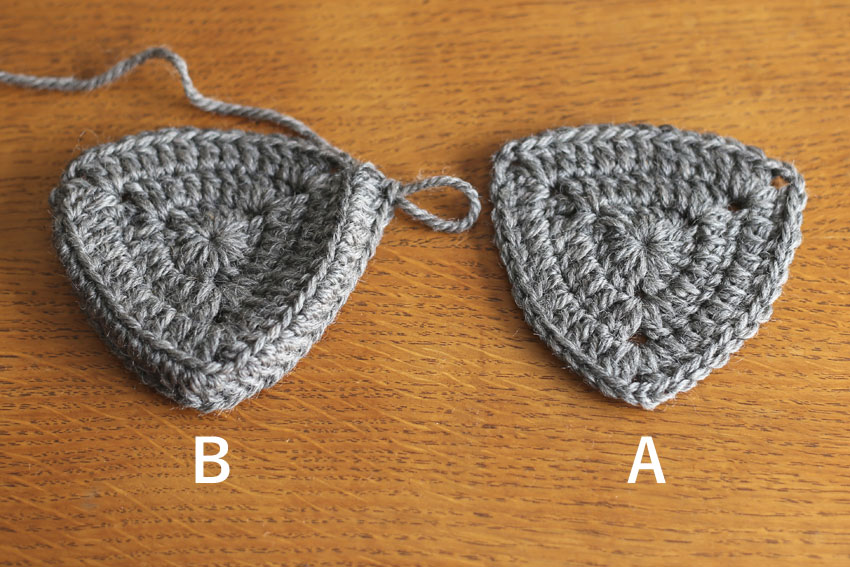
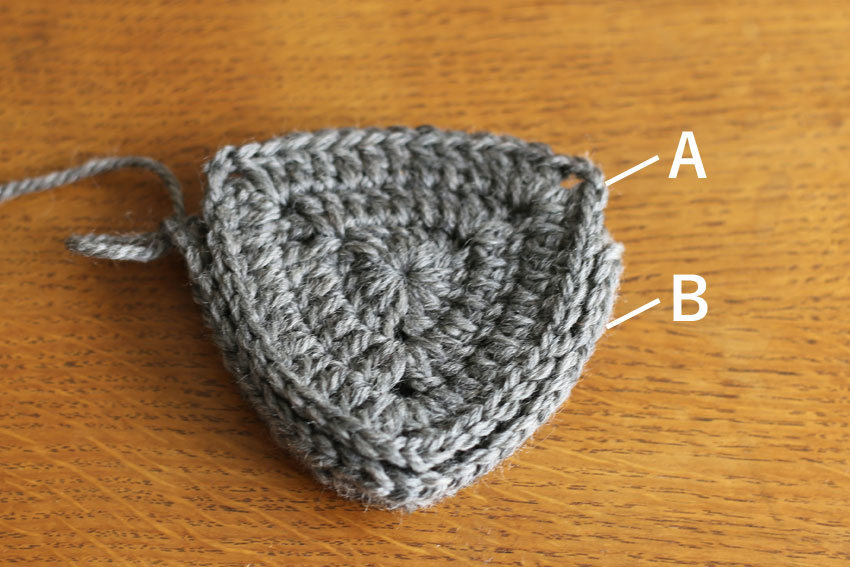
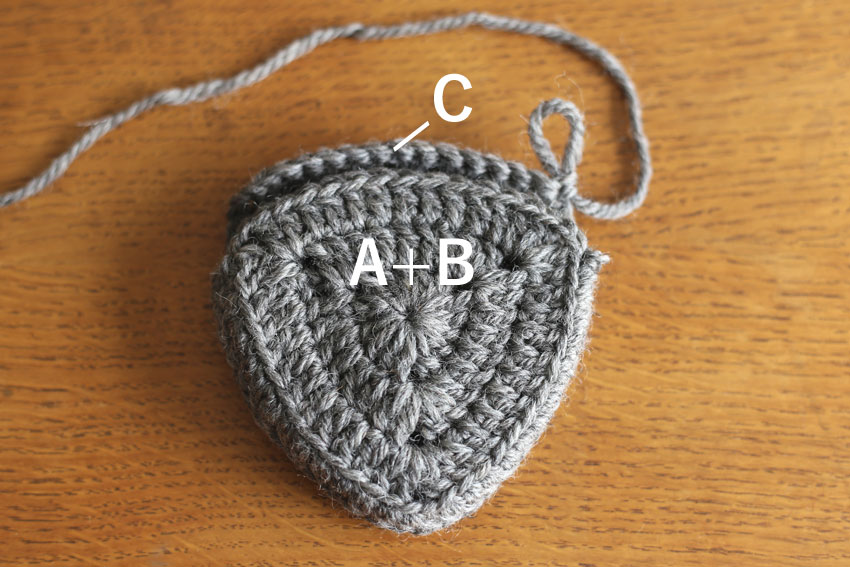
① I have just finished knitting A and B.
Do not cut thread B, but use this thread to sew A and B together.
② You will be knitting A while looking at it from the front, so stack it like this. A and B are facing out.

③Hold the thread and first insert the needle into chain A (scoop up the one on the other side).
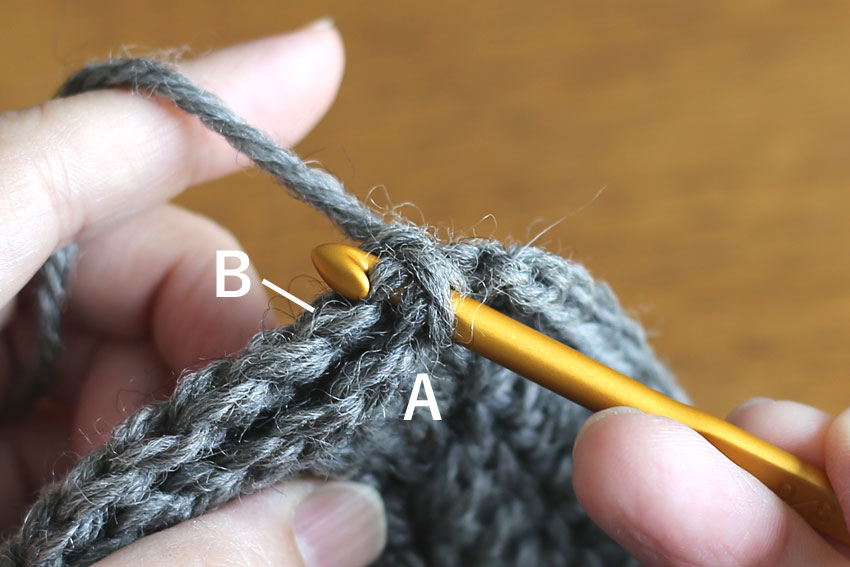
④ Next, insert the needle into the half stitch of B (the one on the inside of the seam).
Insert the needle like this and pull out half a stitch.
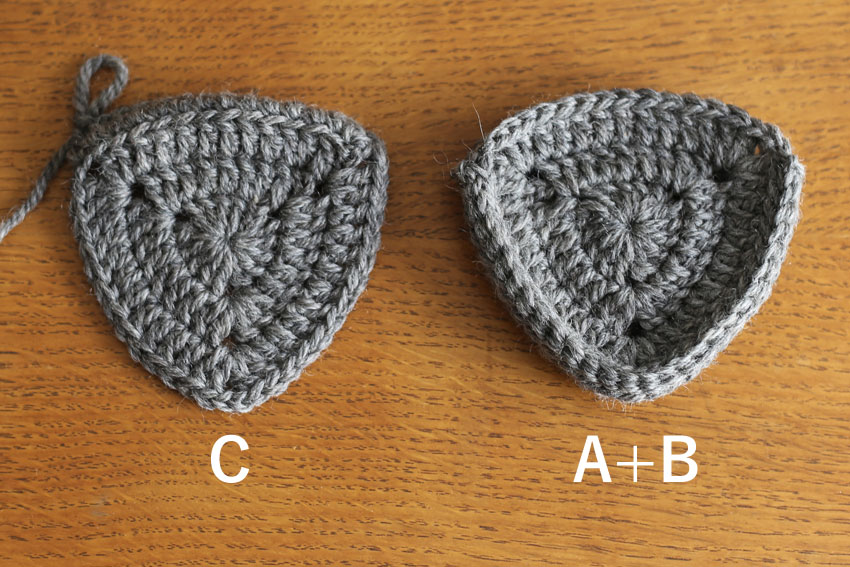
⑤When you sew the first side of A and B together, it will look like this.

⑥ Sew the two sides together to form a bag.
Once you have sewn the pieces together up to this point, cut thread B.
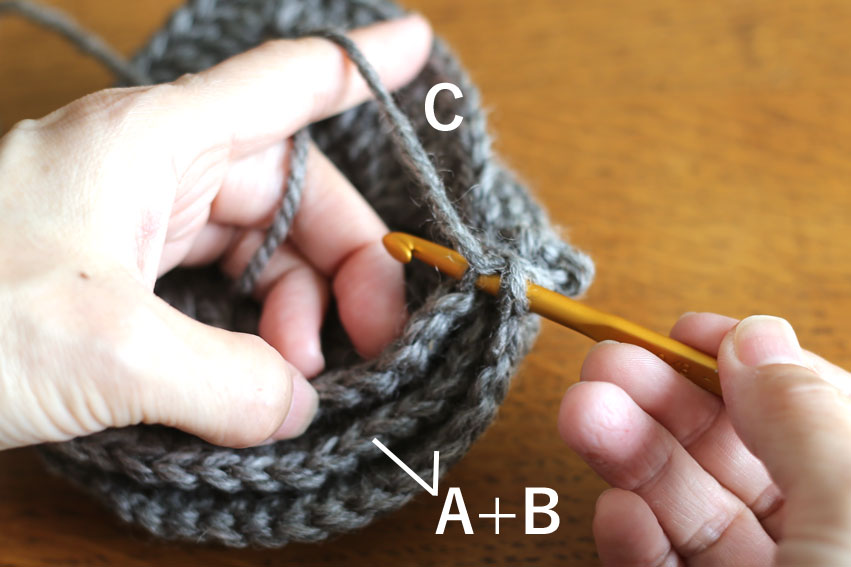
⑦Do not cut thread C either, and continue to pull out the fabric using this thread.
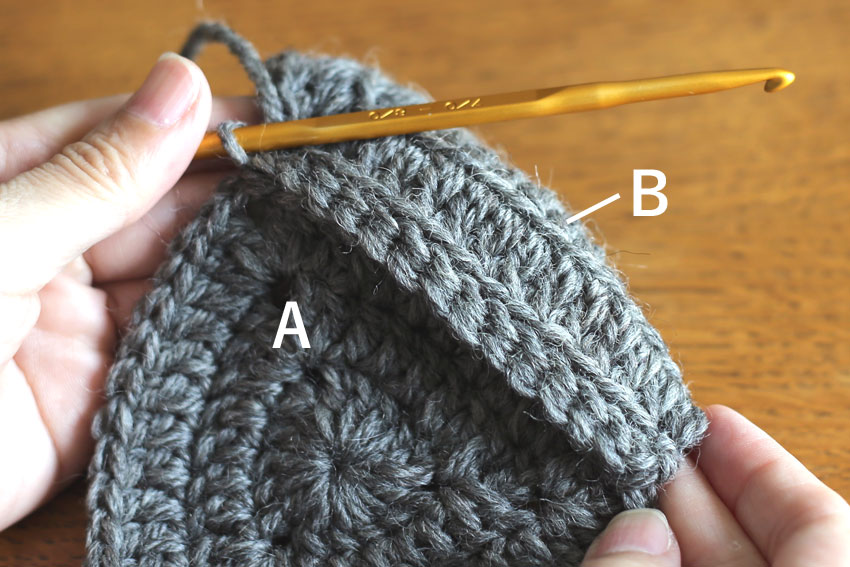
⑧ You will be knitting while looking at the A+B motif in front (B is visible on the front), so overlap the motifs like this.

⑨ With A+B now visible in front of you, insert a needle into the chain of B (by scooping up one on the other side).
⑩Continue in the same way and insert the needle into the half stitch of C.
In this way, scoop up the two strands on the inside of the overlap and pull them out halfway.

⑪When you sew B and C together it looks like this.
Cut the C thread here.