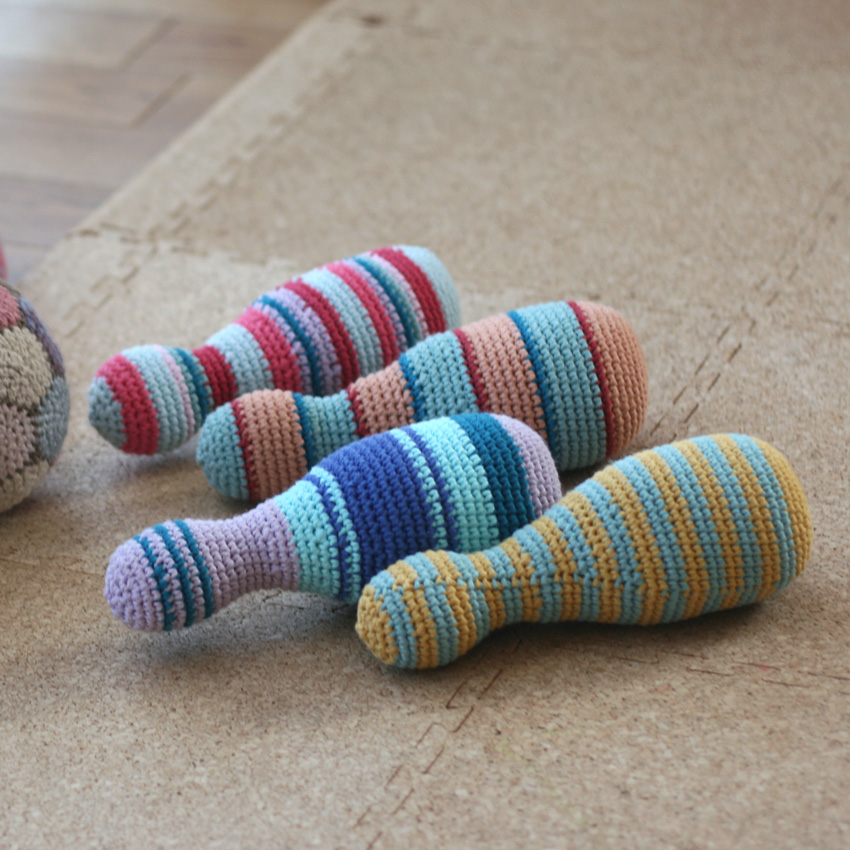
This is a crocheted piece.
I tried crocheting a bowling pin.
I remember bowling being a lot of fun as a kid.
It will be a while before my siblings can enjoy real bowling, but I hope that one day we can go bowling as a family.
Now, I'm hoping to get a similar feeling with this toy.
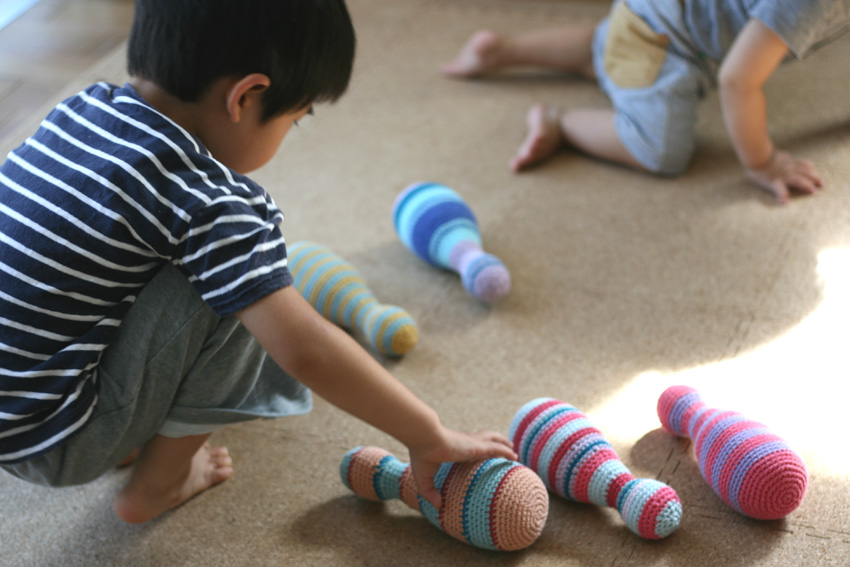
It wasn't until recently, when my brother was approaching four years old, that he started to have a little fun.
However, when the older brother is playing, the younger brother immediately comes over, so maybe there is a baby-like way of having fun.
At first, I thought I would make 10 like the real thing, but six was enough for a child to knock them over with a ball.
To prevent the pin from being too light, we put weights called pellets inside.
This material is used for making amigurumi, so try looking for it at a craft store.
Yarn and Crochet Hook Size

Medium to extra thick cotton yarn
No. 7 crochet hook
Pellets (granular plastic weights like the one in the image on the left)
Polyester wadding
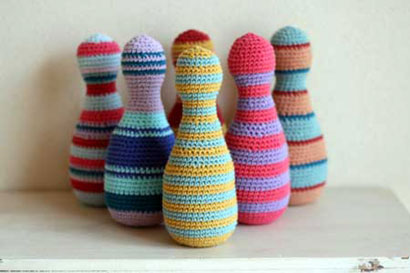
Finished Size
Height: 20cm
Waist circumference 22cm (maximum)
Instructions
① Start knitting by casting on a loop, then knit 6 quarter stitches in the first row.
② Knit all the stitches using knit stitches, increasing or decreasing the number of stitches as shown in the table below.
The increase in the width is like thisRules for knitting loop stitchesIt is knitted with.
Feel free to change the colour of the thread as you go.
For rows 2 to 6, increase 6 stitches in each row.
After that, knit by increasing or decreasing the number of stitches as shown in the table below, and add pellets to the bottom halfway through, then cotton, in that order.
The ease with which the pin falls will change depending on how many pellets you put in, so feel how it feels when you hold it while putting it in. If there are too few pellets, it will be difficult to stand up, and if there are too many, it will take a lot of force to fall down.
Since you'll be making multiple pins, try measuring the pellets using the same cup or something so you can put in the same amount each time.
By the way, I filled each pin with one heaping spoonful (Imagine filling it up to about 20-30% of the finished size).
③When you finish knitting the last row, pass the end of the yarn through the stitch of the last row and tighten it.
| Number of steps | Increasing or decreasing the number of stitches |
| 52 | -6 |
| 51 | -6 |
| 50 | -6 |
| 48-49 | ±0 |
| 47 | -6 |
| 43 to 46 | ±0 |
| 42 | +6 |
| 41 | ±0 |
| 40 | +6 |
| 36-39 | ±0 |
| 35 | -6 |
| 31 to 34 | ±0 |
| 30 | -6 |
| 29 | ±0 |
| 28 | -6 |
| 26-27 | ±0 |
| 25 | -6 |
| 10 to 24 | ±0 |
| 9 | +6 |
| 7-8 | ±0 |
| 1 to 6 | +6 |
Pattern published: September 21, 2010