This is a crocheted piece.
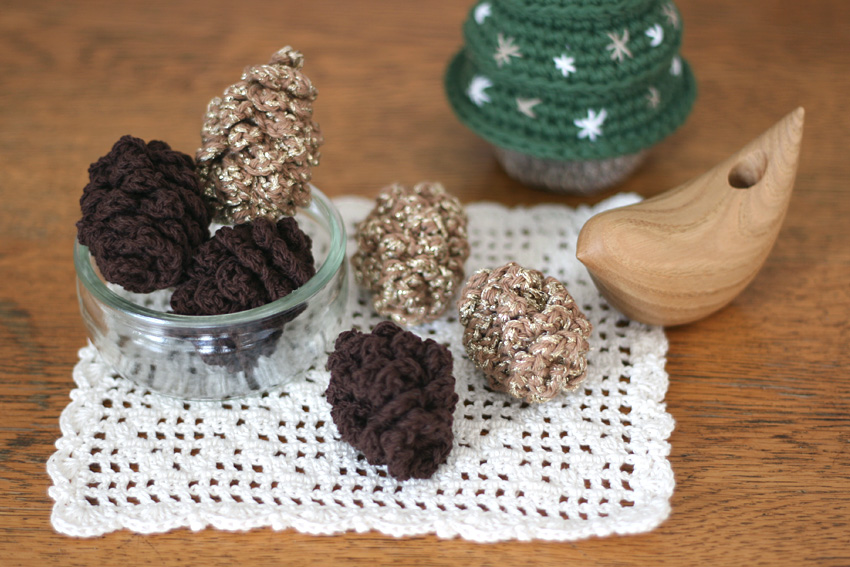
Pine cones, acorns, and other cute things found in nature.
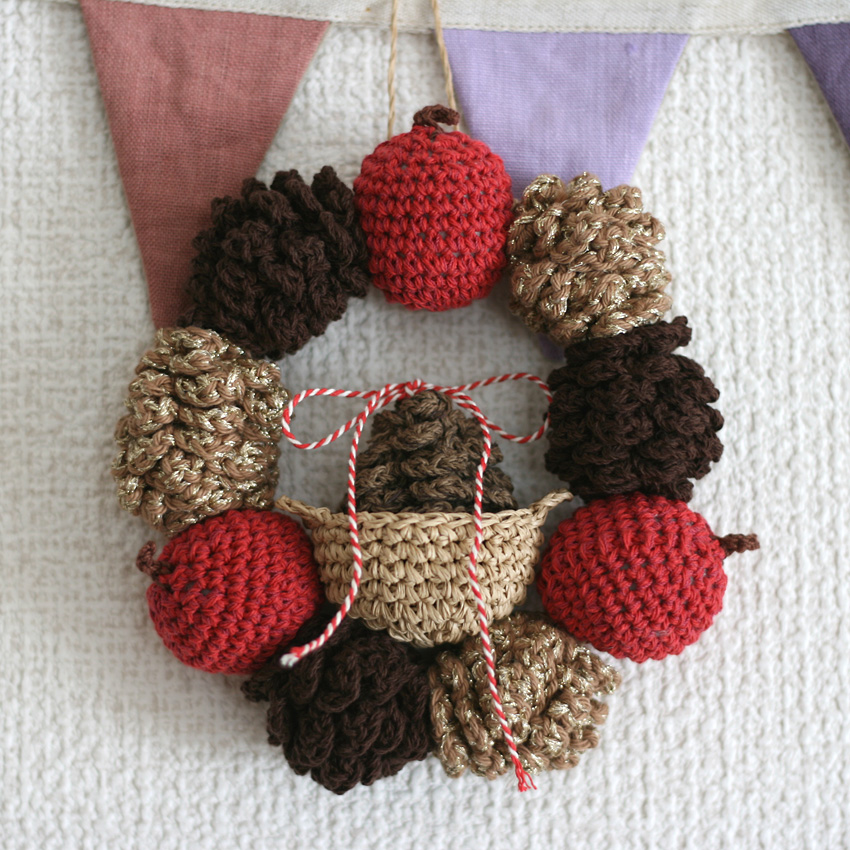
I was inspired by Christmas wreaths made from such materials, so I tried to crochet one myself.
I also tried making acorns, but when I tried them together it didn't quite look right, so I went with apples to give it a Christmas feel.
The sparkling pine cones are made by knitting two strands of medium-thin to medium-thick yarn and a similarly thin glitter yarn.
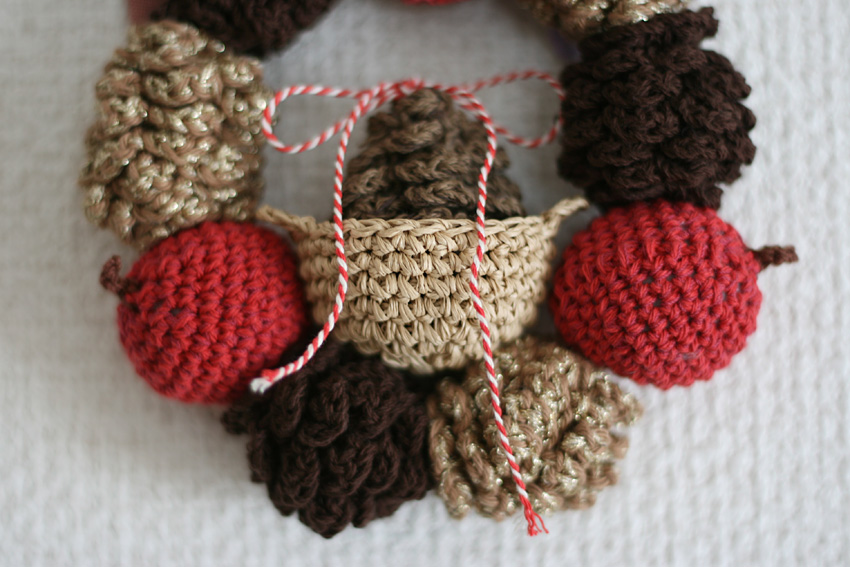
I decorated the pine cones in the basket with a red and white striped string that I received when I was shopping at a Scandinavian goods store.
Maybe I could put some candy in cute wrappers in the basket.
Yarn and Crochet Hook Size
Medium-weight cotton thread (brown)
Medium-fine cotton thread (beige, red, brown)
Medium-thin glitter thread
Jute thread for baskets
Size 3/5 crochet hook
Polyester wadding
Shape-retaining material (Technoroth)
Finished Size
Wreath diameter 16cm Basket diameter 5cm
Pine cone height: 4.5-5cm
Apple height (including stem): 5cm
Crochet Pattern
Pine cone knitting pattern
How to stack pine cone parts
Basket knitting pattern
Instructions
①Please also check the knitting pattern for the pine cone.
The pine cone parts are made up of 3 large pieces, 2 medium pieces, and 2 small pieces. A total of 7 pieces can be combined to make one pine cone.
At this time, for one of the [small] pieces, leave the yarn at the beginning or end of the knitting longer (about 20-25cm)*1.
If you leave the end of the yarn at the end of the knitting, pass it through the loop where you started knitting in the center so that the yarn wraps around to the back side.
Once you have knitted the seven pieces, place the small piece (※1) at the bottom, leaving the ends of the yarn long.How to stack pine cone partsWe will layer them using " as a reference.
Pass the end of the yarn from the bottom [small] part through the loop at the starting point (center) of all the parts.
Once you have threaded the yarn through the center of the topmost [small] part, use that yarn to knit 6 chain stitches (by pulling it out at an appropriate point), then pull it out again at the base, pass the yarn to the back of the part, and finish the yarn.
Make four brown pine cones (including the ones in the basket) and three gold ones.
② Start knitting the apple by casting on a loop, and knit 6 quarter stitches in the first row.
From the second row onwards, increase or decrease the number of stitches as shown in the table below (insert the filling before closing it), and once you have knitted up to the 12th row, thread the yarn through the stitch in the final row and tie it up.
Attach brown yarn to the middle of the end of the knitting, knit about four chain stitches, then pull the chain back with a slip stitch and finish the yarn at the base.
| Number of steps | Increasing or decreasing the number of stitches |
| 10-12 | -6 |
| 6 to 9 | ±0 |
| 5 | +6 |
| 4 | ±0 |
| 2-3 | +6 |
| 1 | 6 |
③ Start knitting the basket that is displayed in the center of the wreath by casting on a loop, and knit 6 stitches in the first row.
From the second row onwardsBasket knitting patternPlease check.
4. Once you have knitted the pine cones, apples, and basket that make up the wreath, thread a stiff, sturdy thread (I used the same jute thread I used to knit the basket) through a darning needle, and connect the parts by piercing the needle in the appropriate places to form a round wreath shape.
If you simply connect the pieces with thread, the weight of the pieces may cause the wreath to become a slightly elongated oval.
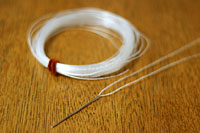
If you thread Technorot (a shape-retaining material) through a sewing needle as shown in the photo below and thread it through the parts in the same way as connecting thread, the shape of the wreath will be less likely to be distorted and it will be able to maintain a relatively round shape.
When I ran two techno rods through the ring of the wreath, it maintained a fairly circular shape, so please use this as a reference.
Attach a string to the back of the top apple of the wreath for hanging.
5. Once the wreath is in shape, decorate the center of the wreath with a basket as shown in the image and sew it in place so that it does not come off (I used sewing thread here).
Just place pine cones inside the basket and you're done.
Your work
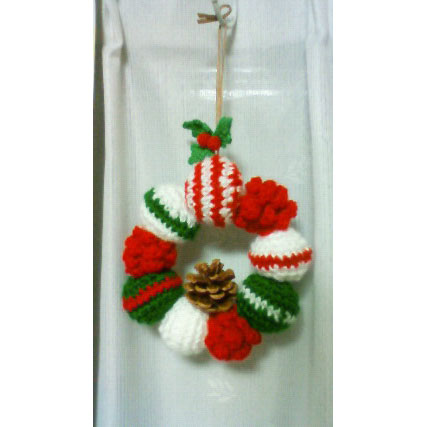
"Pine cone Christmas wreath" by patariro
It looks like it's not the same as the original, but I wanted to finish it somehow with the leftover yarn from knitting Christmas goods, so I ended up with this wreath.
The pine cone in the middle is real and is held in place with thread. I'm happy that I was able to create something that looks like Christmas.