Index
This is a crocheted piece.
I sometimes see beading done with knitting needles, but I feel like I see beading done with crochet hooks more often.
Crocheted fabric is strong and doesn't stretch easily, so it seems like it would hold up even when lots of beads are crocheted in and it becomes heavy.
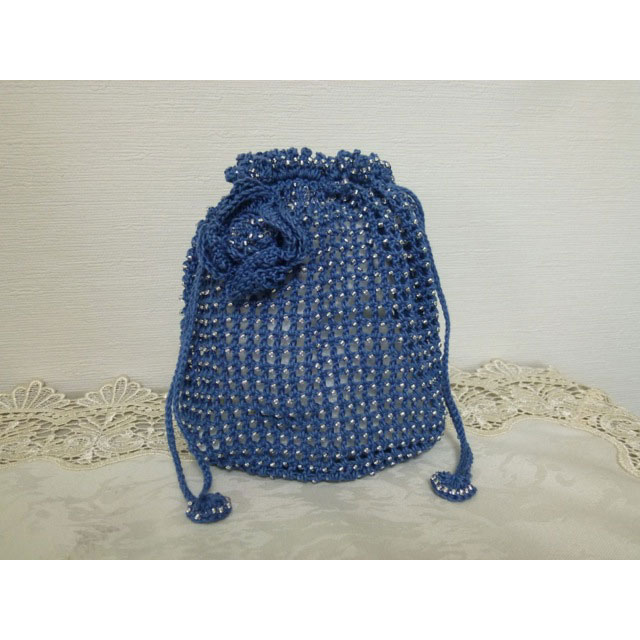
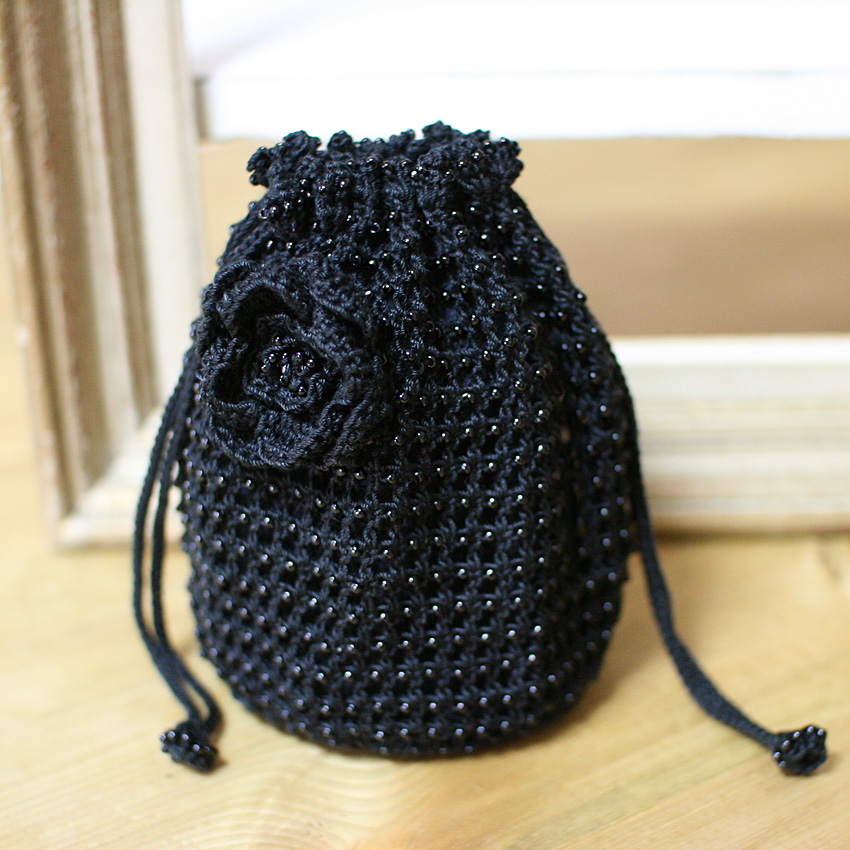
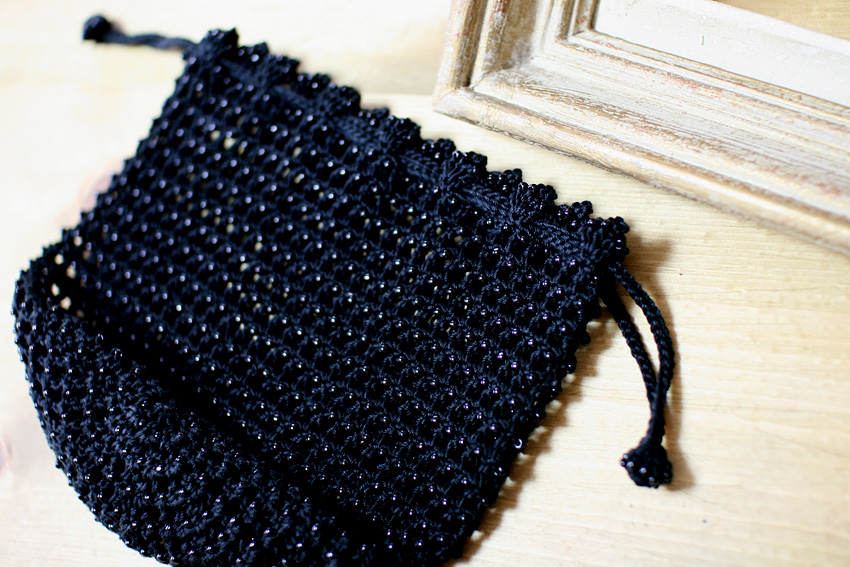
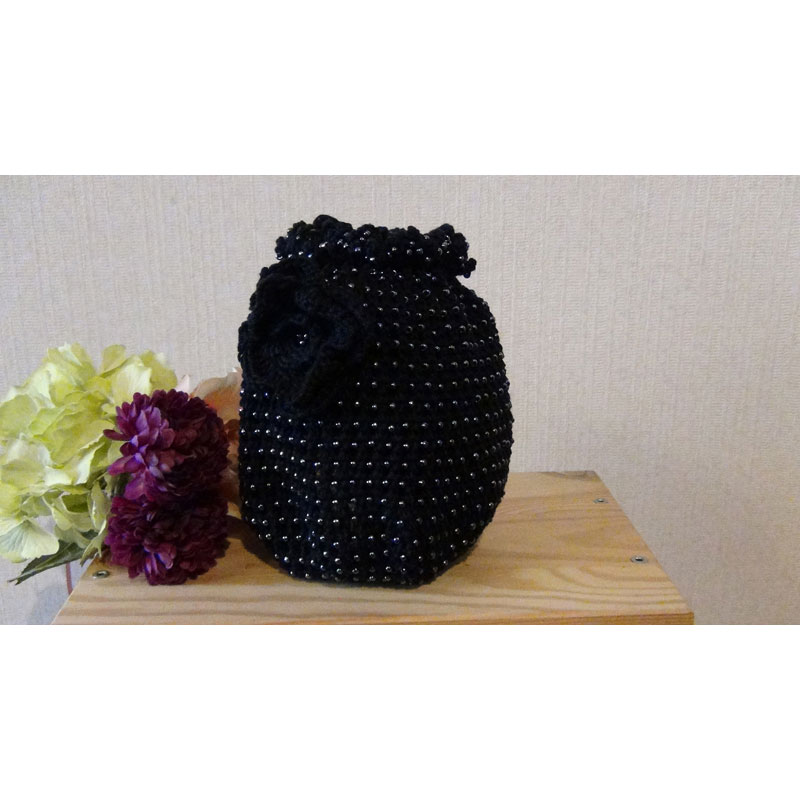
For this piece, I wove beads into a simple grid knitted drawstring bag to add a subtle sense of luxury.
The beads are spaced every other stitch, so I think the finished product is neither too heavy nor too transparent.
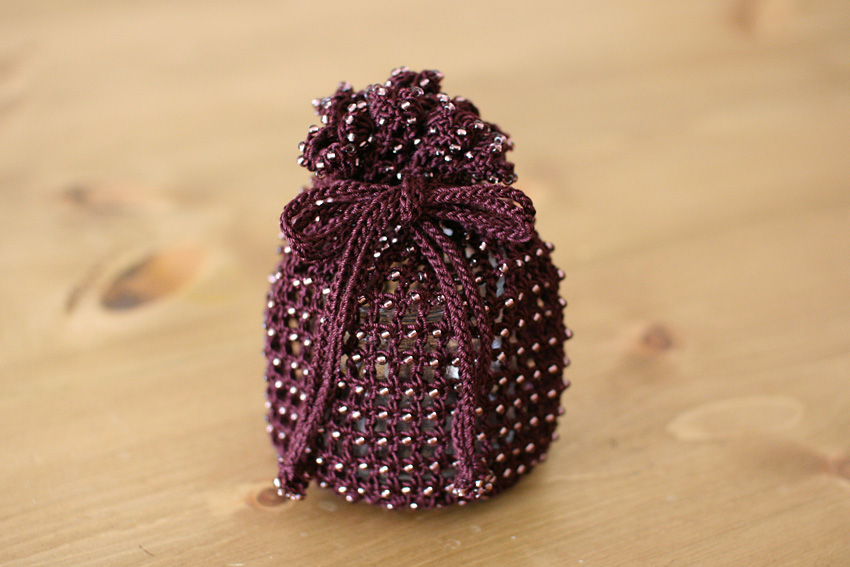
And the corsage, actually, I really like it.
Please try using it alone or attaching it to your clothes or bag.
The bases of both the drawstring bag and the corsage are simple, so once you thread the beads on, the rest goes pretty quickly.
Beading is fun, so be sure to give it a try.
Yarn and Crochet Hook Size
Hand Knitting Lace Yarn, Wister Softy Black, 1 Count
Toho Beads, Large Round Beads, Size 49, Black, 3 Bags (1172 beads)
No. 3 Crochet Hook
Bead threading
Crochet Pattern
Drawstring bag knitting pattern
Corsage knitting pattern
Instructions
① Before you start knitting, thread all the beads onto the thread.
②Once the beads are threaded through, you can finally start knitting.
From here on, please check the knitting pattern along with the instructions on how to make it.
Also, if you come across a knot in the thread along the way, please refer to the [Additional Information] at the end of the page for tips on what to do.
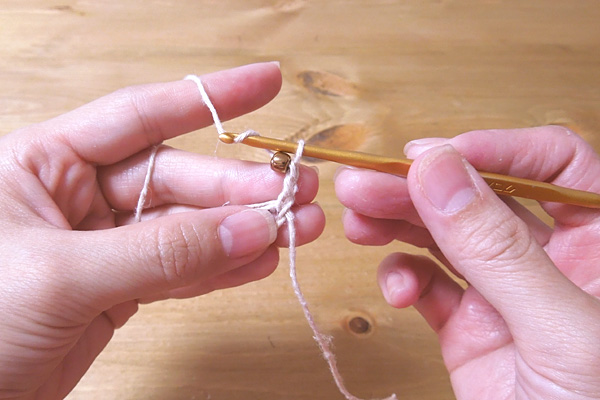
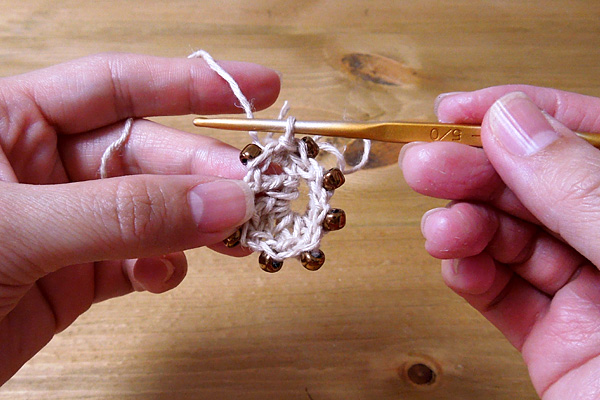
③Start knitting from the bottom of the drawstring bag by casting on a loop.
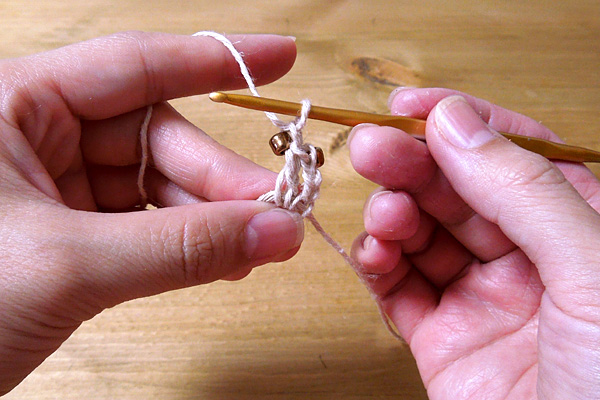
Knit 3 chain stitches (1 double crochet) to start the chain, then knit a bead into the next chain stitch.
When you weave beads into the fabric, the beads will appear on the other side (back side) of the knitted fabric.
It will look like the image above.
④ Next, crochet one double crochet and then crochet one bead into the next chain in the same way.
The base of the knitted fabric is a grid knit of double crochets + 1 chain stitch, and beads are knitted into the 1 chain stitch knitted between the double crochets.
⑤ Repeat this process to complete one full circle. After you have woven eight beads into the first row, pull them through the chain at the beginning to complete the process.
Please tighten the looped yarn at the beginning of knitting.
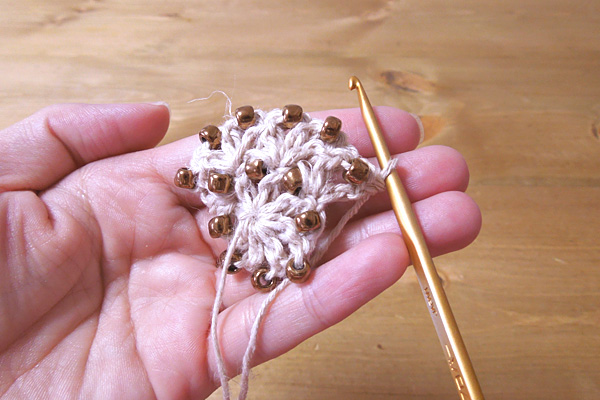
⑥ From rows 2 to 7, increase the number of stitches in each row. The method for weaving the beads is the same. Be sure to check that the number of stitches is correct after each row.
For rows 8 to 22, knit the beads in the same way without increasing or decreasing the number of stitches.
⑦Once you have finished knitting the 22nd row, continue knitting the edge using the same yarn.
The ★ mark on the first row of edge knitting is the position where you will thread the string.
In the second row of edge stitches, work a bead into the double crochets. When you pull out the final stitch to complete the double crochets, work one bead into the double crochets.
⑧Next, knit the string for the drawstring bag.
Knit 150 chain stitches, then slip stitch through all the chain stitches back to the first stitch (you could also crochet 150 cord stitches).
Leave the thread uncut and thread the free end of the thread through the drawstring hole on the drawstring bag.
Once you have passed through, bring the two ends of the string together and connect them with a slip stitch to make a loop.
It's hard to show in the knitting pattern, but insert the needle around the base of the under-joint of this slip stitch, chain three stitches to make a rise (make sure you knit one bead in), and knit nine double crochets in the same place. Knit one bead into these nine double crochets as you pull out the final stitch to complete the double crochet. Once you've knit nine stitches, pull it out into the rising stitch. Once you've created the decorative end of the string, cut the yarn.
Attach the other string in the same way and you're done.
9. Start knitting the corsage by casting on a loop.
After knitting two rows of the grid base, continue knitting the petals.
The part you knit here will be the outermost petal.
For the second round (medium petals) and the third round (small petals), knit towards the inside of the base.
In the first row of "Petal (Medium)", work the stitches marked with a light blue ■ in the pattern by scooping them from the side into a bunch and knitting a round stitch. In the second row, work the chain from the first row into a bunch and knit the petal.
Similarly, for the first row of "Petal (Small)", scoop up the stitches indicated by the orange hexagons in the knitting pattern from the side into a bundle and work with a circular stitch.
Once you have finished knitting the petals in the second row, continue by knitting the decoration in the center of the flower.
Pull the first row of base stitches from the side into a bunch and continue to knit three chains, knitting one bead into each chain.
After knitting three more chain stitches (one bead in each stitch), gather the double stitch next to the base into a bundle and knit a slip stitch.
Repeat this process until you have knitted all of the double crochets in the first row of the base (the orange part scooped up in the first row of the "small petal" and all the other double crochets).
10. Attach the corsage to the drawstring bag and it's complete.
[Additional Information] What to do when knots appear
You may come across knots in your yarn while knitting. I hope this will be helpful when that happens.
First, move the beads aside to create space so the beads don't spill out, and cut off the knot.
Cut both ends of the cut thread at an angle, overlap the ends and twist them together, then apply glue and twist them together even more tightly.
At this time, make sure to leave the ends of the threads a little longer and secure them firmly so that the twisted threads do not come loose. However, be careful not to make the threads too thick and prevent the beads from threading through, so be sure to adjust the amount of glue carefully.
Once the glue has dried, move the beads along this joint to the ball of thread.
All that's left to do is cut off the twisted parts, finish the yarn at the appropriate point (just like when you run out of yarn), and continue knitting.
Pattern published: July 12, 2012
Your work
Minako's "Beaded Drawstring Bag"
Thank you for the knitting pattern for this wonderful piece. This is my first attempt at knitting something with beads, and I'm amazed at how beautiful the finished product is. I used glitter beads this time, but next time I'd like to try knitting something with matte beads.
Mio's "Beaded Drawstring Pouch"
It's a simple knitting technique, but by adding beads, I was able to create a very gorgeous drawstring pouch.
When I saw the finished product, I felt so happy and thought, "It's so beautiful!"
I had a lot of fun knitting it, and I want to knit it again in a different color.
Thank you for teaching me this wonderful design.
I look forward to seeing more of Ronique's work in the future.